background image

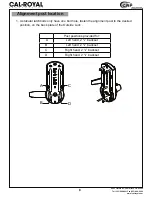
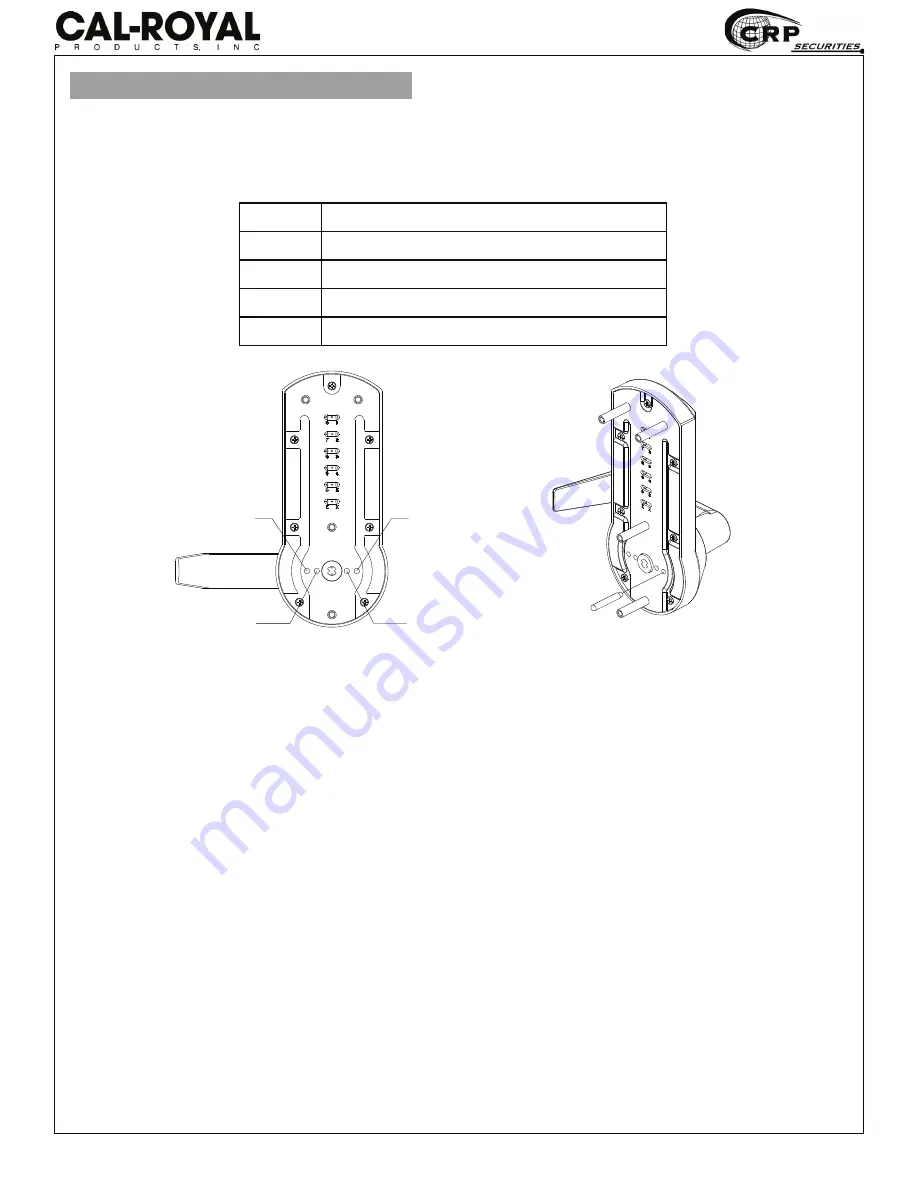
Alignment post location

A

D

C

B

1. As tubular latchbolts only have one bolt hole, fasten the alignment post to the desired 
    position, on the back plate of the Outside Lock .

Post positions provided for:

A

Left hand, 2 

3

/

4

” backset

B

Left hand, 2 

3

/

8

” backset

C

Right hand, 2 

3

/

4

” backset

D

Right hand, 2 

3

/

8

” backset 

6

6605 Flotilla St., Commerce, CA 90040

Tel (323) 888-6601 Fax (323) 888-6699

www.cal-royal.com


Summary of Contents for CRCODE-203

Page 1: ...vent missing important steps Note Improper installations may result in damage to the lock which will void the factory warranty 2 Please keep this Instruction Manual for future reference 3 Contact deal...

Page 2: ...es not work push the C button followed by the code Otherwise it is not necessary to push the C button before entering the code 2 The digits after the C button can be entered in any order to confuse ta...

Page 3: ...ntered 3 The numbers in the code can be interchanged and does not need to be typed in order Password combinations can be from 1 12 digits but 4 to 6 digit codes is suggested for security purposes 4 Th...

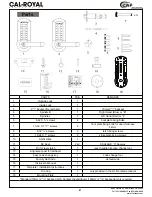
Page 4: ...CHLAGE C Keyway 12 Pin for lever latch 1 lever handle direction change tool 13 Alignment post for latchbolt 1 14 Easy code change key 1 code change tool 15 Factory Set Code 1 default code 16 Instructi...

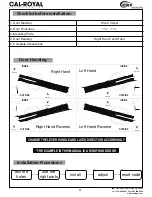
Page 5: ...HE EXAMPLE IN THIS MANUAL IS A RIGHT HAND DOOR Right Hand Left Hand Right Hand Reverse Left Hand Reverse 1 Door Material Wood Steel 2 Door Thickness 1 3 8 1 3 4 3 Mounting Plate 4 Door Handing Right H...

Page 6: ...Drill 1 hole on the edge of the door Chisel a UDEEHW GHHS WR DOORZ ODWFK IDFH XVK W with door edge Mortise for latchbolt front 1 1 8 width x 2 1 4 height x 5 32 deep 2 5 Drill Pilot hole for latchbol...

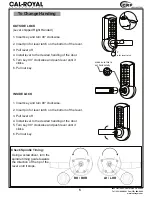
Page 7: ...tally INSIDE LOCK 1 Insert key and turn 90 clockwise 2 Insert pin for lever latch on the bottom of the lever 3 Pull lever off 4 Install lever to the desired handing of the door 5 Turn key 90 clockwise...

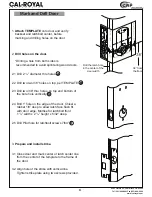
Page 8: ...nment post to the desired position on the back plate of the Outside Lock Post positions provided for A Left hand 2 3 4 backset B Left hand 2 3 8 backset C Right hand 2 3 4 backset D Right hand 2 3 8 b...

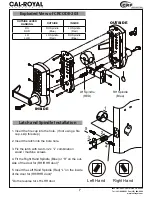
Page 9: ...QRW XVLQJ D UH cup skip this step 2 Insert the latch into the bore hole 3 Fix the latch with two 8 32 x 3 4 combination wood machine screws 4 Fit the Right Hand Spindle Blue or R on the out side of th...

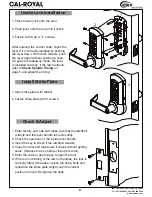
Page 10: ...ck Installation 1 Place Outside Lock on door 2 Align hub onto the spindle and 4 screw posts through prep doors 3 Align the mounting plate of the Outside lock and fasten with 4 screws 8 6605 Flotilla S...

Page 11: ...stuck Remove the key before closing the door 5 Enter the code or use the key to open the door 6 If there is no binding of the latch or handles the lock is FRUUHFWO WWHG 2WKHUZLVH ORRVHQ WKH LQJ EROWV...

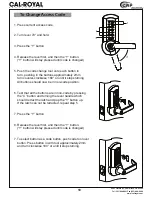
Page 12: ...s approximately 2mm turn counter clockwise 180 or until it stops turning All buttons should now be in non code position 6 Test that all the buttons are in non code by pressing the C button and turning...

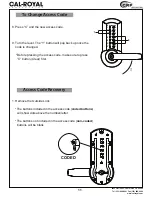
Page 13: ...ton will pop back up once the code is changed Before pressing the access code make sure to press EXWWRQ OHDU UVW Access Code Recovery 1 Remove the Outside Lock The buttons included in the access code...

Page 14: ...12 6605 Flotilla St Commerce CA 90040 Tel 323 888 6601 Fax 323 888 6699 www cal royal com...

Page 15: ......

Page 16: ...6605 FLOTILLA ST COMMERCE CA 90040 TEL 323 888 6601 FAX 323 888 6699 WEBSITE www cal royal com EMAIL sales cal royal com...

Reviews: