Cal Spas Entertainment System
Owner’s Manual
Page 30
Owner’s Manual
17” TV Monitor Operation:
(Optional)
T
urning On the TV Monitor:
Once the
TV has been opened (either by manual or automatic operation) you will be able to operate the TV with
the silver TV remote control.
Fr
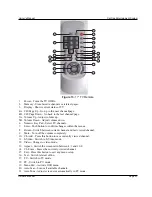
ont Panel Features (Figure 39)
1.
Power Button - Bright red when system is ON, dim when system is OFF.
2. Volume Up/Down - Controls volume to external speakers, if connected. Also, used to adjust picture
control setting when “contrast”, “bright”, “sharpness”, color” or “tint” is displayed on the screen.
3. TV/AV - Any video equipment connected to the AUDIO/VIDEO inputs can be used with the TV by
pressing this button. Each time the button is pressed the Audio/Video source will change in the following
sequence: TV, AV1, AV2, and AUX.
4. Sensor Eye - Allows the remote control to operate the LCM1502TV’s OSD system (On Screen Display),
volume Wired Headphone Jacks (and optional external speakers), and for control of Video Media Player
connected through a source component harness.
5. Three Position Dome Light Switch -
Auto - Automatically switched on the dome lights in conjunction with the vehicle’s interior illumination.
Off - The dome lights will not turn on in this position.
On - Turns on the dome lights.
6. Screen Release - Slides in the direction of the arrow to release the drop down screen.
NOTE
: For safety
, hand hold the screen before you slide the screen release to drop down screen.
7. Menu Button - Gives you access to the OSD Main Menu.
8. Channel Up/Down - Changes the TV channel.
9. ENTER Button - Use this button to end the choice on the menu.
10. Dome Lights - Provides additional information.
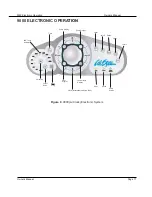
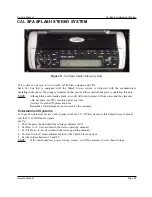
Figure 12.
17” LCD
Display Screen
Summary of Contents for 1100 Electronic Series
Page 12: ...10 ...
Page 78: ...10 ...
Page 118: ...10 ...
Page 161: ...Owner s Manual Page 11 Electrical Installation Owner s Manual Figure 3 GFCI Hook Up ...
Page 219: ...Owner s Manual Page 11 Electrical Installation Owner s Manual Figure 3 GFCI Hook Up ...
Page 282: ...Owner s Manual Page 11 Electrical Installation Owner s Manual Figure 3 GFCI Hook Up ...

