Cal Spas Entertainment System
Owner’s Manual
Page 46
Owner’s Manual
Cal
Spas
Entertainment System Operation
DVD Player and Surround Sound Processor (Optional)
This system contains the DVD player and DVD remote controller.
NOTE
:
Although encased in a plastic housing with weather seals, this system and remote control are not
waterproof. You must be take every step necessary to keep this system dry. Water damage is not
covered by the manufacturers warranty.
These instructions are to describe basic functions. Please see the DVD manufacturers operating instructions for
other features and functions. These instructions are delivered with the Cal Flame owners manual in a clear
plastic bag inside the stainless steel cabinet
Operation
1. Press the
POWER
button on the DVD unit or remote control to turn the system on. A “Welcome DVD
Video” banner will be displayed across the screen.
2. Press
POWER
on the Stereo / Cd player
3. Move the DVD selector switch (Located next to the DVD player) to the
ON
position.
This will allow the Audio signal to be received by the Stereo / CD player
NOTE
:
When not using the DVD player the Audio selector switch must be in the of position to receive
regular AM an FM broadcasts.
4. Tune the Stereo / Cd player to 88.7 FM to receive the audio signal.
5. Press the OPEN button on the DVD player and insert a DVD.
CAUTION
:
DO NOT INSERT WET DVD’S.
6. Press either the ENTER button on the DVD player or the Play button on the remote control to start the DVD
IMPORTANT
:
Recommended stereo settings are BASS +3, 4 and stereo volume not to
exceed 28. Exceeding these setting or using the Z -enhanced feature on the stereo will
cause the system to distort and damage speakers.
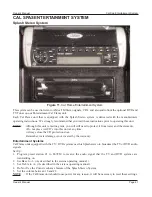
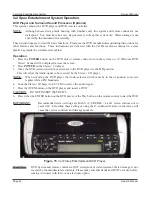
Figure 15
. Cal Flame Entertainment DVD Player.
WARNING
:
DVD System and remote control are NOT waterproof or water-resistant. Water damage is not
covered by the manufacturers warranty. Please make sure that hands and DVD’s are dry before
coming in contact with this or any electronic option.
Summary of Contents for 1100 Electronic Series
Page 12: ...10 ...
Page 78: ...10 ...
Page 118: ...10 ...
Page 161: ...Owner s Manual Page 11 Electrical Installation Owner s Manual Figure 3 GFCI Hook Up ...
Page 219: ...Owner s Manual Page 11 Electrical Installation Owner s Manual Figure 3 GFCI Hook Up ...
Page 282: ...Owner s Manual Page 11 Electrical Installation Owner s Manual Figure 3 GFCI Hook Up ...


