11
Starting Up Your Portable Spa
Filling and Powering-up Your Cal Spa:
1. Once spa is placed on an approved surface and is connected to the correct electrical service, inspect all plumbing
connections in the equipment area of your spa. These connections may have loosened in shipment.
2. If equipped, open all gate valves or slice valves in the equipment area.
Note: Before operating the spa these valves must be in the up or open position.
3. Remove filter basket and cartridge from skimmer / filter canister.
4. Place a garden hose in the skimmer / filter canister and continue filling your spa with
Regular Tap Water
up to the
Water Level line or half way up the skimmer area.
5. Open the air relief valve located on the front of the pump housing.
6. After the air bubbles stop coming out of the air relief valve, hand tighten valve until closed (Do not over tighten).
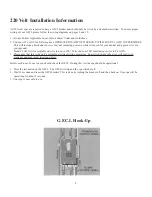
7. Once the water is at the correct level, turn on the power at the GFCI breaker.
Note: Ensure110-Volt spas are connected to the proper electrical outlet.
8. The spa will perform a diagnostic check for 30 seconds. Once complete, the spa will automatically operate at filter
speed and continue heating until the spa water temperature reaches 100
˚
F. (This is every electronically controlled spas
default temperature).
9. Re-install filter and filter basket into skimmer / filter canister.
10. The spa is now ready for use.For operation instructions see the “1500 Electronic Operation” sections of this manual on
pages 15 through 17.
Important Notes:
Be careful not to over tighten plumbing fittings.
Never run spa with gate valves closed or without water circulating for long periods of time.
Never fill your spa with soft water. Soft water makes it impossible to maintain the proper water chemistry and may cause the
water to foam and ultimately harm your spas finish and void your warranty.
Summary of Contents for 1100 Electronic Series
Page 12: ...10 ...
Page 78: ...10 ...
Page 118: ...10 ...
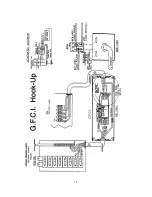
Page 161: ...Owner s Manual Page 11 Electrical Installation Owner s Manual Figure 3 GFCI Hook Up ...
Page 219: ...Owner s Manual Page 11 Electrical Installation Owner s Manual Figure 3 GFCI Hook Up ...
Page 282: ...Owner s Manual Page 11 Electrical Installation Owner s Manual Figure 3 GFCI Hook Up ...


