37
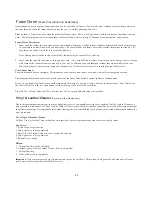
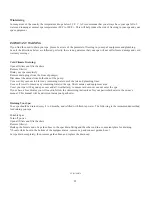
Winterizing
In many areas of the country the temperature drops below
32
˚
F
. C.A.I. recommends that you always have your spa full of
water and running at normal spa temperatures
(80
˚
F to 100
˚
F)
. This will help reduce the risk of freezing in your spa and your
spa's equipment.
IMPORTANT WARNING
If you find the need to drain your spa, please be aware of the potential of freezing in your spa's equipment and plumbing.
Even if the directions below are followed perfectly, there is no guarantee that your spa will not suffer freeze damage and void
warranty coverage.
Cold Climate Draining:
Open all filters and filter baskets.
Remove filter(s)
Drain your spa completely.
Remove drain plugs from the front of pump(s).
Disconnect the unions from both sides of the pump.
Use a wet/dry vacuum to blow any remaining water out of the jets and plumbing lines.
Use a soft towel to remove any remaining water in the spa, filter canister, and equipment area.
Cover your spa with a good spa cover and all-weather tarp, to ensure rain or snow can not enter the spa.
If your have a Gas Heater, you will need to follow the winterizing instructions for your particular heater in the owner’s
manual. This manual will be delivered inside your gas heater
.
Draining Your Spa:
Your spa should be drained every 4 to 6 months, and refilled with fresh tap water. The following is the recommended method
for draining your spa.
Portable Spas
Turn off power.
Open all filters and filter baskets.
Remove filter(s).
Hook up the female end of a garden hose to the spas drain fitting and the other end in a convenient place for draining.
*(Locate white hose in the bottom of the equipment area, remove cap and connect garden hose.)
Let spa drain completely, then remove garden hose and replace the drain cap.
LTR17000174
Summary of Contents for Pneumatic Series
Page 12: ...10...
Page 78: ...10...
Page 118: ...10...
Page 161: ...Owner s Manual Page 11 Electrical Installation Owner s Manual Figure 3 GFCI Hook Up...
Page 219: ...Owner s Manual Page 11 Electrical Installation Owner s Manual Figure 3 GFCI Hook Up...
Page 282: ...Owner s Manual Page 11 Electrical Installation Owner s Manual Figure 3 GFCI Hook Up...

