5
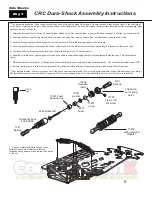
***Pre assembly inspection - Take the shock shaft and slide it through the black Delrin insert. Be sure the shaft slides through freely. If the shaft drags
on the Delrin, simply spin an X-acto Knife tip in each end of the delrin piece. The knife will remove the small manufacturing burr that occasionally forms
right near the end of the hole.
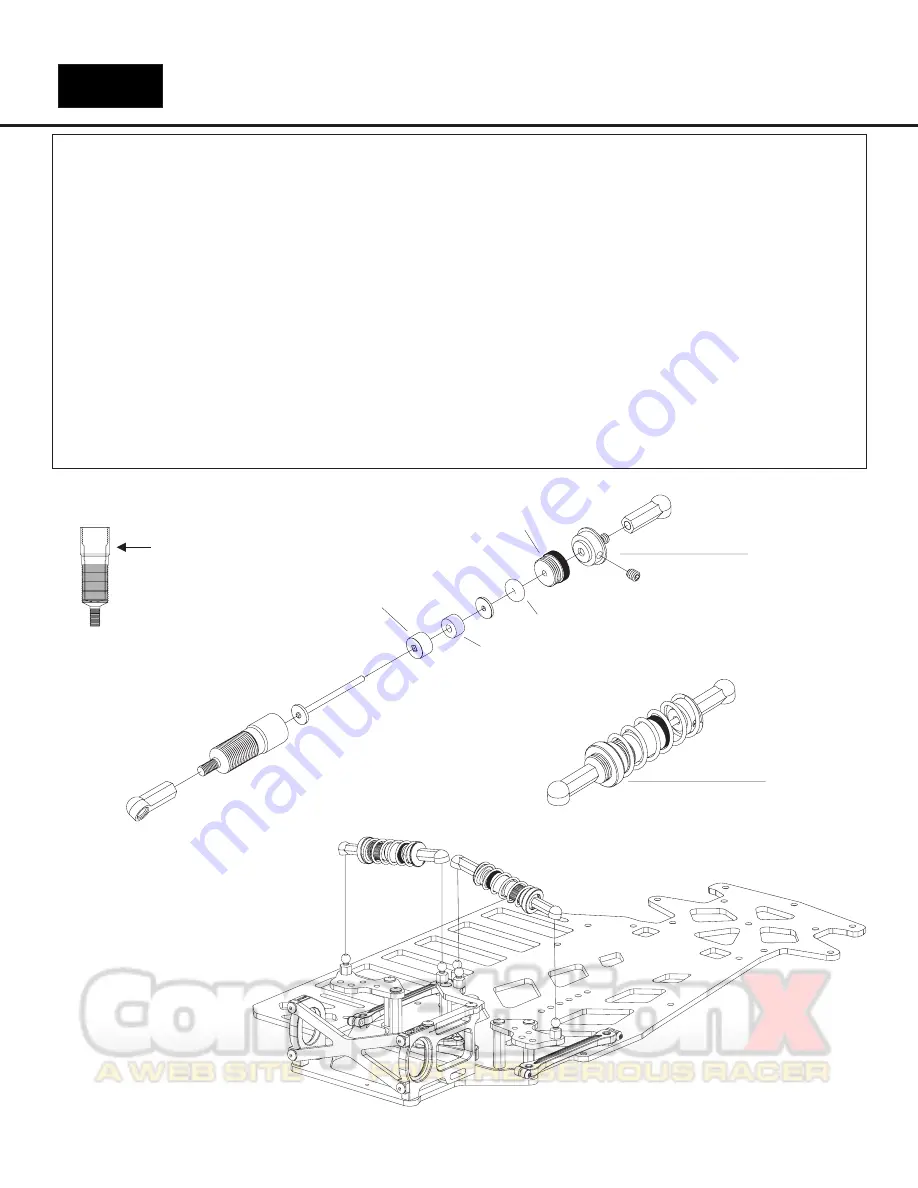
1 - Using the included 30 wt. silicone oil, soak the foam bladder in oil. Squeeze the foam to ensure the oil has soaked in. Wet the red O-ring as well.
2 - Populate the shock shaft in this order; plastic cup (open end away from piston), soaked foam, small pre-oiled red O-ring.
3 - Hold the body upright and fill the body with oil to the line shown. Place the populated shaft in the oil slowly.
4 - Press the shaft slowly until it stops at the bottom of the shock. Slip the Delrin insert over the shaft and begin to thread into the shock body.
5 - The insert will stop threading, hydro-locking as the shock has too much oil. Oil will spill out.
6 - Allow the oil to bleed out, tightening and loosening the delrin insert while keeping the shaft fully depressed inside the body. This will bleed the
shock.
7 - When the shock is fully bled, no oil will leak and the shaft will rebound out very slowly when fully depressed. The shock shaft will rebound out 1/8”.
8 - Be sure that the shock is fully bled, any “pressure” from being overfilled with oil will cause the shock to leak during the first few uses .
***Post assemble notes: Some oil may seep out of the shock near the Delrin insert. This is simply some remnants of the oil bleed process. Just wipe it
off after the first couple uses, and it should go away. This also may happen if the shock was built with too much oil in it. Be sure to bleed fully.
CRC Dura-Shock Assembly Instructions
Oil Fill
Line
1231
Ballcup
1231
Ballcup
13783
4-40 x 1/8”
set screw
Durashock body
4284,85,86
4283 Durashaft
13451 Foam
Housing Cup
13451
washer
13451
o-ring
13458
threaded
insert
13456-rod
end, spring
perch
13459
spring preload
adjuster
13451
Foam
Bag 5
Side Shocks
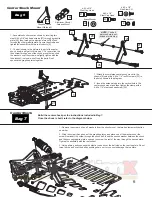
1 - Pop the completed side shocks on to the
ballstuds as shown, making sure that the
threaded spring adjusters face toward the outside
of the car.


