Plastic pivots
2
1
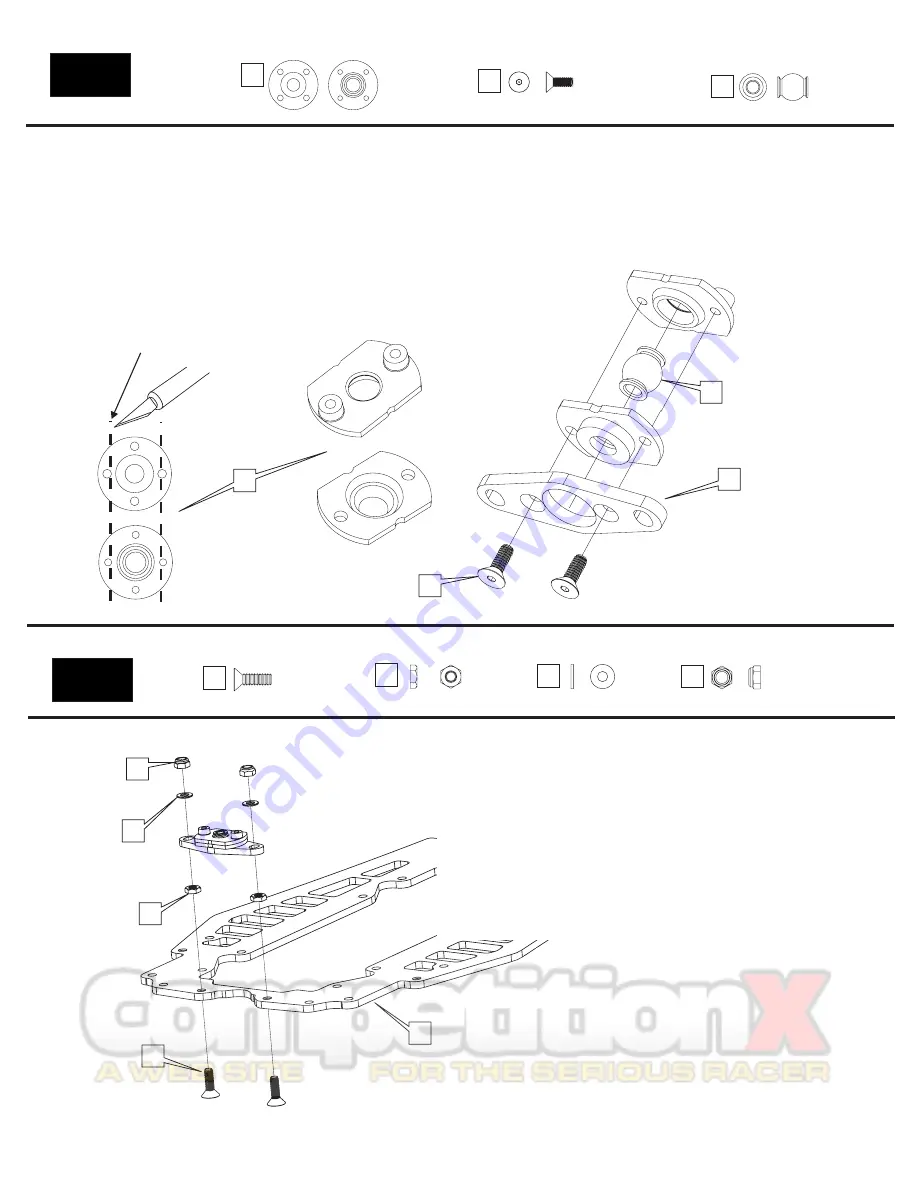
Trim plastic
pivot pieces
using the dotted
lines as a guide.
After trim
Before trim
Graphite “football”
shaped piece.
(American Football)
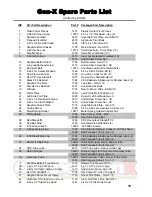
2-56 Flat Head
Alum Pivot ball
4-40 Thin Hex Nut
4-40 x 3/8” FH Steel
Washer
Using a hobby knife, or Dremel tool, trim the plastic pivots [1] as shown. This
gives added motor and battery clearance.
Assemble the Center Pivot assembly as shown in Figure 2. Tighten the 2-56
flat heads [2] enough to remove any up and down play, be sure the flanged
pivot ball [4] pivots freely.
Red Locknut
1 - Place the 4-40 x 3/8” screws [5] through the graphite chassis [6] in
the holes shown. Tighten a 4-40 thin hex nut [7] down fairly tight.
2 - Then, after both thin hex nuts are tight on the 2 mounting screws,
drop the assembled pivot plate over the screw posts.
3 - Drop a washer [8] over each screw above the pivot plate assembly.
4 - Thread on the 4-40 red locknuts [9]. Do not tighten them yet as we
will adjust this later.
Bag 1
Center Pivot
Bag 1
Center Pivot
1
1
1
5
2
3
4
4
7
8
9
5
6
7
9
8
2


