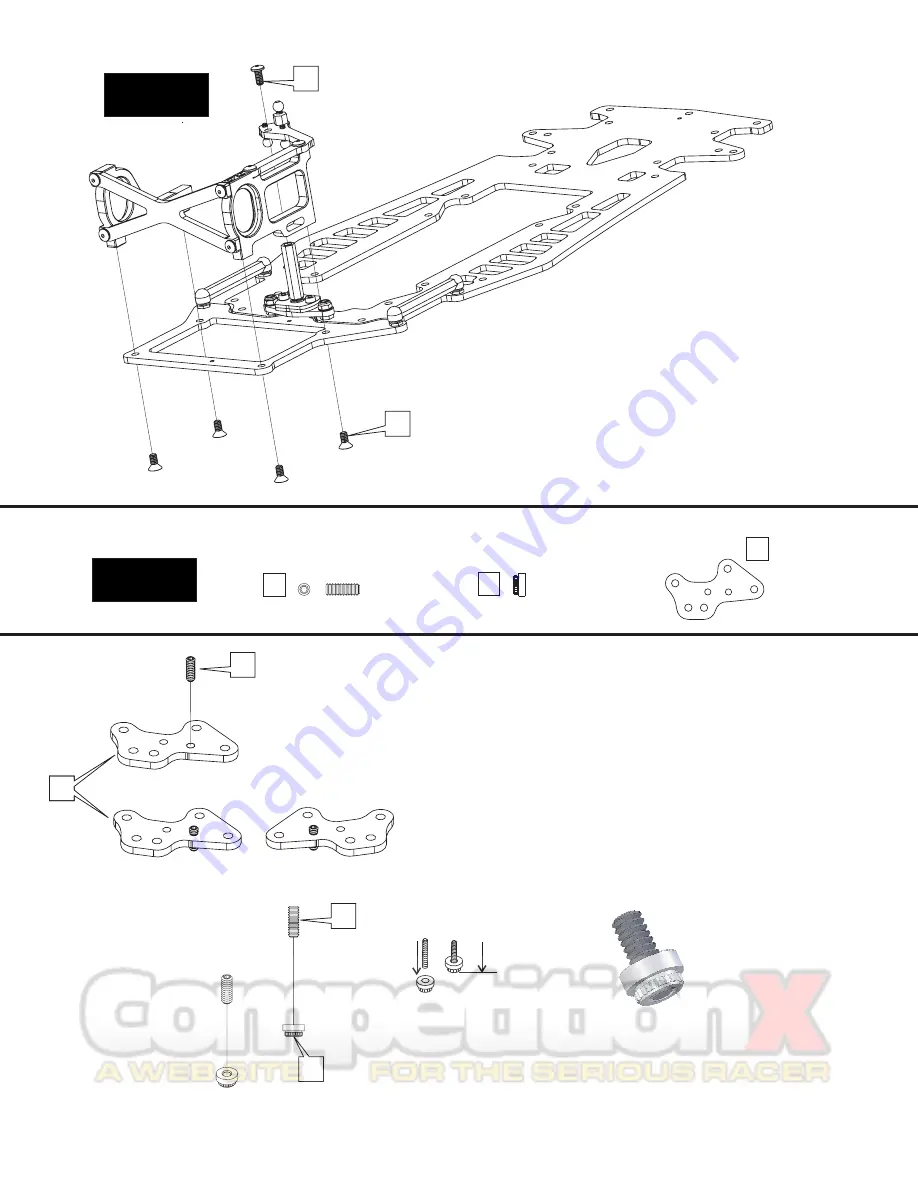
1 - Install the completed rear pod to the chassis sub-assembly
using 4 red alum flat head screws [23]. Keep an eye on these
screws during the first few runs of your car. They tend to
loosen until they take a “set” and then they’ll stay tight.
We do NOT recommend using thread lock in aluminum to
aluminum applications. They will stay tight after being re-
tightened once or twice.
2 - Tighten the top plate to the hex standoff [15] using a red
button head screw [22].
Bag 4
4-40 x 5/16”
set screw
Thread the set screw in until flush
with the bottom of the holder. Add a
dab of super glue to keep these 2
parts secure to each other.
Metal Spring Holder
Graphite Tweak
Plate (x2)
I
NSERT
T
WEAK
S
CREWS IN
B
RACE
A
SSEMBLY
1 - Place the Tweak Brace [24] on a smooth, flat table and thread the
Tweak set screws [25] into the brace per the illustration. Try to be careful
to thread it in straight and perpendicular.
2 - With the tweak screw threaded through the brace, super glue or thread
lock the tweak screw to the metal spring holder [26] as shown in the
illustration. The tweak screw should thread in until flush with the bottom of
the spring holder.
3 - Repeat the above steps for the second Tweak Plate, but flip the plate
first as this is for the opposite side of the car.
Bag 3
Rear X-Pod
Tweak Plates
4
23
24
25
26
24
25
25
26
22


