Once the spa is placed on a proper foundation and con-
nected to the appropriate electrical service, the spa may
be filled and made ready for use. For best results, read
each step in its entirety before proceeding with that step.
1. PREPARE SPA FOR FILLING
• Clear all debris from the spa.
• Although the spa shell has been polished at the fac-
tory, you may want to treat it with a specially formulat-
ed spa cleaner and wax available from your dealer
prior to filling it for the first time.
• Before filling your spa for the first time, remove the equip-
ment compartment door and check to ensure that the
unions on either side of the pump and heater are
hand-tight. Also, install the pump’s drain plug, if nec-
essary.
2. FILL THE SPA
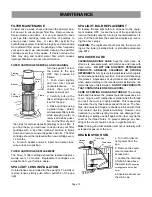
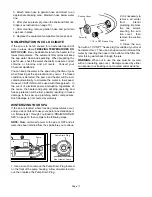
• Remove the skimmer basket and weir.
(See page 10).
• Insert the end of a garden hose into the filter canister
and begin filling the spa.
• Stop filling when the water level is approximately one
inch above the highest jet.
• Reinstall the skimmer basket and weir.
3. TURN ON POWER
Turn on power to the spa at the home’s circuit breaker,
Ground Fault Circuit Interrupter (GFCI) and any other
switching devices installed by your electrician.
When
power is on, the spa’s LCD screen will display information.
4. ACTIVATE JETS
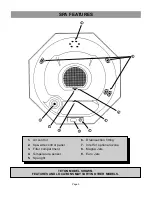
• Set all air controls to the “Max” position. (See illustration
on page 5.)
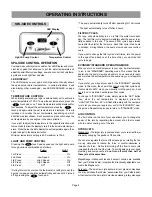
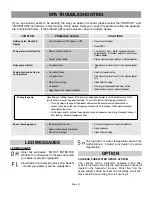
• Press the touch pad on the control panel
twice to turn on the high speed of the dual-speed
pump - see “SPA SIDE CONTROLS” illustration on
page 6.
• You should be able to feel a steady stream of water
from the jets. If not, refer to the instructions for priming
the pump in the SPA TROUBLESHOOTING section in
the back of this manual.
5. ADD START-UP CHEMICALS
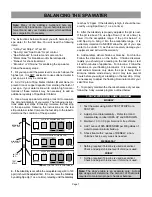
Add the spa water chemicals as directed by your Caldera deal-
er, by the instructions contained in your spa chemical kit or in
the section titled “BALANCING THE SPA WATER” on page 7.
6. SET TEMPERATURE
Your spa has been pre-set to automatically achieve a water
temperature of 100
0
F, which is the temperature typically pre-
ferred for comfortable spa enjoyment. To view the set tem-
perature, press the touch pad once. The set temper-
ature will be displayed for four seconds.
To adjust the set temperature, press the touch pad
again while the set temperature is displayed. This will increase
or decrease the set temperature, depending on which direction
was last chosen. Each successive press will change the set
temperature by one degree in the same direction.
If you want to adjust the temperature in the opposite direction,
wait four seconds to allow the display to revert to the actual
water temperature. Press the touch pad to display the set tem-
perature again, then again to adjust in the desired direction.
• Minimum temperature setting is 80
0
F, maximum is 104
0
F.
• The time required for initial heat-up will vary depend-
ing on the voltage of the spa’s power supply, the tem-
perature of the fill water and the size of the spa. If your
spa is connected to 220V, you may expect a tempera-
ture rise of approximately 7 to 10 degrees per hour. If
your spa is connected to 110V, you may expect a tem-
perature rise of 2 to 3 degrees per hour.
7. INSTALL THE SPA COVER
• Place the cover squarely on the spa.
• Position the tie-down locks included with your cover on
the side of the spa so that they are easily reached by the
cover tie-down straps. Allow for about 1/2” to 3/4” slack in
the straps to make it easy to insert straps into locks and
to compensate for vinyl shrinkage in cold weather.
• Attach the locks with the screws provided and insert
the cover tie-down straps into the locks.
Keeping the cover in place any time the spa is not in use
will reduce the amount of time the heater operates, there-
by minimizing operating costs.
DANGER. RISK OF INJURY.
• Never leave a spa uncovered or unattended.
• Never leave a spa cover unlocked.
• Do not stand, sit or lie on the cover.
DANGER. RISK OF INJURY. Always check the water
temperature carefully before entering the spa.
NOTE: Never fill your spa with water from a water
softener. Its corrosive effects will damage your spa’s
components.
IMPORTANT - Do not activate power until the spa
is filled. To avoid damage to the spa’s equipment,
the pumps must never be operated unless the spa
is filled with water.
START-UP INSTRUCTIONS
Page 4
(During winter months, the pump’s drain plug is re-
moved to prevent possible freeze damage during shipping and storage. If this
is the case with your spa, a notice to this effect will be attached to the front
of the spa’s control box and the drain plug will be in the plastic bag that
includes this owner’s manual. Screw this plug into the the threaded hole in the
face of the pump.)
Summary of Contents for HIGHLAND Series
Page 15: ...Page 13 NOTES ...


