9
Formato A3
FOGLIO 2
Centralina SATK II
SCALA
DISEGNATO: D.V.
FILE: G095_02A6
DATA: 07/12/2016
CODICE: CRAE030
FINITURA:
OGGETTO
MATERIALE:
REV.N.
REV. N. 1
GRADO RUGOSITA' SUPERFICI
RETTIFICA
PRESSOFUSIONE
PIALLATURA
TORNITURA
3-6
0,4-3
1,6-3
0,1-0,8
FUSI O STAMPATI
+/- 0,5%
+/- 2°
+/- 10%
LAVORATI
ANGOLI
0 - 80
> 80
+/- 30'
+/- 0,1
+/- 0,25
TOLLERANZA GENERALE
SPESSORE
LUNGH. O Ø
ANGOLI
VIETATA LA RIPRODUZIONE
NON RILEVARE LE QUOTE DAL DISEGNO
EXP PORT OTS
RT
PREPAID
LOAD
RS-485 BUS
(250Vac 3A max)
A
B
C
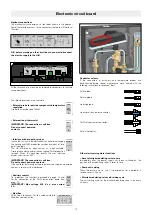
Use of an external room thermostat
An external room thermostat, if installed, must necessarily be with
potential-free contact
.
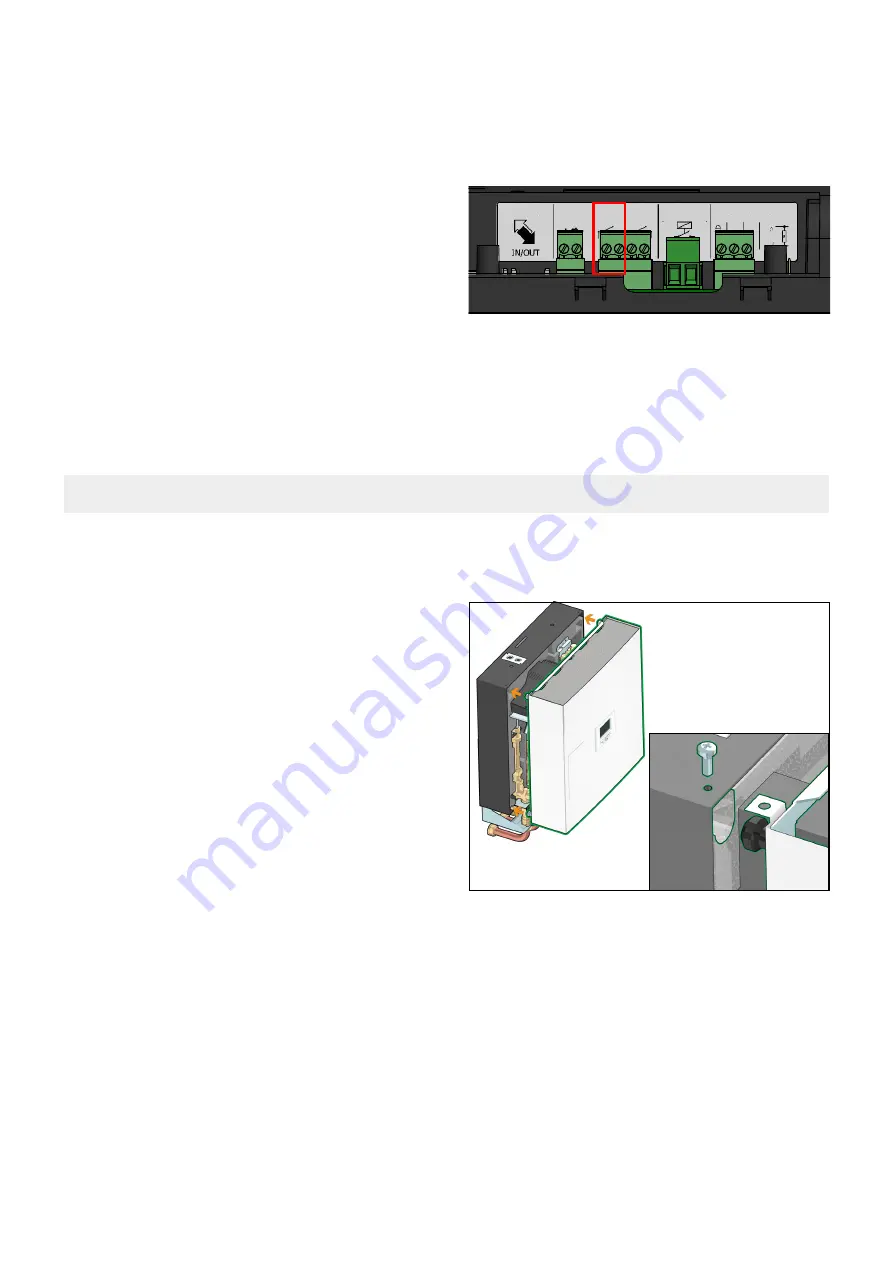
The external thermostat has to be connected to the terminals “RT”
shown in the adjacent figure. The terminals can be accessed by
removing the door on the HIU electronic regulator (see page 19).
In case the thermostat function of the remote user interface is
enabled, any external thermostat will work in parallel (management of
different temperature zones).
Alternatively, when the thermostat function of the remote user
interface is disabled, the interface can be used to define the hourly
programming of the space heating function for all thermostats
connected to the terminals “RT”.
Refer to the user interface dedicated manual.
Installation in the room
Use the cable outlet provided for connection of the remote user
interface to the electronic circuit board.
The chrono-thermostat function has to be enabled through the remote
control. Refer to the dedicated user manual for the procedure.
Filling the central heating system
Open the shut-off valves on the connections to the centralised line
and, in the central heating system, proceed with charging the system
to the design pressure.
Once these procedures are complete, vent the system and check its
pressure again (repeat the filling process if necessary)
N.B.
during the procedures for venting/draining the system use
suitable measures to avoid the risk of any liquid dripping onto the
electronic components.
System start-up
Before starting the HIU, visually check the hydraulic connections for
the absence of any leakage and all the electric connections. After
finishing the check, activate the electric supply to the HIU and check
for the presence of any error signal.
If there is any, eliminate the fault indicated (see page 18) and proceed
with setting the set point of the domestic water and heating cycles,
programming the remote user interface according to the desired
temperatures and times, and checking the operating cycles.
Commissioning
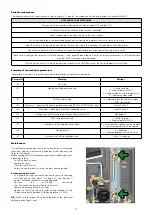
Fitting the cover
Fit the cover on the HIU by inserting the pins (A) in the locations
provided (B).
Secure the cover by tightening the 4 screws provided (C).


