Thermosight HT
5.1
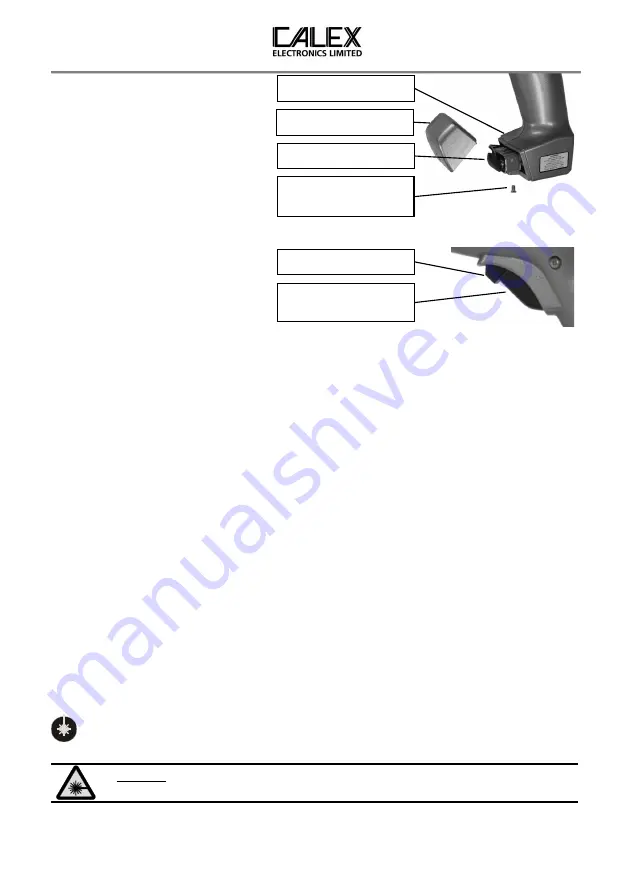
Battery insertion
For operating the
THERMOSIGHT
HT
a
9 V battery or 9 V rechargeable bat-
tery is necessary. For insertion of
the battery remove the locking screw
and the battery case cover.
Now the instrument is ready to use.
5.2
Switch on
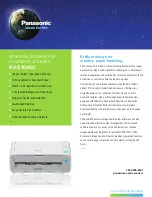
The instrument’s push button has
two trigger points.
First trigger point:
The instrument is switched on if the button is pushed to the first trigger point. The measurement
starts after a short self test of approximately 1 second. After releasing the push button the last mea-
sured value will be displayed for 10 seconds (HOLD function) and the sign “HOLD” is shown on the
display. After these 10 seconds the instrument is switched off automatically.
The display indicates “7777” if the measured temperature is below 250°C, it indicates “8888” above
1800°C.
Second trigger point:
The second trigger point activates the data logger and stores the actual temperature reading. It can
be adjusted if only the actual temperature value is stored or if a continuous storing should be done
as long as the push button is hold on the second trigger point
(setting of time interval see
8.10
).
The data logger can store up to 750 temperature values. Should the pyrometer be switched to sin-
gle value data logging, the data logging is confirmed by a beep and in the display the used number
of the stored value is indicated for a short time (e.g. for the first stored value STO
#
01 is shown).
The pushbutton can be locked in the second trigger point position with the locking lever by pushing
the lever upwards. This activates the continuous measuring mode. Pressing the trigger once again
releases the locking and switches off the continuous measuring mode.
5.3
Sighting
For exact aiming to the object the pyrometer is equipped with a laser targeting light. The laser
shows a red flashing circle at the position of the measuring spot on the object. The size of the circle
varies depending on the distance and has approximately the size of the measuring spot.
If the instrument is in operation the laser targeting light function can be activated or deacti-
vated by pressing the laser key. If this function is activated the laser targeting light is auto-
matically switched on as long as the trigger button is pushed.
Caution:
Do not look directly into the laser beam!
Laser class 2 according to IEC 60825-1-3-4
5.4
Spot size
- 7 -
Battery case cover
Battery connector
Locking screw for
battery case cover
Locking lever
Push button with 2
trigger points
Battery case


