9
Match the level of the more dominating of the two outputs to the weaker one.
Make sure the Peak Output LED is not illuminating. If the Peak Output LED is
illuminating, lower the output level control slightly until the distortion is no lon-
ger noticeable and the LED has stopped flickering. Again, if there is more gain
needed, adjust the input level control on the amplifier.
10 Take a few minutes now to listen to the system to determine if the settings
are satisfactory. Adjust the volume knob to several different levels and fine
tune your settings. Do this using music tracks you know well.
11 Depress the equalizer On/Off switch (2) once again so the equalizer gets in
its “On” position.
Equalization
How does an equalizer work?
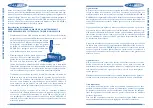
Simply put, an equalizer corrects deviations in frequency over a given bandwidth.
The slider knobs on the CXQ20 are each numbered with the center of the fre-
quency “Q” they adjust. By sliding the adjustment knobs up or down, you can
boost or cut a particular frequency to smooth the response of your system and
acquire the desired sound.
Adjusting your equalizer
Adjusting your CXQ20 is not an easy task. Caliber recommends the use of a
Real Time Analyzer (RTA).Without a RTA it will be hard to distinguish the dips
and peaks, and to value how much to adjust them. Wheter you use a RTA or
adjust your systen by the taste of your ear, always follow these basic steps.
1
Always start with the frequencies that need to be cut or reduced.This has a
very simple reason. If you boost a frequency up 3, 6 or 12dB the system
noise will be boosted up with an equal amount. Cutting of frequencies first
will also cut of system noise.
2
Remember to adjust no more than two frequency bands at one time. This
makes it much easier to distinguish wheter the changes make an improve-
ment or not. Since the CXQ20 is typically mounted in the trunk it’s impor-
tant to listen to the changes in response after each setting in the drivers- or
passengersseat. Because there is where you want it to sound great.
Level Adjustments
By now you’re probably really anxious to listen to your improved audio system.
But before you turn on your radio, you have to complete some very important
adjustments in order to fine tune your system.These are the level controls.
Follow the steps below starting with the
preliminary adjustments
.
1
Before you do anything, set the input- and output levels to a safe level,
then set the Equalizer to your personal taste of sound.
Now you can
start adjusting all the input and output levels for a maximum performance.
2
Adjust the input level control (2) of your CXQ20 to 2/3 of the maximum.
3
Preset the High Pass - (11) and Low Pass output level controls (6) to slightly
above the minimum gain. Depress the equalizer On/Off switch (2) to its “Off”
position.
4
Set the input levels of your amplifiers to 25%.
5
Activate the radio power. Set the tone controls, balance and fader controls to
the center or flat position.
And now it is time to make some serious music. Find a couple of dynamic tracks on
your favorite CD, insert the CD into the CD-player, and follow the level adjustments
given to you in points 6 to 11.
6
Adjust the volume of your radio to 75% of the maximum volume. Listen care-
fully to make sure the music is not clipping. Continue to play the tracks you
chose throughout the rest of the adjustment period.
7
Check the input peak LED (4) on your CXQ20 and make sure it is not illumina-
ting. Adjust the input level control (2) up until the Peak LED (4) starts to
flash.Then back of the level control slightly so the Peak LED will stop flashing. In
some cases the input Peak LED will not illuminate, not even at full maximum level.
This is OK, because in this case your radio might not have a high output level.
8
Turn the output level controls (6 or 11) up until onset or audible distortion is
heard. Make sure the Peak Output LED (8 or 12) is not illuminating at this point.
Now, lower the output level slightly until the distortion is no longer noticeable
and/or Peak Output LED is not longer flickering. Make a note that most ampli-
fiers will not accept an input level of 9V, so your output level controls should not
be over 75% of their max. If more gain is needed, adjust the input level control
on your amplifier.
6
7
LEVEL ADJUSTMENTS
HO
W
DOES
AN
EQ
U
ALIZER W
ORK


