anchors – DO NOT fasten screws all the
way down; leave approximately 3/32” of
gap from the wall to the screw head. Hang
the range hood body onto the Type “B”
screws. Ensure the range hood is level and
then fasten the screws completely.
Note: for wall mounted range hoods (not
island mounted), the rear panel of the range
hood body (against the installation wall) is
plain sheet metal and can be drilled and
screwed into the wall for additional
stabilization. DO NOT drill into or screw
through any wires, any wire harnesses, or
any critical fixtures.
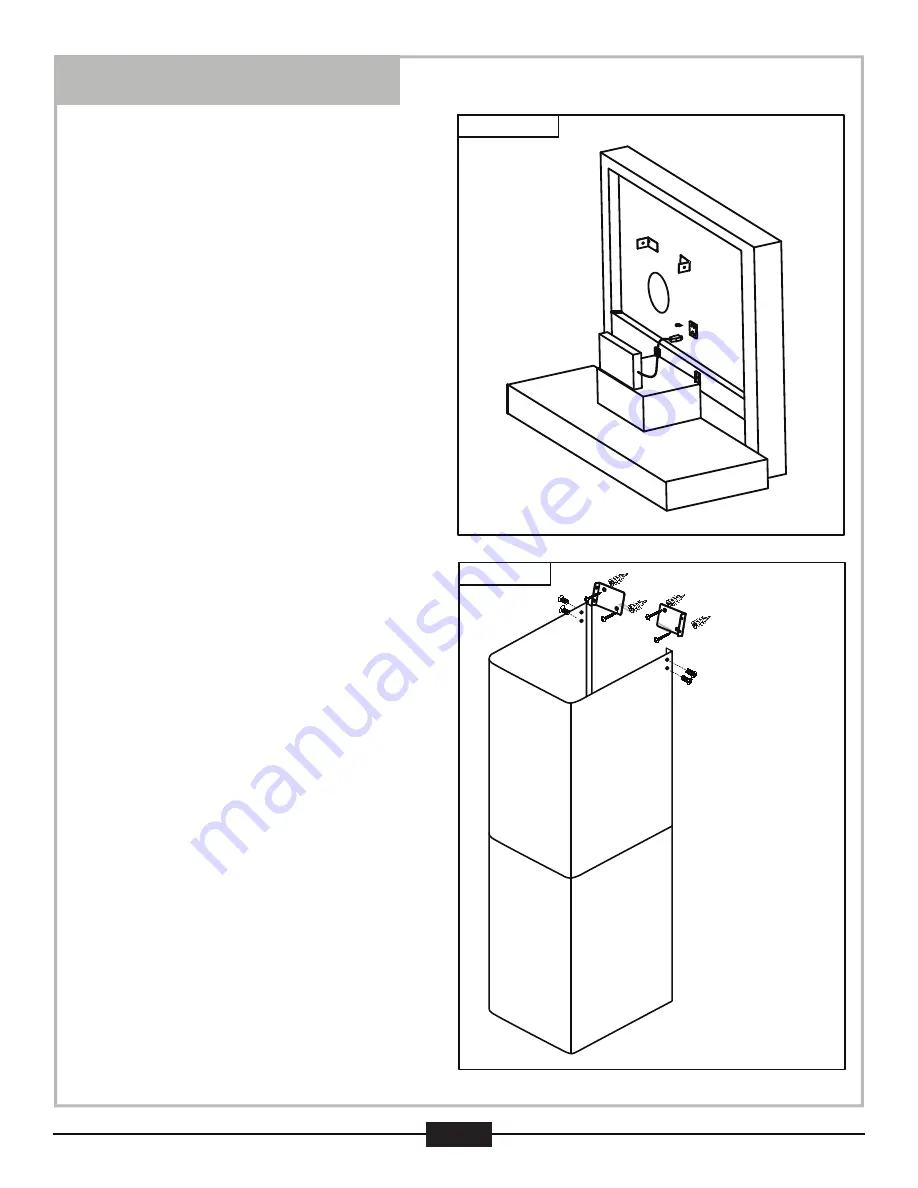
Install the upper chimney mounting
bracket
(if using factory hardware)
:
Reference steps "4" & "5" to complete this
step "6", at the locations previously marked
in step "3".
Install the flexible duct tube:
First install the flexible duct tube onto your
household ducting and then extend the
ducting downward, allowing about 6 inches
of extra ducting; cut off excess ducting.
Install the ducting onto the range hood
(body) duct
adapter
. Use certified ducting
tape or fastening devices.
Install power plug:
Plug in the power cord into your power
socket. DO NOT turn on main power
supply until installation is complete; or if a
function test is desired (should be done
before starting installation); clear
workspace; ensure workspace is safe, and
then temporarily supply power to unit and
then test functions. Please ensure to
completely SHUT OFF POWER SUPPLY
after testing and before continuing
installation.
Pg 12
Installation (Continued)
Hold in position and
secure lower chimney
to range hood
Fasten mounting
bracket
Slide up and secure
upper chimney to
mounting bracket
Figure 5
Figure 4A
BA
CK SUPPOR
T
DR
Y
W
ALL
6.
7.
8.


