Digital Broadcast Production Console
I/O BOXES & HYDRA PATCHBAYS SAMPLE RATE SELECTION IN H2O
From Version 8
,ArtemisShine,Ray
BeamandLightconsolescannow
workat96kHzsamplingfrequency.
There are 2 elements to 96kHz
operation of Artemis consoles:-
Configuring the DSP and configuring the
I/O to run at different sample rates.
Consolesat96kHz
The consoles can switch between 48kHz
& 96kHz working as required and they
switch their sampling frequency by loading
a show at the required sample rate built
from a template at that rate.
The numbers of channels and buses are
reduced at 96kHz but the numbers at
48kHz are the same as before.
There is no reduction in the numbers of
monitor inputs and outputs at 96kHz.
I/OandHydra2Patchbaysat96kHz
Before the I/O can be used with a 96kHz
console its sample rate has to be changed
to match. In H2O a new button labelled
“Sample Rate” is made available, selecting
this opens the list of I/O boxes connected
to the Hydra2 Network.
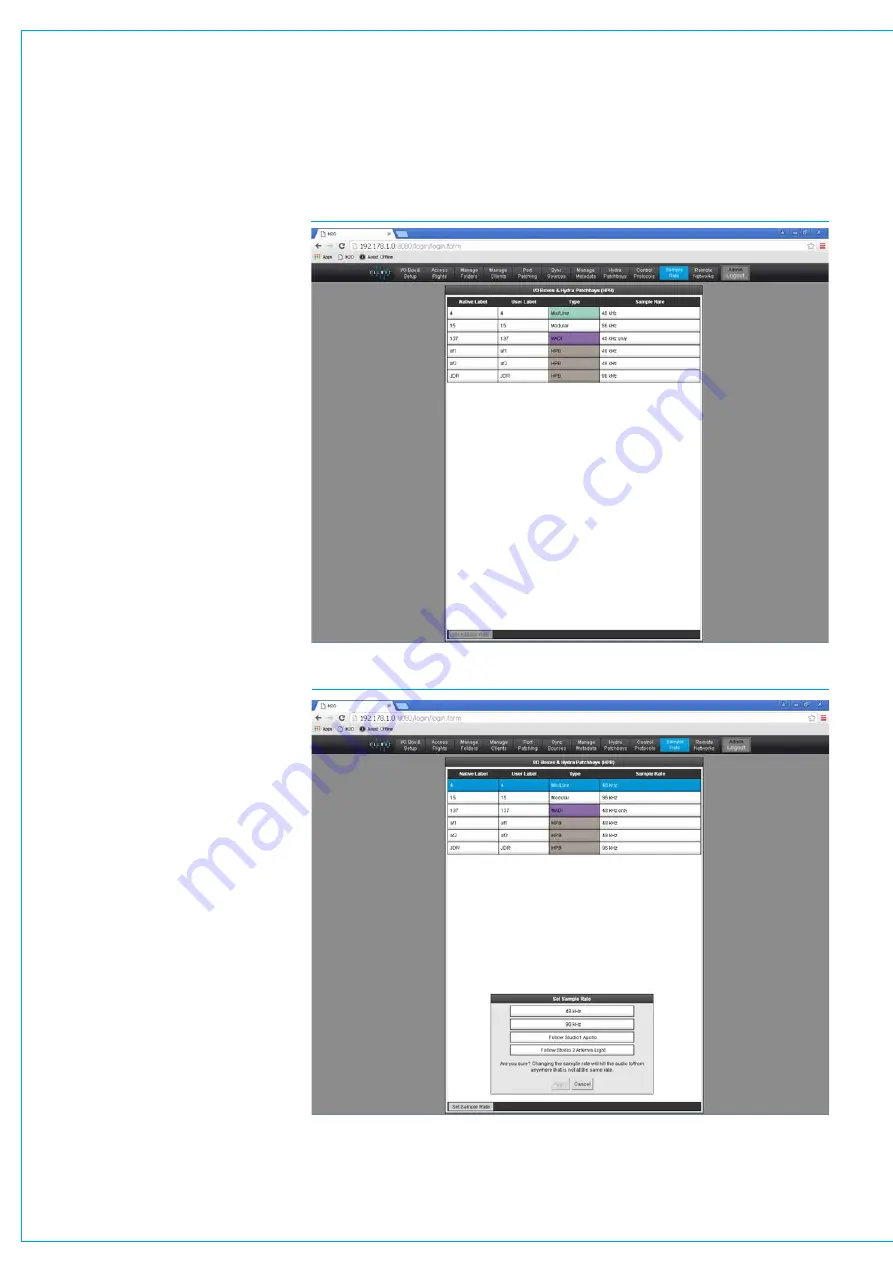
The list shown in Fig 1 shows the sample
rate set for each I/O box or Hydra2
Patchbay. In order to change the sample
rate the user first selects the required I/O
box or Hydra2 Patchbay box, this enables
the Set Sample Rate button at the bottom
left of the screen.
Clicking on this opens the Set Sample
Rate popup, allowing the I/O boxes and
Hydra2 Patchbays to be set to 48kHz or
96kHz, or to follow the sample rate of a
specific console. This is shown in Fig 2,
please note that certain older I/O boxes
cannot be set to run at 96kHz such as the
fixed format MADI box.
The Hydra2 network supports 48kHz
and 96kHz consoles and I/O boxes
simultaneously, it achieves this by running
at 48kHz irrespective of whether the
Consoles and I/O boxes are running at
96kHz or not. It simply uses 2 samples
per 96kHz signal.
FIG 1 - I/O BOXES & HYDRA2 PATCHBAYS SAMPLE RATE SCREEN IN H2O
FIG 2 -SET SAMPLE RATE POPUP SCREEN IN H2O
Summary of Contents for Artemis
Page 7: ...calrec com Putting Sound in the Picture ARTEMIS INFORMATION ...
Page 11: ...calrec com Putting Sound in the Picture ARTEMIS INTRODUCTION ...
Page 17: ...calrec com Putting Sound in the Picture ARTEMIS CONTROL OVERVIEW ...
Page 29: ...calrec com Putting Sound in the Picture ARTEMIS CONTROL PANEL MODES ...
Page 36: ...36 ARTEMIS Digital Broadcast Production Console Control Panel Modes WILDABLE CONTROLS ...
Page 39: ...calrec com Putting Sound in the Picture ARTEMIS GETTING SIGNALS INTO ARTEMIS ...
Page 69: ...calrec com Putting Sound in the Picture ARTEMIS PROCESSING AUDIO ...
Page 93: ...calrec com Putting Sound in the Picture ARTEMIS ROUTING AUDIO ...
Page 109: ...calrec com Putting Sound in the Picture ARTEMIS PASSING SIGNALS OUT OF ARTEMIS ...
Page 117: ...calrec com Putting Sound in the Picture ARTEMIS MONITORING ...
Page 132: ...132 ARTEMIS Digital Broadcast Production Console Monitoring ...
Page 133: ...calrec com Putting Sound in the Picture ARTEMIS COMMUNICATIONS ...
Page 138: ...138 ARTEMIS Digital Broadcast Production Console ...
Page 139: ...calrec com Putting Sound in the Picture ARTEMIS METERING ...
Page 148: ...148 ARTEMIS Digital Broadcast Production Console ...
Page 149: ...calrec com Putting Sound in the Picture ARTEMIS SHOWS MEMORIES AND PRESETS ...
Page 163: ...calrec com Putting Sound in the Picture ARTEMIS CONSOLE FACILITIES ...
Page 168: ...168 ARTEMIS Digital Broadcast Production Console ...
Page 169: ...calrec com Putting Sound in the Picture ARTEMIS EXTERNAL INTERFACING ...
Page 180: ...180 ARTEMIS Digital Broadcast Production Console External Interfacing ...
Page 181: ...calrec com Putting Sound in the Picture ARTEMIS SYSTEM STATUS ...
Page 184: ...184 ARTEMIS Digital Broadcast Production Console ...
Page 185: ...calrec com Putting Sound in the Picture ARTEMIS GLOSSARY OF TERMINOLOGY ...
Page 191: ...calrec com Putting Sound in the Picture ARTEMIS FEATURES BY SOFTWARE VERSION ...


