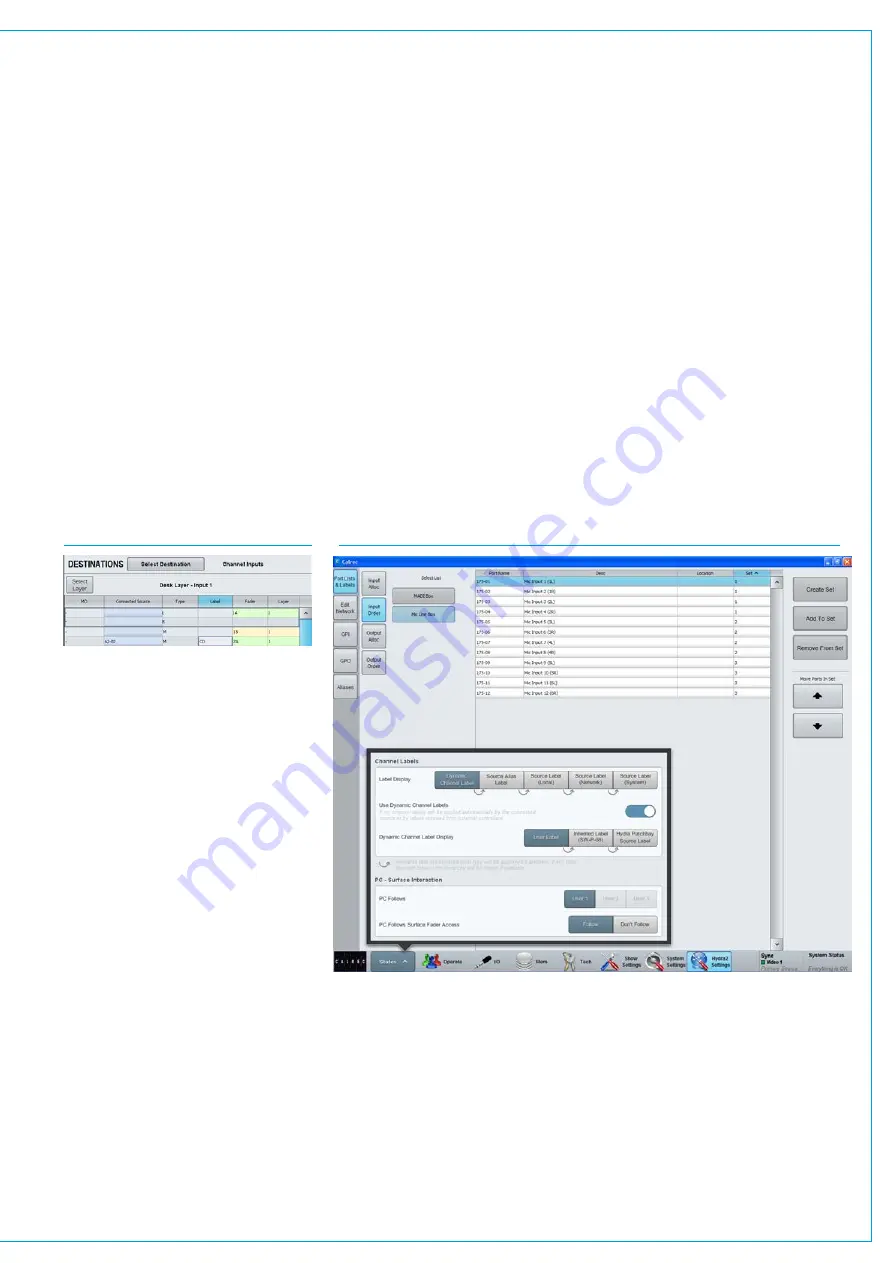
FIG 8 - SOURCE LABEL HIERARCHY
SourceLabelHierarchy
Path labelling has been improved providing consistency across all path widths and types.
There is a hierarchy of labels available: from system defined default labels, through
network level user labels, all the way up to user defined path labels:
1. User Path Label
2. External Label (from SW-P-08)
3. Hydra2 Patchbay Source (if source connected to channel via a Hydra2 Patchbay)
4. Source Alias Label (if connected through an alias)
5. Source Label - Local (if given a label in the main application)
6. Source Label – Network (if given a label in H2O)
7. Source Label – System (combination of the box and port ID)
By default, the highest level of label in this hierarchy is displayed, but you can choose
to force this to show whichever level of label you prefer. This can be very useful for
diagnostics. It’s also possible to turn off dynamic labels received via SW-P-08, or when
showing the sources of Hydra Patchbays, see Fig 8.
Customfaderlabels
The ‘Label’ column allows custom user
labels to be shown in the fader’s label
display. Double click on a cell in this
column to enter a custom label. Note that
custom labels are associated with the
fader, rather than the input port.
The custom label is retained even if
the input port is changed. If the port is
removed, the fader’s label will display ‘No
Input’. When a new port is patched, the
custom label will be displayed again.
To clear a custom label and revert to
the port label, double click the label cell,
delete it and press enter. See Fig 7.
AbilitytoReceiveExternalSource
LabelsviaSW-P-08
Apollo and Artemis can now receive and
display external labels over SW-P-08.
This can be incredibly useful when
integrating with external matrices, as it
allows the source labels from the external
matrix to be passed through to faders on
the surface.
FIG 7 - ENTER CUSTOM FADER LABEL
Summary of Contents for Artemis
Page 7: ...calrec com Putting Sound in the Picture ARTEMIS INFORMATION ...
Page 11: ...calrec com Putting Sound in the Picture ARTEMIS INTRODUCTION ...
Page 17: ...calrec com Putting Sound in the Picture ARTEMIS CONTROL OVERVIEW ...
Page 29: ...calrec com Putting Sound in the Picture ARTEMIS CONTROL PANEL MODES ...
Page 36: ...36 ARTEMIS Digital Broadcast Production Console Control Panel Modes WILDABLE CONTROLS ...
Page 39: ...calrec com Putting Sound in the Picture ARTEMIS GETTING SIGNALS INTO ARTEMIS ...
Page 69: ...calrec com Putting Sound in the Picture ARTEMIS PROCESSING AUDIO ...
Page 93: ...calrec com Putting Sound in the Picture ARTEMIS ROUTING AUDIO ...
Page 109: ...calrec com Putting Sound in the Picture ARTEMIS PASSING SIGNALS OUT OF ARTEMIS ...
Page 117: ...calrec com Putting Sound in the Picture ARTEMIS MONITORING ...
Page 132: ...132 ARTEMIS Digital Broadcast Production Console Monitoring ...
Page 133: ...calrec com Putting Sound in the Picture ARTEMIS COMMUNICATIONS ...
Page 138: ...138 ARTEMIS Digital Broadcast Production Console ...
Page 139: ...calrec com Putting Sound in the Picture ARTEMIS METERING ...
Page 148: ...148 ARTEMIS Digital Broadcast Production Console ...
Page 149: ...calrec com Putting Sound in the Picture ARTEMIS SHOWS MEMORIES AND PRESETS ...
Page 163: ...calrec com Putting Sound in the Picture ARTEMIS CONSOLE FACILITIES ...
Page 168: ...168 ARTEMIS Digital Broadcast Production Console ...
Page 169: ...calrec com Putting Sound in the Picture ARTEMIS EXTERNAL INTERFACING ...
Page 180: ...180 ARTEMIS Digital Broadcast Production Console External Interfacing ...
Page 181: ...calrec com Putting Sound in the Picture ARTEMIS SYSTEM STATUS ...
Page 184: ...184 ARTEMIS Digital Broadcast Production Console ...
Page 185: ...calrec com Putting Sound in the Picture ARTEMIS GLOSSARY OF TERMINOLOGY ...
Page 191: ...calrec com Putting Sound in the Picture ARTEMIS FEATURES BY SOFTWARE VERSION ...


