Maintenance and troubleshooting
Instruction manual ATS4, Mar-16
22
•
With keys
and
select the function „RINSE NOZZLE“.
•
Accept with ENTER
This way some rinsing liquid is pressed / blown out of the nozzle.
•
For this function a syringe must be mounted in the instrument.
5.4
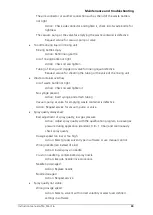
Septum puncher
Prior to using the instrument check the state of the septum punch. A
bent or broken septum punch will damage the needle
.
To get correct results and keep the instrument in god condition, CAMAG recommends
following below point:
•
Check the needle of the septum punch prior to each use of the instrument.
•
From time to time also check the position of the septum punch. The position is
factory adjusted to the position of the syringe needle.
•
If the movement of the turret or the sample rack was or is obstructed by anything
immediately press RESET.
•
The sample rack should only be removed when the application head is in park
position.
•
If you apply samples from open vials use the optional baffle bridge with septum foil
(CAMAG part number 022.7460, see Fig. 9). The septum foil (CAMAG part
number 022.7462) is inserted with the Teflon layer face down and secured with
the foil holder. The septum foil serves the same purpose as a septum on a sample
vial and can be used with well-plates without closure. See also part “Mounting the
baffle bridge with septum foil”.
5.5
Replacing the septum puncher
A bent or damaged septum puncher can cause a number of malfunctions and damage the
syringe needle. Therefore it should be replaced if any irregularities are observed (tilt
puncher, tip has a hook, tip is no longer sharp).
To replace the septum puncher:
•
Switch off the instrument.
•
Remove the syringe and the sample rack.
•
For easy access loosen and remove the screws on the left and right of the baffle
bridge.
•
Manually pull the holder (arm) of the septum punch into the middle position.
•
Loosen the septum puncher with a 6 mm wrench while pushing the arm slightly to
the right. This avoids twisting the arm. Use the wrench rectangular to the arm to
minimize large lateral forces.
Summary of Contents for ATS 4
Page 1: ...INSTRUCTION MANUAL AUTOMATIC TLC SAMPLER 4...
Page 31: ......

