background image

Camangi WebStation Manual 

45 

Power by Camangi © 2009-2010 Reserved by Camangi Corporation 
This document contained herein is the exclusive property of Camangi Corporation, and shall not be distributed, reproduced, or disclosed in 
whole or in part without prior written permission of Camangi Corporation. 

3.3.


Manage your Email 

3.3.1.


Using Email 

Email application provides you to add external POP3 and IMAP email accounts 

from popular web-based email service providers on your WebStation. 

A

A

d

d

d

d


E

E

m

m

a

a

i

i

l

l


A

A

c

c

c

c

o

o

u

u

n

n

t

t


Touch the 

Email

 icon on the Launcher screen to enter your Email account 

settings for the first time using Email application and touch the 

Next

 icon to enter the 

Set up email screen. And, fill out the Email address and Password you want to set and 
touch the 

Next

 icon to send the information. Then, enter to the Add new email 

account screen. 

Note 

You can touch the 

Manual setup

 icon on the Set up email screen to directly set 

the incoming and outgoing settings for the email account you are setting up. 


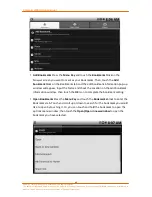
On the Add new email account screen, touch to choose the account type-POP3 

or IMAP you want to set and enter to the Incoming server settings screen.   

On the Incoming server settings screen, please enter the Username, Password, 

POP3 server, and Port information, and then select the Security type and Delete 
email from server. Then, touch the 

Next

 icon to enter the Set up email screen.   

Note


Before configuring the Incoming server settings information, please search your 

email inbox for POP3 and IMAP type account setting and check the Port and Security 

information on the local setting of your Email service. 

Summary of Contents for WebStation

Page 1: ...Rkjh Manual February 09 2010 Version 1 2 Version 1 2 Date of Last Revision February 09 2010 ...

Page 2: ...ou to reserve your WebStation package for possible Return Exchange Warranty and Repair service while in transit You will be responsible for any damage occurred during transit of above service if without original WebStation package Intellectual Property Right Information Copyright 2009 2010 Camangi WebStation All Rights reserved Camangi is a trademark of Camangi Corporation Camangi Corporation shal...

Page 3: ... do not force the connector or port into your WebStation check whether the connector matches or is correctly positioned in relative to the port Please use the Adapter included in the package to charge your WebStation and make sure the power adapter is firmly plugged into the power outlet This product should be operated only with the following designated power supply unit s AC Adapter PHIHONG Model...

Page 4: ...he possible interference caused by the WebStation to an aircraft s navigation system and communications network the law in most countries is against to use the internet connecting functionality on board an airplane Software License Agreement Please read the following terms and restrictions before using your WebStation By using the WebStation you are agreeing to the following terms and restrictions...

Page 5: ... and impolite wording offensive Any Third Parties reserve the right to change remove or disable access to any application services at any time without notice Camangi is not responsible for the above actions damages or losses from the third parties Disclaimer of Warranties To the maximum extent permitted law the WebStation software are provided As Is and As Available Hereby Camangi disclaim express...

Page 6: ... 20 2 1 WIRELESS CONTROLS 20 2 2 SOUND DISPLAY 22 2 3 SECURITY LOCATION 24 2 4 APPLICATIONS 26 2 5 SD CARD DEVICE STORAGE 28 2 6 DATE TIME 29 2 7 LOCALE TEXT 31 2 8 ABOUT WEBSTATION 33 3 GETTING CONNECTED 34 3 1 CONNECTING TO THE INTERNET 34 3 2 USING BROWSER 38 3 3 MANAGE YOUR EMAIL 45 4 MANAGE YOUR DIGITAL LIFE 49 4 1 WEATHER 49 4 2 CALENDAR 51 4 3 ALARM CLOCK 56 4 4 CALCULATOR 58 5 ENRICH YOUR ...

Page 7: ...PECIFICATIONS 87 8 2 CERTIFICATION AND NOTICE 89 INDEX 91 T Ta ab bl le e TABLE 1 WEBSTATION STATUS ICONS 16 TABLE 2 WEBSTATION NOTIFICATION ICONS 16 TABLE 3 WEBSTATION MUSIC ICONS 79 TABLE 4 WEBSTATION HARDWARE SPECIFICATIONS 87 TABLE 5 WEBSTATIONI OPERATING SYSTEM AND PREINSTALL APPLICATIONS 88 TABLE 6 CERTIFICATIONS OF WEBSTATION 89 ...

Page 8: ...ncluded in the Package 1 WebStation WS provides internet connectivity and entertainment anywhere includes stylus pen 2 Headset with mic used as a peripheral for your WebStation 3 AC Adapter recharges the battery 4 Stand used to support your WebStation 5 Quick Start Guide provides a quick guide to your WebStation 6 Important Product Information refers to the Usage Notice Certification and Warranty ...

Page 9: ...rrent screen or applications You can press the Return Key to return to the previous screen or step while any applications or screen is loaded press and hold the Return Key to return to the main screen of the currently loaded application and press the Return Key to close the onscreen soft keyboard Additional information about the screen will introduce later on next page For additional description a...

Page 10: ...e Volume Up key to increase the media volume and press the Volume Down key to decrease the media volume L Le ef ft t P Pa an ne el l Plug in the AC Adapter to start charging the battery Press the Reset button with the stylus to reset your WebStation USB Mini B Connector connects USB cable for file transfer USB Connector connects the USB cable to use Keyboard Plug in the Earphone to listen to the m...

Page 11: ...ated to the bottom of the Launcher screen It contains useful applications including from left to right Digital Frame Email Music eBook Market and Settings applications For more information about any of the above applications please refer to the following contents Applications Area is located to the middle of the Launcher screen Pre installed applications from left to right and top to bottom are Gm...

Page 12: ...he unlock action For more information about the Date and Time Settings please refer to 2 6 Day time on page 29 for more details For more information about the Wallpaper setting please refer to 6 1 Gallery on page 69 for more details I Id dl le e S Sc cr re ee en n Idle Screen after you ve stopped using your WebStation for a certain amount of time the timeout screen or digital frame slideshow will ...

Page 13: ...t to start charging the battery as shown on the illustration C Ch ha ar rg gi in ng g I In nd di ic ca at ti io on n The LED Power Light displays the power indication The upper LED turns on when the device battery is being charged and will switch from Red to Green after the battery has been fully charged The lower LED turns to Green when the device is under the Power on status The Battery Icon on ...

Page 14: ...n and shall not be distributed reproduced or disclosed in whole or in part without prior written permission of Camangi Corporation C Ca au ut ti io on n Do not arbitrarily remove the AC Adapter while the battery has not been fully charged For the safety precaution if your WebStation overheats while the battery charging please stop and pull out the plug immediately ...

Page 15: ...ro SD Slot cover located to the rear of the device by opening the cover from top to bottom and insert the micro SD Card into the slot with gold pins facing down R Re em mo ov vi in ng g t th he e S St to or ra ag ge e C Ca ar rd d Open the cover of micro SD Slot and press the storage card to eject it from the slot While your WebStation is on please do the following process first before removing mi...

Page 16: ... position Touch and scroll right or left to shift the screen to see and choose more applications on Launcher Screen Touch and scroll up down right left to shift the screen to read more information items contents and so on Touch and scroll down the notification area from the status bar to load additional functionality on the Notification Panel For more information about Notifications Panel refers t...

Page 17: ...our WebStation Notice When using stylus pen please gently touch the screen and avoid hard pressing or scraping This may cause screen damaged under long term usage R Ro ot ta at te e O Or ri ie en nt ta at ti io on n Rotate the screen from portrait to landscape orientation or vice versa by rotating the WebStation sideways For more information about using the Soft Keyboard on different screen orient...

Page 18: ...g g o of ff f y yo ou ur r W We eb bS St ta at ti io on n 1 Press and hold the Power Button until the options menu appears 2 On the options menu touch the Power off block 3 Touch the OK icon to complete the power off action S Sl le ee ep p M Mo od de e 1 Press the Power Button to switch your WebStation to sleep mode A Aw wa ak ke en ni in ng g f fr ro om m s sl le ee ep p m mo od de e 1 Press the ...

Page 19: ...ion requires you to type or enter text or numbers the Soft Keyboard will appear Touch and hold on the input column to open the Soft Keyboard Press the Return Key to close the Soft Keyboard Soft Keyboard Using Orientation You can choose to use the Soft Keyboard on landscape or portrait orientation by rotating the WebStation sideways C Ca au ut ti io on n Remember to turn on the screen orientation s...

Page 20: ...eyboard from alphabet to numeric and symbol keyboard or vice versa Touch and hold the Switch Key to open the options menu window Touch the Keyboard Settings block to access and set additional settings for the keyboard applicable For more information about the Keyboard Settings please refer to 2 7 Locale text on page 31 for more details Touch the Input Method block to select and switch input method...

Page 21: ... Del Key If you need to insert or delete a character on the input column use finger or the stylus to touch the position that needs to be change Touch the Enter Key to go back the previous application after you re done entering letters on the Soft Keyboard screen to see the word you have entered show up on the application column On the alphabet keyboard touch the Shift Key to change between upperca...

Page 22: ...n when you enter an URL the Comma Key at the bottom alternates to com Key for your convenience and the Enter Key alternates to the Go Keys for your convenience while surfing the web Special emphasis should be placed on the Enter Key which will alternate between Next Go or Done Key depending on different applications and usage On the Browser application if you want to enter additional text column o...

Page 23: ...s on Battery is very low GPS is connected N No ot ti if fi ic ca at ti io on n I Ic co on ns s Notification Icons appear on the Notification area located toward the left of the status bar Table 2 WebStation Notification Icons More not displayed notifications Storage card is full Disconnected under Wi Fi on and wireless networks available USB connected to your computer Upcoming event Uploading data...

Page 24: ...not be distributed reproduced or disclosed in whole or in part without prior written permission of Camangi Corporation If you have completed an operation on the Notifications Panel you can touch and scroll up the bottom icon upward on the Notifications Panel or press Return Key to close the Notifications Panel Notification block Close notification block Clear notifications icon ...

Page 25: ...nstalling the micro SD Card please refer to 1 4 Installing the Storage Card on page 8 for more details 2 Use the USB cable to connect the WebStation USB Mini B connector to a computer USB connector as shown on the illustration USB connected notification icon will appear on the status bar of the WebStation 3 Touch and Scroll down to open the Notifications Panel N No ot te e For more information abo...

Page 26: ...nal storage device You can copy data pictures or files directly from your computer into the micro SD Card in WebStation T Tu ur rn n o of ff f t th he e W We eb bS St ta at ti io on n s s U US SB B S St to or ra ag ge e 1 Touch and Scroll down to open the Notifications Panel 2 In the Notifications Panel touch the Turn off USB storage block and you will see the Turn off USB storage dialog window 3 ...

Page 27: ...view all available settings on the screen Wireless controls Sound display Security location Applications SD card device storage Date time Locale text About WebStation 2 1 Wireless controls Configure your WebStation s wireless connection including Wi Fi and Airplane mode W Wi i F Fi i Touch the Wi Fi block to enable or disable Wi Fi connection WebStation will automatically scan for available wirele...

Page 28: ...e wireless name you have configured display on the Wi Fi networks section Connect to Another Wi Fi Network On Wi Fi settings screen press the Menu Key and touch Scan block Then touch another Wi Fi network to connect it Check Additional Wi Fi Information You can check the signal strength of a connected Wi Fi network displays on the Wi Fi networks section Then touch the connected Wi Fi block to see ...

Page 29: ...ioned function will resume its normal operation Ringer Volume Touch the Ringer volume block and the Ringer volume adjustment window will appear Touch and hold to adjust the notification volume then touch the OK icon to complete the volume adjustment Media Volume Touch the Media volume block and the Media volume adjustment window will appear Touch and hold to adjust the media volume and then touch ...

Page 30: ...s feature enabled for example Browser Gallery Alarm Clock Calendar Calculator Email Settings and so on Animation Touch the Animation block to enable or disable it The checkbox on the Animation block displays whether you successfully enabled this feature or not When you enable the Animation the WebStation will show an animation while opening closing or switching windows or screens Brightness Touch ...

Page 31: ...PS service and unlock pattern for the lock screen Touch the Security location block to enter settings My Location sources Section Select the check box of Enable GPS satellites and Use wireless networks before starting any GPS related applications Screen unlock pattern Section Create the Unlock Pattern Touch the Set unlock pattern block to enter setting Read the information on the screen then touch...

Page 32: ...lock pattern will appear while you draw the correct pattern on the lock screen Change the Unlock Pattern Touch to enter the Change unlock pattern block Touch and draw your original screen unlock pattern for confirmation Touch and draw your new screen unlock pattern and touch the Continue icon after completion Touch and draw your new screen unlock pattern again and touch the Confirm icon to complet...

Page 33: ...the Third Party Applications block and the notice will appear on a pop up window After reading the agreement touch the I agree icon and you will return to the Application settings screen Then you will see the checkbox displays on the Third Party Applications block M Ma an na ag ge e a ap pp pl li ic ca at ti io on ns s Touch the Manage application block to enter the applications list screen Press ...

Page 34: ...oduced or disclosed in whole or in part without prior written permission of Camangi Corporation Cache Section Display the cache information You can clear the cache depending on the application if applicable Launch by Default Section Display the default setting information You can clear defaults depending on the application if applicable Permission Section Display access information of an applicati...

Page 35: ...ting You will see the available storage information for the micro SD Card Unmount the SD Card Touch the Unmount SD Card block to unmount the micro SD Card for safe removal before ejecting the micro SD Card After the process the available storage information for the micro SD Card will disappear Format SD Card The Format SD card function will be available after you unmount SD card Touch the Format S...

Page 36: ...e values of your WebStation If you want to set the date and time of your WebStation you have to touch to disable the Automatic functionality to enable the date and time setting S Se et t D Da at te e o of f y yo ou ur r W We eb bS St ta at ti io on n Set Date Touch the Set Date block and the screen will pop up the Date set window Touch the plus or minus icon to select the month day and year you wa...

Page 37: ...u screen Touch and scroll up or down to search the time zone you want to set Then touch the time zone to complete the time zone setting And the screen will return to the Date time settings screen the selected time zone you have chosen will display on the Select time zone block Set time Touch the Set Time block and the Time set pop up window will appear Touch the plus or minus icon to select the ho...

Page 38: ...f your WebStation S Se el le ec ct t L Lo oc ca al le e Touch the Select locale block to enter the locale and language list screen Touch and scroll up or down to search the locale and language you want to set Then touch the locale and language to complete the locale and language setting The screen will then return to the Locale text settings screen and the language you have selected will display o...

Page 39: ...ithout prior written permission of Camangi Corporation Touch the Soft Keyboard block to enable or disable it to use the Soft Keyboard on applicable applications For the further Soft Keyboard settings touch the Soft Keyboard settings to enable or disable more functionalities depending on the application applicability Note For more information about the using input Soft Keyboard please refer to 1 6 ...

Page 40: ... disclosed in whole or in part without prior written permission of Camangi Corporation 2 8 About WebStation Touch the About WebStation block to view the Model number Firmware version Baseband version kernel version and Build number information for the WebStation S St ta at tu us s Touch to enter the Status screen for the Battery status Battery level Wi Fi Mac address and Up time information of you...

Page 41: ...ss connection of your WebStation from the Status Bar If your WebStation is connected to a wireless network the Status Icon of the status bar would appear the Connected to a Wi Fi network icon which illustrates the approximate signal strength from the number of band lights If your WebStation has problem connecting to a wireless network the Notification Icons of the status bar will display Disconnec...

Page 42: ...o return to the Launcher screen to start using applications that needs internet Note If required please enter your PIN code number And press the OK icon to complete the PIN code setting If you have entered the incorrect PIN Code three times please contact your Internet service provider and you will be asked to enter PUK code After your PUK code has been entered press the OK icon to complete the pr...

Page 43: ... turn off 3G Wizard application and pull out your 3G Dongle from the WebStation when on board an aircraft Remember to turn off your WebStation Due to the possible interference caused by the WebStation to an aircraft s navigation system and communications network the law in most countries is against to use the internet connecting functionality on board an airplane 3 3G G W Wi iz za ar rd d S Su ub ...

Page 44: ...n Change APN Provide you the ability to change your PDP carrier Touch the Change APN block of the sub functionalities to enter the Change APN window Enter the APN you want to change and then touch the Change icon to complete the process Or you can enter Username and Password if applicable FAQ Answers some of the frequently asked questions Touch the FAQ block linking to the 3G Wizard FAQ About us P...

Page 45: ... complete your additional internet browsing needs Before using Browser application please make sure your WebStation is connected to the internet For methods to connect to the Internet please refer to 3 1 Connecting to the internet on page 34 for more details B Ba as si ic c M Ma an ni ip pu ul la at ti io on ns s Using Search Engine On Browser application you can enter the words you desire into th...

Page 46: ...Forward block to forward to the next page Using Orientation You can choose to browse on landscape and portrait orientation by turning the WebStation sideways C Ca au ut ti io on n Remember to turn on the screen orientation setting before using Browser on different orientation For more information about the orientation setting please refer to 2 2 Sound display on page 22 for more details Zoom in or...

Page 47: ...a keyword and you will see the matched characters displayed with green shade Furthermore you can use the left and right arrow to go to the previous or next matched word Copy Text on the Web Page Press the Menu Key and touch the More block Then touch the Select text block Touch the starting point of the text and drag to the end of text you would like to copy using your Finger or Stylus Then release...

Page 48: ...want to use and touch the OK icon to complete the setting N Ne ew w w wi in nd do ow w W Wi in nd do ow ws s Open a New Browser Window Press the Menu Key and touch the Windows block to enter the Current Windows screen Touch the upper left window on the screen to open a new window Switch between Browser Windows Press the Menu Key and touch the Windows block to enter the Current Windows screen Touch...

Page 49: ... as your Bookmarks Then touch the Add bookmark block on the Bookmarks tab and the edit bookmark information pop up window will appear Input the Name and check the Location on the edit bookmark information window then touch the OK icon to complete the bookmark setting Open Bookmarks Press the Menu Key and touch the Bookmarks block to enter the Bookmarks tab Touch and scroll up or down to search for...

Page 50: ... tab touch and hold the bookmark you want to copy then touch the Copy link URL block to copy the bookmark URL Then move to the screen you want to paste the URL then touch and hold to enter the Edit text options menu Touch the Paste block to complete the paste action Delete Bookmarks On the Bookmarks tab touch and hold the bookmark you want to delete then touch the Delete bookmark block and touch t...

Page 51: ... Market Apps on page 66 for more details Before downloading applications please make sure you have already installed your micro SD Card and agreed the Third Party Application agreement For more information about installing the micro SD Card please refer to 1 4 Installing the storage Card on page 8 for more details For more information about Third Party Application agreement please refer to 2 4 App...

Page 52: ...nd fill out the Email address and Password you want to set and touch the Next icon to send the information Then enter to the Add new email account screen Note You can touch the Manual setup icon on the Set up email screen to directly set the incoming and outgoing settings for the email account you are setting up On the Add new email account screen touch to choose the account type POP3 or IMAP you ...

Page 53: ...red Then touch the Done icon to complete the email settings afterward the Email application will begin to load messages from your email service After the above process press the Menu Key and touch the Account Settings block to enter the account settings Then touch and scroll down the screen until you see the Server settings section Touch the Outgoing settings block to enter the SMTP server Port Se...

Page 54: ...e email Set your Email Account Press the Menu Key and touch the Account settings block to enter the account settings You can touch the Email check frequency block on the General settings section and the Email check frequency options menu will appear Touch the check frequency you want to configure to complete the Email check frequency setting Touch the Email notifications block to enable or disable...

Page 55: ...ress the Menu Key and touch the Accounts block Afterward press the Menu Key and touch the Add account block to add additional email accounts Also follow the process previously described to create more email accounts Alternatively you can press the Menu Key and touch the Account Settings block Then touch the Add another account block to add additional email accounts 3 3 2 Using Gmail Touch the Gmai...

Page 56: ...er A Ad dd d C Ci it ty y W We ea at th he er r Touch the Weather icon on the Launcher screen to enter Weather application And press the Menu Key and touch the Add City icon Then the screen would pop up the Search for the City window Input the city name for the application applicable and touch the OK icon Then you will view the city you set display on Weather application Besides you also can input...

Page 57: ...ill be displayed on the middle of the screen From left to right the first weather information displays the Current Weather Temperature Humidity and Wind condition of a city The following four weather information displays the four days weather forecast including the Day Weather and Temperature range information of a city You can touch and scroll left or right on the weather screen to see weather in...

Page 58: ...he Calendar icon on the Launcher screen to enter Calendar application C Ca al le en nd da ar r V Vi ie ew ws s Press the Menu Key on Calendar application and touch the Agenda block to view the set agenda in Calendar application of your WebStation Also you can see the different calendar view patterns on your WebStation Press the Menu Key on Calendar application and touch the Day Week and Month bloc...

Page 59: ... s calendar from the date currently being displayed On the Week view you can touch and scroll up or down to see different hours within a week Furthermore you can touch and scroll right or left to shift the screen to the next or previous week calendar Then you can press the Menu Key and touch the Today block then the screen will be returned to the current week from the week currently displayed on t...

Page 60: ...or more information about the date and time settings please refer to 2 6 Date time on page 29 for more details C Cr re ea at te e E Ev ve en nt ts s On any Calendar view press the Menu Key and touch the New event block to enter the event creation screen Enter the desired event information and select the period repetition and reminders options Then touch the Save icon to complete the event creation...

Page 61: ...ect or change the reminding time on the Reminders options menu window On any Calendar view touch and hold the set event block to see the Calendar options menu window Touch the Edit event block on the options menu window to enter into event editing screen After you have entered the event editing screen you can start to enter and change any desired event information and selection then touch the Save...

Page 62: ...ons menu window pop up on the screen Touch to select the option to complete the alerts notification setting If you select the Status bar notification block you will see the Calendar Notifications displayed on the Notification Panel while an event arriving Open the Notification and touch the Calendar notification to enter the event directly On the Reminder settings section of the Calendar Settings ...

Page 63: ...ck icon on the Launcher screen to enter the Alarm Clock application On Alarm Clock application you will see the current time and configured alarms Press the Menu Key and touch the Hide clock block to show or hide the clock on Alarm Clock application S Se et t A Al la ar rm m Touch an alarm to enter the alarm setting On the Set alarm screen you can touch the Time block and the alarm time set pop up...

Page 64: ...le the alarm clock You can also name an Alarm by touching the Label block on the Set alarm screen Simply enter a name and touch the OK icon to complete the renaming action After the time ringtone repeat and label settings have been configured please remember to touch the Turn on alarm block on the Set alarm to enable the alarm clock A Ad dd d D De el le et te e A Al la ar rm m Press the Menu Key a...

Page 65: ...uted reproduced or disclosed in whole or in part without prior written permission of Camangi Corporation 4 4 Calculator Touch the Calculator icon on the Launcher screen to enter the Calculator application And touch the icon to start the calculation Press the Menu Key and touch the Advanced panel block to switch the calculator panels between Basic and Advanced mode Basic panel Advanced panel ...

Page 66: ...o 2 2 Sound display on page 22 for more details Touch the screen while playing a slideshow for Slideshow Controller to appear on the screen Touch the play or pause icon to switch between the playback modes Touch the previous or the next arrow to view the previous or the following slide S Se el le ec ct t A Al lb bu um ms s Press the Menu Key to access additional sub functionalities Touch the Selec...

Page 67: ...s epub format eBook application provide two methods of reading an eBook document Downloading eBook from the Internet and opening an eBook from the Books folder of the micro SD Card If you would like to read an eBooks from the micro SD Card remember to create a folder named Books in the micro SD Card and put eBook into the Books folder B Ba as si ic c M Ma an ni ip pu ul la at ti io on ns s Touch a...

Page 68: ... permission of Camangi Corporation If you want to choose another eBook press the Menu Key and touch the Library block to search for an eBook On the Library screen of the eBook application you can sort By author and Recent to search an eBook Afterward touch the eBook block you want to read to enter an eBook document You can use search function under library and bookmark interface by pressing menu k...

Page 69: ...produced or disclosed in whole or in part without prior written permission of Camangi Corporation Use search function under bookmark Note When the eBook application opens the eBook screen will go directly to the page you last stopped reading You can also switch between Day and Night reading screen mode Press the Menu Key and touch the Day or Night block to switch between Day and Night reading mode...

Page 70: ...age you want to mark Then press the Menu Key and touch the Bookmarks block to enter the bookmarks screen Touch the Current page tab and touch the New bookmark block then the bookmark will appear on the screen Open Bookmarks If you want to open a bookmark over the current eBook touch the Current page tab on the bookmarks screen and touch the bookmark you want to open Then the eBook screen would bri...

Page 71: ... or disclosed in whole or in part without prior written permission of Camangi Corporation eBook screen will bring you directly to the bookmarked page on the eBook Delete bookmarks On the bookmarks screen touch and hold the bookmark you want to delete You will see the bookmark options menu window appear on the screen Touch the Delete bookmark block on the bookmark options menu window to delete the ...

Page 72: ...ined herein is the exclusive property of Camangi Corporation and shall not be distributed reproduced or disclosed in whole or in part without prior written permission of Camangi Corporation 5 3 Gbook Touch the Gbook icon on the Launcher screen to connect and read an eBook located on the Google Book web page ...

Page 73: ...ital life Touch the Market icon on the Launcher screen to connect to the Camangi Market web page and touch the Apps icon to enter the Camangi Market Apps web page S Se el le ec ct t A Ap pp ps s Find Apps by Search Touch and hold the Search column then enter the apps name you want to find and touch the Go icon to start the search The screen will show you the related apps list Find Apps by Category...

Page 74: ...nd you will see a detailed description about the app you have selected including screenshot and reviews You can also download and install the apps into your device But remember to login before downloading and installing any apps For more information about downloading apps please refer to 3 2 Using Browser on page 38 for more details on Advanced Manipulations paragraph Note You can login by touchin...

Page 75: ...reen you can modify your personal setting and manage apps you have downloaded by touching the functionalities icon Touch the My Download icon on the My Account screen and you will see the apps list you have downloaded and installed And you can rate and update the apps you have ever downloaded and installed by touch Rating or Update icons 5 5 Camangi Market Lives The Camangi Market Live provides a ...

Page 76: ...allery Gallery application provides a viewing space for your pictures and videos Before using Gallery application remember to install the Micro SD Card For more information about installing the Storage Card please refer to 1 4 Installing the Storage Card on page 8 for more details Touch the Gallery icon on the Launcher screen to enter the Gallery application On the Gallery screen the default folde...

Page 77: ...humbnails Touch and scroll up or down to view additional picture thumbnails Touch to select a picture thumbnail for full screen display on your WebStation Touch the screen while picture is being displayed on the full screen to activate the zoom icons and control arrows Touch the minus zoom icon to zoom out from a picture Touch the plus zoom icon to zoom into the picture Touch the Previous Arrow to...

Page 78: ...tting please refer to 2 2 Sound display on page 22 for more details Delete Pictures Press the Menu Key and touch the Delete icon while the picture is displayed on the full screen Then touch the OK icon to complete the deletion View all Pictures as Slideshow Touch to enter the folder you want to select then press the Menu Key and touch the Slideshow block WebStation will start playing a slideshow o...

Page 79: ...ear on the screen Touch the Rotate left or Rotate right block to rotate the picture to the desired orientation The rotated picture will then save the new rotation to be displayed on picture view Crop Pictures Press the Menu Key and touch the Crop icon while the picture as full screen Afterward you will see the Cropper Tool appear on the screen Touch and hold the interior of the Cropper Tool move t...

Page 80: ...the Wallpaper you want to set Then touch the Save icon and you will see the new wallpaper you have chosen on the lock screen More Details Press the Menu Key and touch the More icon while the picture is in full screen then touch the Details block Afterward you will see a Details window appear on the screen On the Details window you will see the size and resolution of the pictures Touch the OK icon ...

Page 81: ...st the video position 6 1 3 Gallery Settings O On n a an ny y G Ga al ll le er ry y s sc cr re ee en n p pr re es ss s t th he e M Me en nu u K Ke ey y t th he en n t to ou uc ch h t th he e S Se et tt ti in ng gs s i ic co on n o or r t th he e M Mo or re e i ic co on n t to o s se el le ec ct t S Se et tt ti in ng gs s b bl lo oc ck k t to o e en nt te er r t th he e G Ga al ll le er ry y S Se e...

Page 82: ... S Sl li id de es sh ho ow w s se et tt ti in ng gs s S Se ec ct ti io on n Slideshow Interval Touch the Slideshow interval block and you will see the Slideshow interval options menu appear on the screen Touch to select the interval seconds you want to set to complete the interval setting Slideshow Transition Touch the Slideshow transition block to see the Slideshow transition options appear on th...

Page 83: ...r applications at the same time Before using Music application remember to install the micro SD Card For more information about installing the Storage Card please refer to 1 4 Installing the Storage Card on page 8 for more details Touch the Music icon on the Launcher screen to enter the Home screen of Music application you will see your Music libraries Artists Albums All Songs Playlists and Cover ...

Page 84: ...ay the music in order until the end of the album On the album list for the artist touch and hold the album and then touch the Play block on the options menu to play all songs in the album Or press the Menu Key and touch the Play all block on the songs list of the album to play all songs in the album Albums Touch the Albums icon on the Music screen to enter the albums list Touch the Albums block to...

Page 85: ...ll songs list Touch any track to play through the music Press the Menu Key and touch the Play all block to play all the songs Playlists Touch the Playlists icon on the Music screen to enter the Playlists list Touch the Playlists block to enter the songs list within a playlist and touch a song to play the music until the end of the list And touch and hold the Switch Order icon on the left side of t...

Page 86: ...Touch the Home icon to return to the Home screen of Music application Playing Touch the Playing icon to go to the Playing screen And display the current song being played on any list screen Music Notification Song is playing Displayed on the Notification in the status bar Open the Notification Panel and touch the music notification to enter the Playing screen Shuffle off Shuffle is off for current...

Page 87: ...e playing screen Touch the play or pause icon to switch between the playback modes or touch the previous and next arrow to play the previous and next song Touch the screen to activate the Mode Controller displayed the top of the playing screen Touch and scroll right or left on the progress bar to adjust the playback section of the currently playing music You can set shuffle or repeat modes by touc...

Page 88: ... Now Playing Screen On the playing screen touch the Now Playing icon on the mode controller to enter the Now Playing screen On the now playing screen you will see the playing list and the Playing icon on the right side of the screen with the song being played Touch and hold the Switch Order icon on the left of the screen to shift the playing sequence on the now playing list Delete Songs On the pla...

Page 89: ...e Current playlist block to add songs into the currently playing list Touch the New block to create a new folder to add the song into the new playlist Touch the other block created previously to add the song into the playlist Set Ringtone On the playing screen press the Menu Key and touch the Use as ringtone block to configure a song as the ringtone After completing the ringtone setting the song w...

Page 90: ...y y Clear Temporary Files On the Browser application press the Menu Key and touch the More block and choose the Download block Touch and hold the downloaded application and touch the Clear from list block to clear the files On the Browser application press the Menu Key and touch the More block to choose the Settings block On the Privacy settings section touch the Clear cache Clear history Clear al...

Page 91: ...Parts Spare Parts application provides additional information about status and general setting of your WebStation including the Device info General and Applications sections Touch the Spare Parts icon on the Launcher screen to enter Spare Parts application D De ev vi ic ce e I In nf fo o S Se ec ct ti io on n Battery History Touch the Battery history block to enter usage information screen You can...

Page 92: ...sage Statistics Touch the Usage statistics block to enter the application usage statistics screen You can select the sorting method for different viewing mode G Ge en ne er ra al l S Se ec ct ti io on n Window Animations Touch the Window animations block the window speed options menu will appear on the screen Select a window speed to complete the setting Transition Animations Touch the Transition ...

Page 93: ...ive property of Camangi Corporation and shall not be distributed reproduced or disclosed in whole or in part without prior written permission of Camangi Corporation enable or disable the animations for screen rotation The check box on the fancy rotation animations block displays whether you success fully turn on this feature or not ...

Page 94: ...rvell PXA303 624MHz Memory System Memory 128MB Mobile DDR Flash Memory 256MB NAND System Operating System Android 1 5 OS Communication WiFi IEEE 802 11 b g GPS GPS module Display Display 16M True Color 7 TFT LCD A grade 800 x 480 Pixels Orientation G sensor Connectivity USB Type A USB port mini B USB port Card Micro SD Card Slot Audio Audio Out 3 5mm Stereo Headphone Microphone Built in Omni direc...

Page 95: ...i in ng g S Sy ys st te em m a an nd d P Pr re ei in ns st ta al ll l A Ap pp pl li ic ca at ti io on ns s Table 5 WebStation Operating System and Preinstall Applications Language Multi language Display Japanese English Spanish France German Simplified Chinese Traditional Chinese Multi language Input English Simplified Chinese Japanese Internet Browser 3G Wizard Email Gmail Multimedia Music Galler...

Page 96: ...tifications of WebStation US FCC ID XWJ CMSLBEE1USJYC EU JP TW FCC Certification This device complies with part 15 of the FCC rules Operation is subject to the following two conditions 1 this device may not cause harmful interference and 2 this device must accept any interference received including interference that may cause undesired operation CE Certification This device complies with the Radio...

Page 97: ...bStation FCC Modifying this device to receive cellular radiotelephone service signals is prohibited under FCC rules and federal law CE Modifying this device not authorized by Camangi could void the EMC compliance and negate your authority to operate the device This device has demonstrated EMC compliance under using peripheral included in the package with system components It is important that you ...

Page 98: ... 26 36 38 39 40 41 42 43 44 46 47 48 49 50 51 52 53 55 56 57 58 59 60 61 62 69 70 71 72 75 76 78 79 80 81 micro SD Card 3 8 11 18 19 28 60 81 Mode Controller 78 Mount 18 Music 4 8 74 75 76 77 78 86 Notification Icons 16 34 Notification Panel 9 16 47 55 77 Options menu 11 13 22 23 29 41 42 43 47 53 54 55 57 59 62 72 73 75 80 83 84 Orientation 10 12 15 23 39 68 69 70 85 Picture 8 19 67 68 69 70 71 7...

Page 99: ...ngi Corporation and shall not be distributed reproduced or disclosed in whole or in part without prior written permission of Camangi Corporation Unmount 8 28 USB cable 3 16 18 USB Connector 3 USB Mini B 3 18 video 67 71 72 Video Controller 72 Visible passwords 25 Wallpaper 4 5 71 Weather I 4 49 50 86 Wi Fi 3 16 20 21 33 34 88 Zoom in 39 zoom out 39 68 ...

Reviews: