Chapter 5: Installation
268
1
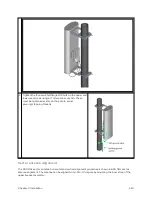
Choose the best mounting location for your particular application.
2
Align the BHM as follows:
l
Move the module to where the link will be unobstructed by the radio horizon and no
objects penetrate the Fresnel zone.
l
Use a local map, compass, and/or GPS device as needed to determine the direction to
the BHS.
l
Apply the appropriate degree of downward or upward tilt.
l
Ensure that the BHS is within the beam coverage area.
3
Using stainless steel hose clamps or equivalent fasteners, lock the BHM into position.
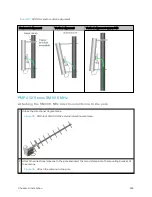
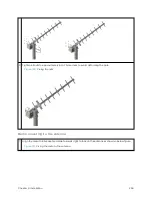
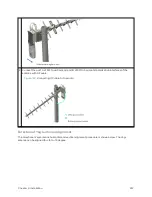
See Installing external antennas to a connectorized ODU for connecting external antenna
4
If this BHM will not be connected to a CMM, optionally connect a cable to a GPS timing source
and then to the SYNC port of the BHM.
5
Either connect the BHM’s Aux to the CMM or connect the DC power converter to the BHM
and then to an AC power source.
RESULT: When power is applied to a module or the unit is reset on the web-based interface,
the module requires approximately 25 seconds to boot. During this interval, self-tests and
other diagnostics are being performed.
6
Access Configuration > General page of the BHM for Synchronization configuration.
7
If a CMM4 is connected, set the Sync Input parameter to the AutoSync or Au Free
Run selection.
Inst alling a 4 50 Plat f or m Fam ily BHS
To install a PTP 450 platform Series BHS, perform the following steps.
Procedure 8 Installing a BHS
1
Choose the best mounting location for the BHS.
2
Terminate the UV outside grade Category 5 Ethernet cable with an RJ-45 connector and connect the
cable to the BHS. (See Powering the AP/SM/BH for test configuration)
3
Use stainless steel hose clamps or equivalent fasteners to lock the BHS into position.
4
Install a surge suppressor as described in the section Mount the Surge Suppressor
5
For coarse alignment of the BHS, use the Audible Alignment Tone feature as follows:
l
At the BHS, connect the RJ-45 connector of the Alignment Tool Headset to the Aux port via
an alignment tone adapter as shown in section Alignment Tone in Configuration Guide.
l
Listen to the alignment tone for pitch, which indicates greater signal power (RSSI/dBm) by
higher pitch.
Adjust the module slightly until you hear the highest pitch and highest volume
Summary of Contents for PMP 450 Series
Page 92: ...Chapter 2 System hardware 92 Figure 29 MicroPoP Omni antenna implementation pattern Vertical...
Page 134: ...Chapter 3 System planning 134 Figure 51 Mast or tower installation...
Page 135: ...Chapter 3 System planning 135 Figure 52 Wall installation...
Page 136: ...Chapter 3 System planning 136 Figure 53 Roof installation...
Page 137: ...Chapter 3 System planning 137 Figure 54 GPS receiver wall installation...
Page 158: ...Chapter 3 System planning 158 Figure 61 cnMedusa Antenna...

