Chapter 2: Packaging and Installation of Access Point
25
Mounting XE5-8
The XE5-8 units are mounted either by ceiling mount, wall mounting or T-bar mounting method.
Ceiling mount
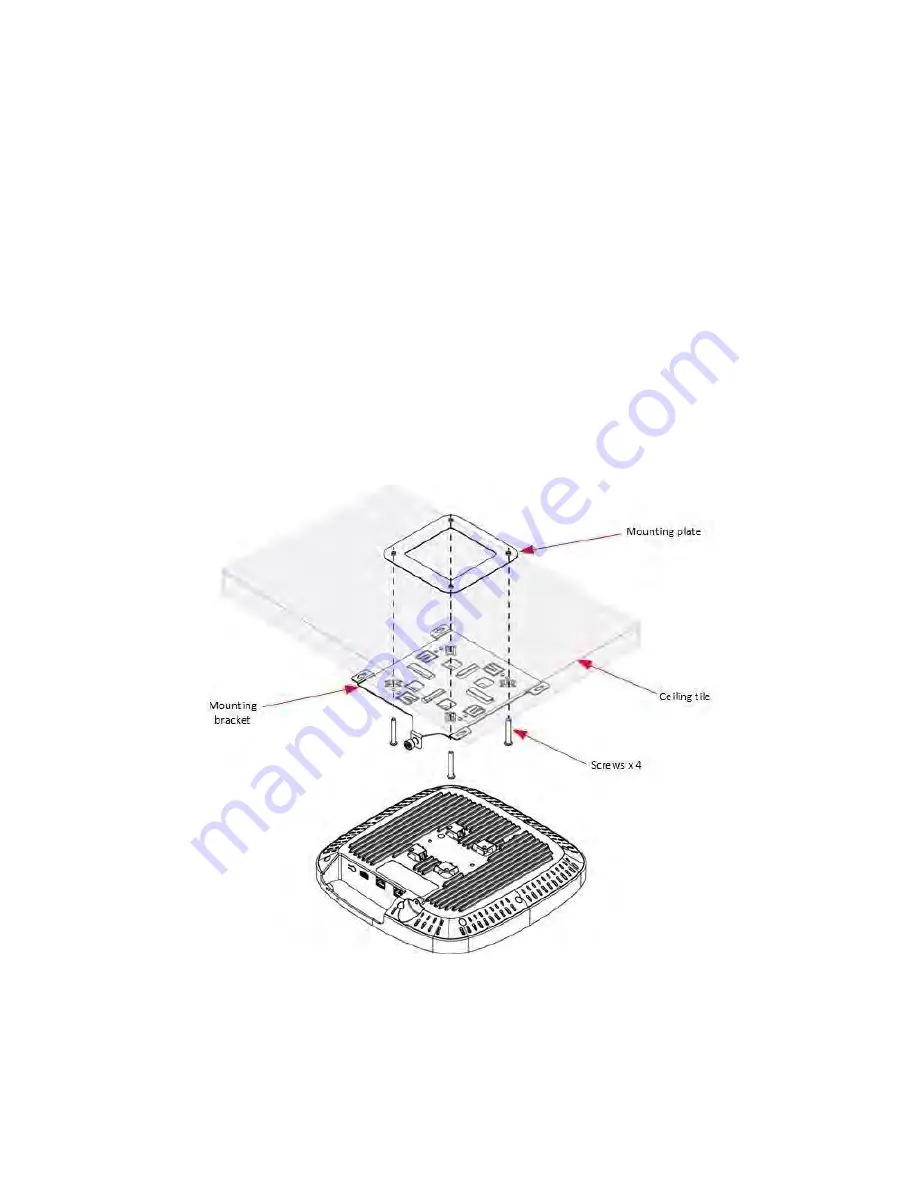
To mount the XE5-8 unit on the ceiling, perform the following steps:
1.
Determine where XE5-8 needs to be mounted and remove the ceiling tile.
2.
Using the hole template, mark the hole locations.
3.
Drill the holes for the four mounting screws using a 5 mm
(3/6”)
diameter drill bit.
4.
Drill a hole for the RJ45 cable using a 15 mm
(5/8”) diameter
bit.
5.
Hold the mounting plate on the top side of the ceiling tile and screw it on the mounting bracket.
6.
Run the RJ45 cable (s) through the 15 mm hole and remount the ceiling tile.
7.
Attach the RJ45 cable (s) to the XE5-8 unit.
8.
Slide the XE5-8 unit into the mounting bracket.
Wall mounting
You can mount XE5-8 unit to any wall by using two screws with corresponding wall anchors. The ceiling
mount bracket can be used as a template to align the screws with the unit.
Summary of Contents for XE5-8
Page 1: ...HARDWARE INSTALLATION GUIDE Enterprise Wi Fi 6 Access Point System Release 6 5...
Page 36: ...Chapter 2 Packaging and Installation of Access Point 36...
Page 44: ...Chapter 2 Packaging and Installation of Access Point 44...
Page 47: ...Chapter 2 Packaging and Installation of Access Point 47...


