SPATZ
Tel. +49-7335-921400
Mühlhauser Str.5
Fax. +49-7335-921402
73344 Gruibingen
e-mail:spatz@spatz-tech.de
Germany
www.spatz-tech.de
HDMIFIX/DVIFIX
Manual/Anleitung Programmable EDID Simulator
Description
The HDMIFIX/DVIFIX is an user programmable EDID Emulator
that manipulates the communication between source and
display.
The source only sees the EDID of the HDMIFIX/DVIFIX and
does not know about the hardware connected beyond the
HDMIFIX/DVIFIX. This ensures user controlled EDID with
predictable results and faster switching times.
BEWARE ! The manipulation of the automatic negotiation
between source and display can cause incompatible resolutions
outputted by the source resulting in a blank picture on the
display !!
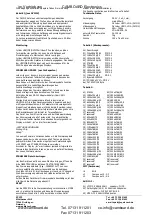
480p@60Hz (resolution 1 of table 2) should result in a picture
all the time -this is the minimum shared standard between the
HDMI consumer and professional DVI world.
The HDMIFIX/DVIFIX has two operation modes. The standard
mode allows assignement of one of the 60 Video EDID and the
video output colorspace to one of the 10 user presets (01-10).
All audio formats are turned active in this mode.
PRESET 00 forwards the display EDID to the source, PRESET
11 can learn EDID of any display attached at the
DMIFIX/DVIFIX’s output and forward it to the attached source.
There is an additional fixed 3D EDID that holds the EDID table
of 1080p 3D compatible display and is the preferred setting if
you need a 3D output from a BluRay Player.
Cycling through one of the 13 presets is the standard operation
mode of the unit.
Activation of the Standard Programming Mode:
To activate Standard Programming Mode press the +10 button
for 2 s while powering the unit. The unit displays “S” for 3
seconds.
In the standard mode you can assign one of the 60 output
resolutions and define the colorspace you want the
HDMIFIX/DVIFIX to forward to the source. Pressing MODE one
time will bring you to the video output (Table 2) settings
(VIDEO LED is on). With +1 and +10 buttons you may select
one of the 60 output resolutions. Pressing MODE again will
bring you to the FMT setting (VIDEO and FMT LED is on).
With +1 button you may cycle through the 3 available color
space settings.
If you use the unit with DVI sources that are true DVI then FMT
changes will have no effect, as DVI only uses RGB color space.
Pressing MODE again brings you back in the operation mode.
The FMT LED will flash indicating that a HOTPLUG signal has
been executed. The source should now start renegotiating the
new settings with the HDMIFIX/DVIFIX.
The new setting will automatically be stored in the previous
selected PRESET.
It is mandatory to finish the sequence for activating the new
settings.
Activation of the Expert Programming Mode:
To activate Expert Programming Mode press the +1 button for
2 s while powering the unit. The unit displays “E” for 3 seconds.
In the expert mode you can assign one of the 60 output
resolutions and define the colorspace you want the
HDMIFIX/DVIFIX to forward to the source.
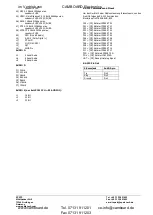
In addition to the standard mode, you can select one of 15
audio formats (Table AUDIO 1), specify the numbers of audio
channels (AUDIO 2), defining audio sample frequency
(AUDIO 3) and specify the bit depth for the PCM audio modes
(AUDIO 4). This is the MODE sequence that is available through
repetitive button presses:
Adjustment Sequence:
VIDEO (00 -60) -> FMT (RGB, C2, C4) ->AUDIO 1 (00-15)
->AUDIO 2 (2CH, 6 CH, 8CH) -> AUDIO 3 (F1-F7) and optional
AUDIO 4 (r1,r2 und r3) for PCM audio modes.
Once you return to the operation mode the unit will flash the
FMT LED indicating that HOTPLUG has been executed. Your
settings will automatically be saved in the previous selected
PRESET.
The source should now start renegotiating the EDID and start
with the settings you have selected in the HDMIFIX/DVIFIX.
Make sure that you cycled through the complete sequence !
ATTENTION !
Not all settings must have an effect on the behaviour of the
source. This is varying from manufacturer and HDMI source as
these may not use all functions specified in the HDMI standard.
The HDMIFIX/DVIFIX is offering you all kind of manipulations
provided
by the standard but has no control over the implementation of
firmware in the individual sources.
HOTPLUG -activating the settings
The Hotplug signal is the signal that initiates the
resynchronizing of the source. Once the source detects this
signal it starts rereading the EDID.
To force the EDID rereading at any time simply press the
MODE button for 2s. The FMT LED will flash.
Read EDID Save into PRESET 11
HDMIFIX/DVIFIX can learn the EDID of any display that is
connected to the output connector. You may use any HDMI or
DVI display.
Please select PRESET 11.
Press MODE (first) and (then) +10 simultanously until the
display flashes.
You have now succesfully stored the EDID of the attached
display to the PRESET 11.
You may use this as a reference for other installs or just use it
with the current install to speed up switching times and ensure
reliable operation. You would have to use one HDMIFIX/DVIFIX
for any of the sources that are in use.
However we recommend to use one the 60 single output
resolutions EDIDs as they will really force the source into the
resolution that works best with your display, instead of using
the one that is marked as “NATIVE” that is probably not the
best choice.
Give it a try and decide yourself !
im Vertrieb von
CAMBOARD Electronics
www.camboard.de
Tel. 07131 911201
Fax 07131 911203
ce-info@camboard.de


