C
D
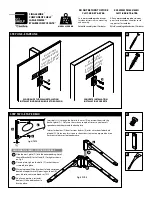
Insert bolts ( C ) through the holes in the arm ( E ) and screw them into the
back of plate ( D ). Only turn the screws a couple of times so you leave ¼”
space between the arm and the back plate.
Insérer les boulons (C) dans les trous du bras (E) et les visser dans le dos de la
plaque (D). Ne tournez les vis que sur deux tours, laissant un espace d'environ
6 mm entre le bras et la plaque arrière.
C
D
E
E
f ig. 2
/l'ill. 2
f ig. 3/l'ill. 3
SECURING THE ARMS • FIXATION DES BRAS
1
2
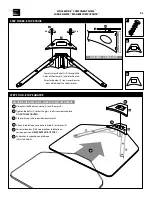
Slide the arm’s plate ( D ) into the corresponding slot of
the wall bracket (L) for Left and ( R ) for right as shown
on Fig. 3
Once in place, tighten the bolts ( C ) so that the arm
is secured into place.
1
2
Glissez la plaque (D) du bras dans la fente correspon-
dante du support mural (L) pour la gauche et (R)
pour la droite, comme indiqué sur l'ill. 3.
Une fois en position, serrez les
boulons (C) afin de bien fixer le
bras en place.
1
2
Use
a lev
el w
hen
mou
ntin
g wa
ll br
acke
t
Se u
n ni
veau
en m
onta
nt
des
pare
nthè
ses d
e m
ur
Use
a lev
el w
hen
mou
ntin
g wa
ll br
acke
t
Se u
n ni
veau
en m
onta
nt
des
pare
nthè
ses d
e m
ur
L
R
A
B
A
B
CONCRETE INSTALLATION
WOOD AND STUD WALL INSTALLATION
INSTALLATION CONCRÈTE
INSTALLATION DE MUR EN BOIS ET DE GOUJON
STEP ONE • ÉTAPE UNE
STEP TWO • ÉTAPE DEUX
MAX
25lbs
11kg
DO NOT RETURN TO STORE
Call 1-888-876-6786
Estimated assembly time: 15 minutes
Go to
www.cambreproducts.com
for video instructions on mounting
and assembly.
MODEL #SW1B-BB
SINGLE WIDE
COMPONENT SHELF
LARGE SIMPLE
ÉTAGÈRE COMPOSANTE
NE REVENEZ PAS AU MAGASI
Call 1-888-876-6786
Délai d'assemblage d'évaluation : 15 minutes
Allez à
www.cambreproducts.com
pour les instructions visuelles sur le
support et l'assemblée.
E


