background image

4

These instructions are for setting up your 640H network with a PC using

Windows 2000. 

If your network is connected to a Domain (Domain Name Controller - i.e.

when you are required to state a domain name when you log on to a

Windows PC) you need to turn to the "640H network advice" (4.) section

before continuing. 

Note: If you are using a wireless network, please consult the manual of

your wireless network adaptor for setting up an IP address for your PC

and skip to the "Testing your Network configuration" (3.4) section.

3.1 Setting up a Dynamic IP address

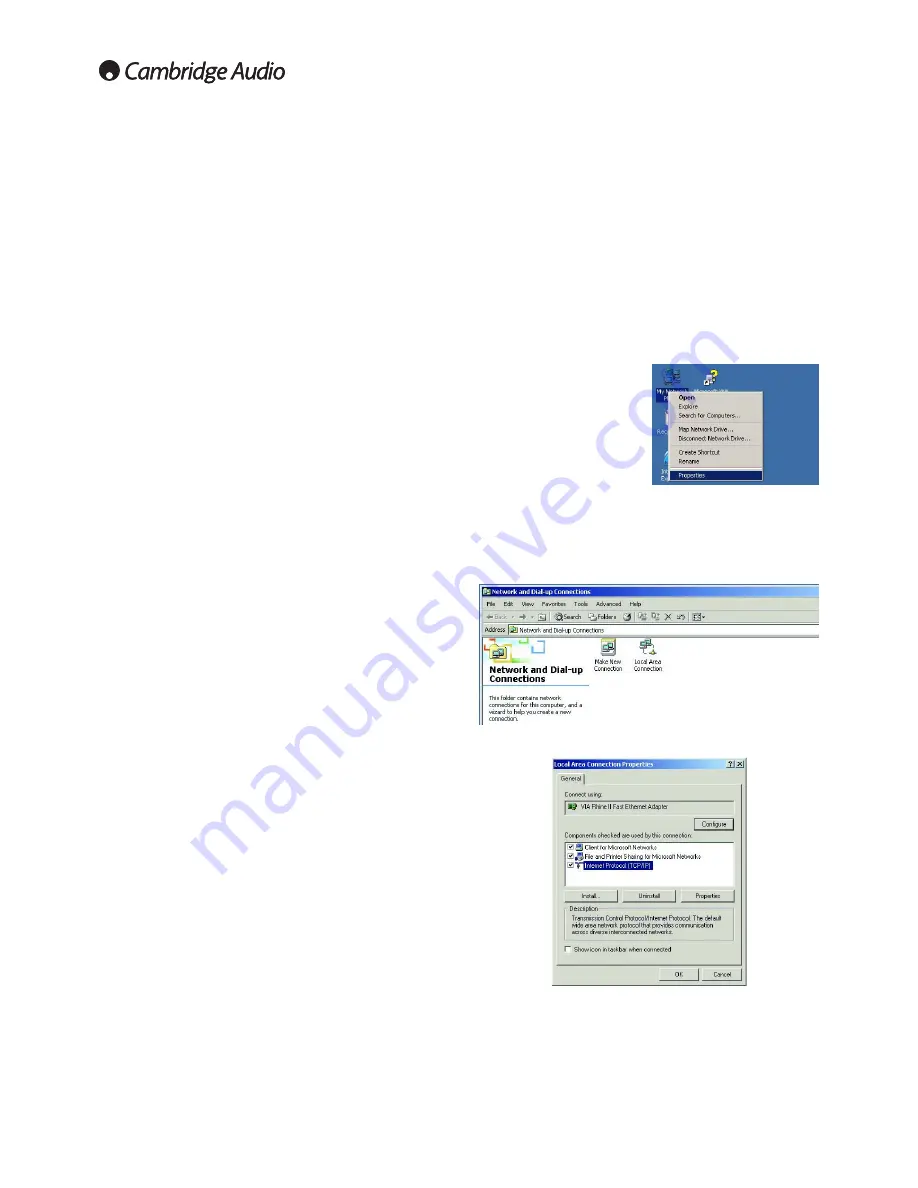
1. Right click on "My Network

Places" and select "Properties":

"My Network Places" can be

found in one of two locations -

the desktop of your PC or in

control panel. In the control

panel it is called "Network and

Dial-up Connections" and here

you need to double left click. 

2. Right click on the network connection corresponding to the Ethernet

port on your PC (the one that is connected to the 640H via the

Ethernet cat5e lead) and select "Properties". In most situations this

connection is called "Local Area Connection" however it may be called

"Local Area Connection 1", "Local Area Connection 2" etc depending

on your network setup:

3. In the window that appears, select "Internet Protocol (TCP/IP)" and

then click on the "Properties" button:

4. The following window that appears is split up into two sections; The IP

address setup and DNS setup. In the IP address setup there are two

options; "Obtain an IP address automatically" and "Use the following

IP address". The DNS set up should be as specified by your ISP.  

5. Select "Obtain an IP address automatically" and click "OK". Note: The

PC may take a while to update. Close the window. Click "OK" on the

next window and close all the other windows:

3. Setting up your PC - Windows 2000

Once your network connections have been made, for the connected
devices to communicate to each other you will need to specify the
unique "IP address" for the device (i.e. like a house number, and street
name so the house can be identified for posting letters). 

There are two types of IP address; DHCP (Dynamic Host Configuration
Protocol), which is more commonly known as dynamic addressing, and
static. Dynamic is used when you have a router, set-top box modem or a
PC/Mac with DHCP server enabled, as they can automatically give each
device an IP address upon physical connection. We encourage the use
of dynamic addressing as this is the default mode of the 640H, and
therefore no further setup would be required for the 640H.

Note: With a DHCP assigned IP address, it is possible that the 640H will
have a different IP address assigned to it, if left switched off over night.
This is normal and will not cause a problem.

We recommend using static IP addressing for peer-to-peer networking
only. The static address will not change unless you manually change it.
This is particularly useful for network troubleshooting.

2. Setting up IP addresses for network

devices

Summary of Contents for 640Hazur

Page 1: ...Music server Networking guide Windows 2000 Updated 10 06 640H azur...

Page 2: ...do I get the Guest account in Windows turned on 3 8 Enabling the Guest Account 9 How do I get my 640H to access the music folder on my PC 3 9 Adding Content to your 640H from your PC 10 How do I acce...

Page 3: ...Before setting up your network we encourage you to read through the entire section and then decide on the network layout that you wish to implement We advise this because different network layouts req...

Page 4: ...s setup and DNS setup In the IP address setup there are two options Obtain an IP address automatically and Use the following IP address The DNS set up should be as specified by your ISP 5 Select Obtai...

Page 5: ...ions Obtain an IP address automatically and Use the following IP address The DNS set up should be as specified by your ISP 5 Select the option Use the following IP address 6 This should then un grey t...

Page 6: ...e you are connecting to i e PC Mac or another 640H etc 8 After you have entered the correct information click Apply to store the settings This may take a few seconds to take effect The process is now...

Page 7: ...through the procedures listed above again If you see the third message then the network has been setup correctly Type exit in the command prompt and press the Enter key This will close the command pro...

Page 8: ...t set up your music folder to be shared you can test whether it has been shared by carrying out the following 1 Select Start and then select Run 2 In the run prompt type computer name music folder nam...

Page 9: ...ndows until you get back to the Control Panel window 9 To make sure the guest account has been activated double left click on the Administrative Tools icon 10 Double left click on the Computer Managem...

Page 10: ...e Setting up your PC to share music over a network section earlier 8 It is possible to add many locations to your 640H either from different network devices or from the same network device i e PC This...

Page 11: ...tart 2 Select Run 3 Type 640H Name media where 640H name is the Unit name you have assigned to the 640H located in Settings System System Info Unit name on the 640H 4 Press the Enter key 5 A new windo...

Page 12: ...t accordingly 12 4 640H network advice In each folder on your 640H there are two files cddb nfo and attributes txt These two files are not to be changed or deleted under any circumstances They are imp...

Page 13: ...via the Ethernet port but want the 640H to access the internet through the PC you need to carry out the following 1 On your PC open up Internet Explorer 2 Select Tools at the top of the window and se...

Page 14: ...information 5 1 Cat5 568A RJ 45 cable jack 5 2 Cat5 568B RJ 45 cable jack A straight thru one to one patch cable has identical ends 568A 568A A crossover cable has different ends 568A 568B 1 Green Wh...

Page 15: ...AP20855 1 Cambridge Audio Gallery Court Hankey Place London SE1 4BB England www cambridge audio com 2006 Cambridge Audio Ltd...

Reviews: