background image

10. Pressing 

during playback will take you back to the ‘Program Mode’

stage. Pressing 

again at this point deletes the program.

Note:

During programmed playback, it is possible to use the ‘Remain’
function only to show the time remaining on the track playing. You
can not view the time remaining on the disc.

Only the ‘Repeat All’ feature can be used during Program mode. You
are not able to repeat specific tracks in the program.

Using the set-up menu

The 350C allow the setting of some options related to Auto Play and Auto
Power Down.

1.

Press and hold 

Stop

for five seconds to open the set-up menu.

2.

Scroll through the menu (shown below) using the 

Skip/Scan

< >

buttons. 

3.

Play/Pause

selects a sub-menu. Scroll through sub-menu options

with the 

Skip/Scan

< > 

buttons. The default setting is indicated by

the symbol 

.

4.

Select an option by pressing 

Play/Pause

.

5.

Return to the sub-menu or exit the options menu by pressing the 

Stop

button.

Note:

It is not possible to access the set-up menu during disc playback.

The 

Stop

button on the remote control cannot be used to open the

set-up menu. Once you have accessed the menu, however, the
remote control can be used to scroll through and select sub-menu
options. 

Press 

Stop

for 5 seconds

Auto Play

Auto Power Down

Off

On

Off

5min

10min

15min

Auto Play Setting

If required the 350C can automatically play disks inserted into the drawer
without the 

Play

button having to be pressed. Auto Play is simply enabled

in the menu when desired. The default setting for Auto Play is ‘Off’.

Auto Power Down Setting

If desired the 350C can shut itself down if not used for a period of time.
Power down after an inactive period (no disk playback or any functions of
the player used) of 5, 10 or 15 minutes can be selected. The default
setting for Auto Power Down is ‘Off’ (i.e. disabled).

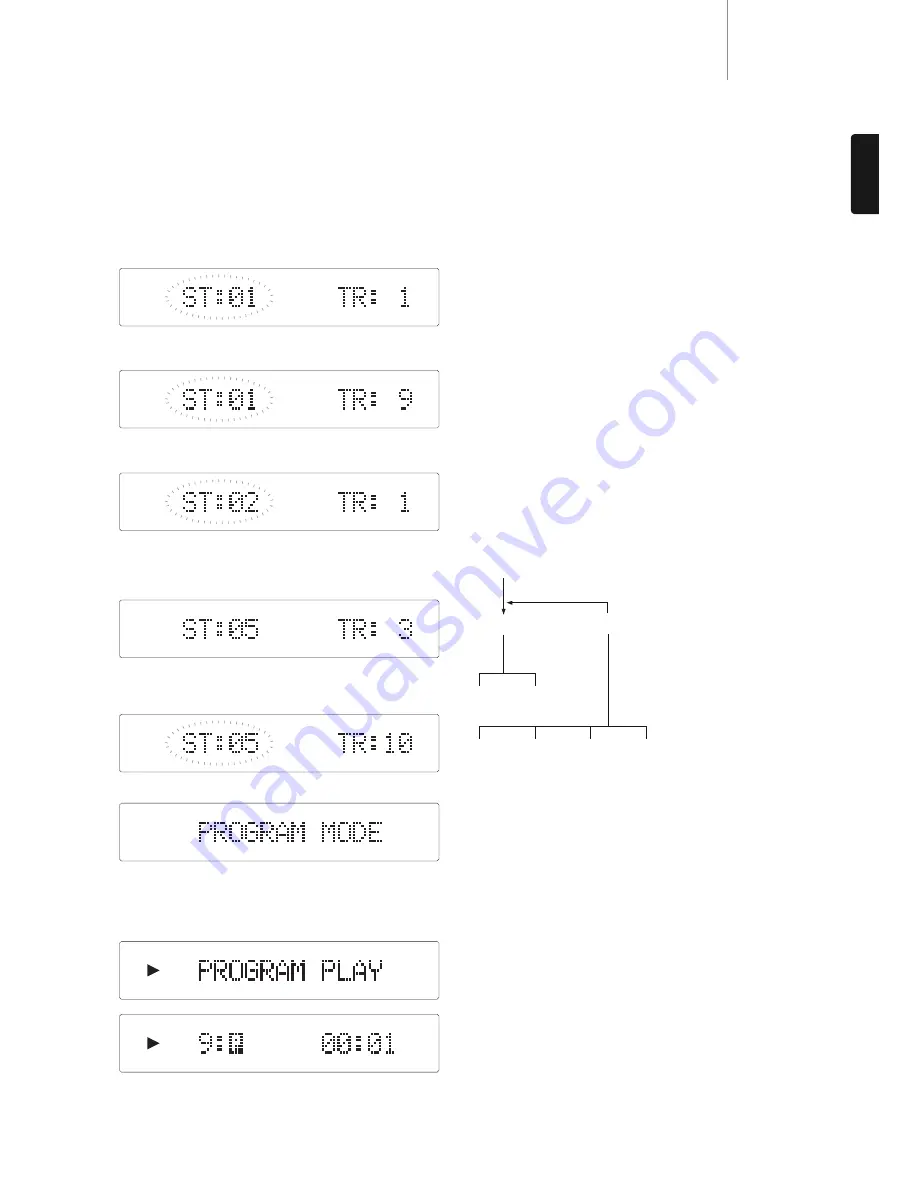
Programming disc play

It is possible to program the 350C to play back in any order only the tracks
you wish to listen to.

1.

Ensure that a disc is loaded. The display should show the TOC data.

2.

Press 

Program

on the remote control. The Program set-up will appear

in the display (as long as the display backlight is set to ‘Bright’ or
‘Dim’ modes). ‘ST:01’ will flash.

3.

Using the


,

0-9  or -/-- buttons, skip to or enter the track number

that you want to program as your first track.

4.

Press

. The desired track is now programmed. The program number

automatically increases by one for the next entry.

5.

Repeat steps three and four until all your desired tracks are entered.
A maximum of 30 tracks can be programmed.

6.

To go back and change a programmed track, press 


to locate the

desired program step. ‘ST:0-’ does not flash.

Press 


to choose the replacement track. ‘ST:0-’ flashes to

indicate a change of program. Press 

to select the new track and

continue.

7.

Press 

Program

or 

to exit.

Press 

Program

again to return to program editing. At this point you

can either press 

again to delete the program and return to TOC

display, or press 

to start playing your selection.

8.

When 

is pressed, ‘Program Play’ appears briefly on the display and

playback of the programmed tracks commences.

9.

You can use the skip and scan functions on your remote control to
move through your programmed selection in the same way as normal
playback.

9

350C

azur

ENGLISH

Summary of Contents for AZUR 350C - TECHNICAL

Page 1: ...Your music our passion 350C azur ENGLISH Compact disc player User s manual 2 ...

Page 2: ...s our new casework design with a thicker braced front panel more rigid wrap over lid assembly and dual layer damped feet all of which contribute to better control of resonance Another highlight is an eco friendly low power 1W standby circuit This circuit completely powers down the CD player circuits in Standby mode yet is itself totally isolated when the CD player is on thus having no effect on so...

Page 3: ...cover the ventilation grilles with items such as newspapers tablecloths curtains etc This unit must not be used near water or exposed to dripping or splashing water or other liquids No objects filled with liquid such as vases shall be placed on the unit The lightning flash with the arrowhead symbol within an equilateral triangle is intended to alert the user to the presence of un insulated dangerous...

Page 4: ... If your dealer is not equipped to perform the repair of your Cambridge Audio product it can be returned by your dealer to Cambridge Audio or an authorised Cambridge Audio service agent You will need to ship this product in either its original packaging or packaging affording an equal degree of protection Proof of purchase in the form of a bill of sale or receipted invoice which is evidence that t...

Page 5: ...wn DacMagic or a digital recording machine To obtain best results use a high quality 75ohm digital RCA interconnect cable not one designed for normal audio use TOSLINK Optical digital output Use to connect to the input of a separate DAC or digital recording machine Use a high quality TOSLINK fibre optic interconnect cable Note To obtain the best results from your system we recommend using only high...

Page 6: ...cted 1 2 3 4 5 6 1 2 3 4 5 6 Front panel controls Standby On Switches the unit between On and Standby mode The blue LED will remain bright when the unit is on becoming dim when the unit is in a special eco friendly standby mode The unit consumes less than one watt of power during standby The unit can remain in Standby mode when not in use It is advisable to switch the unit off at the mains if it i...

Page 7: ...track select Press the number of the desired track The track will then play automatically from the start of the track Track select To select a track number greater than nine press followed by the track number Playback of the chosen track starts automatically Play Stop Pause Press the relevant button to play stop or pause the CD Skip Right Skip Press to skip forward by one track on the CD Left Skip...

Page 8: ...resumed by pressing Play again Locating a specific track during playback 1 A single short press of the Skip Scan button will take you to the beginning of the next track on the CD Repeat as necessary 2 A single short press of the Skip Scan button will take you to the beginning of the previous track Locating a specific track when playback is stopped 1 A single short press of the Skip Scan button will ...

Page 9: ...s Off Auto Power Down Setting If desired the 350C can shut itself down if not used for a period of time Power down after an inactive period no disk playback or any functions of the player used of 5 10 or 15 minutes can be selected The default setting for Auto Power Down is Off i e disabled Programming disc play It is possible to program the 350C to play back in any order only the tracks you wish t...

Page 10: ...in the mains plug or adaptor The player will not read the disc Check the disc is not loaded upside down Check that the disc is not too scratched or dirty There is no sound Ensure that the amplifier is set correctly Check that the interconnects are inserted correctly The disc is skipping Check that the disc is not too scratched or dirty Ensure the player is on a firm surface and not subject to vibrat...

Page 11: ...11 350C azur ENGLISH ...

Page 12: ...e Audio is a brand of Audio Partnership Plc Registered Office Gallery Court Hankey Place London SE1 4BB United Kingdom Registered in England No 2953313 www cambridge audio com 2010 Cambridge Audio Ltd AP25840 3 ...

Reviews: