background image

Please take a moment to read these notes before installing your CD player,
they will enable you to get the best performance and prolong the life of the
product. We advise you follow all instructions, heed all warnings and keep the
instructions for future reference.

The unit is of Class 1 construction and must be connected to a Mains sock-
et outlet with a protective earthing connection.

Only use the specified attachments/accessories with this unit.

Do not defeat the safety purpose of the polarized or grounding-type plug. A
polarized plug has two blades with one wider than the other. A grounding type
plug has two blades and a third grounding prong. The wide blade or the third
prong are provided for your safety. If the provided plug does not fit into your
outlet, consult an electrician for replacement of the obsolete outlet.

The unit must be installed in a manner that makes disconnection of the
mains plug from the mains socket outlet (or appliance connector from the
rear of the unit) possible. Where the mains plug is used as the disconnect
device, the disconnect device shall remain readily operable. Protect the
power cord from being walked on or pinched particularly at plugs, conven-
ience receptacles, and the point where they exit from the unit.

This unit must be installed on a sturdy, level surface. Do not place
in a sealed area such as a bookcase or in a cabinet. Any space open
at the back (such as a dedicated equipment rack) is fine however.
When a cart is used, use caution when moving the cart to avoid
injury from tip-over.

The unit requires ventilation. Do not situate it on a rug or other soft surface
and do not obstruct any air inlets or outlet grilles.

Do not install near any heat sources such as radiators, heat registers, stoves,
or other apparatus (including amplifiers) that produce heat.

WARNING - To reduce the risk of fire or electric shock, do not expose this unit
to rain or moisture. This unit must not be used near or exposed to dripping or
splashing water or other liquids. No objects filled with liquid, such as vases,
shall be placed on the unit. In the event, switch off immediately, disconnect
from the mains supply and contact your dealer for advice.

Ensure that small objects do not fall through any ventilation grille. If this hap-
pens, switch off immediately, disconnect from the mains supply and contact
your dealer for advice.

To turn the unit off completely switch off on the rear panel. If you do not
intend to use this unit for a long period of time, unplug it from the mains sock-
et. Unplug this unit during lightning storms.

To clean the unit, wipe its case with a dry, lint-free cloth. Do not use any
cleaning fluids containing alcohol, ammonia or abrasives. Do not spray an
aerosol at or near your CD player.

This unit is not user serviceable, never attempt to repair, disassemble or
reconstruct the unit if there seems to be a problem. Servicing is required
when the unit has been damaged in any way, such as power-supply cord or
plug is damaged, liquid has been spilled or objects have fallen into it, the unit
has been exposed to rain or moisture, does not operate normally or has been
dropped. A serious electric shock could result if this precautionary measure
is ignored.

IMPORTANT SAFETY INSTRUCTIONS

Important  Note

This unit has been designed to play compact discs, record-
able CDs (CD-R) and re-writable CDs (CD-RW) bearing the
identification logo shown here. No other discs can be
used. The CD-R/CD-RW discs should contain properly
recorded TOC (Table of Contents) information so that they

can be played back. This unit can play only the discs recorded in the CD-DA
format designed for music reproduction. Do not attempt to play a disc on this
unit containing other data, such as a CD-ROM for PCs.

Summary of Contents for TOPAZ CD10

Page 1: ...CD5 Compact disc player User s manual ...

Page 2: ... power supplies for the D A converter circuitry audio filters clocks and other stages as well as extensive use of low impedance film capacitors The CD5 CD player also now features MP3 playback and allows naviga tion of MP3 folders on the disc directly from the remote control and front panel Your CD player can only be as good as the system it is connected to Please do not compromise on your amplifi...

Page 3: ...be fitted or if any other type of plug is used a 3amp or 5amp fuse must be fitted either in the plug or adaptor or on the distribution board Checking the Power Supply Rating For your own safety please read the following instructions carefully before attempting to connect this unit to the mains Check that the rear of your unit indicates the correct supply voltage If your mains supply voltage is dif...

Page 4: ...pparatus including amplifiers that produce heat WARNING To reduce the risk of fire or electric shock do not expose this unit to rain or moisture This unit must not be used near or exposed to dripping or splashing water or other liquids No objects filled with liquid such as vases shall be placed on the unit In the event switch off immediately disconnect from the mains supply and contact your dealer...

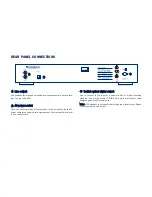
Page 5: ...ISQUE DE CHOC ELECTRIQUE NE PAS OUVRIR VORM ÖFFNEN DES GERÄTES NETZSTSCKER ZIEHEN Compact Disc Player www cambridge audio com Designed in London England Designed in London England OPTICAL OUT OPTICAL OUT Class 1 Laser Product Luokan 1 Laserplaite Klass 1 Laserapparat Manufactured in an ISO9002 approved facility REAR PANEL CONNECTIONS Toslink optical digital output Use to connect to the input of a ...

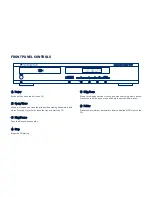
Page 6: ...disc and pauses play Stop Stops the CD playing 1 2 3 4 FRONT PANEL CONTROLS POWER POWER Compact Disc Player Compact Disc Player CD5 CD5 OPEN OPEN CLOSE CLOSE FOLDER FOLDER Skip Scan Allows for skipping between tracks and also searching within tracks Press once to skip a track press and hold to search within a track Folder Press to skip forward or backward to locate a desired MP3 folder on the CD 5...

Page 7: ... the CD Press and hold to scan backwards through tracks Folder Press to skip forward or backward to locate a desired MP3 folder on the CD Program Repeat Random Intro Refer to the Operating instructions section of this manual for more infor mation Numerical track select Press the number of the desired track The track will then be played from the start of the track To select a track number greater t...

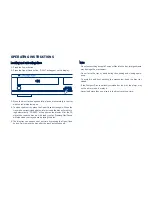
Page 8: ...ady to play Pressing Play Pause will also close the tray and start playing the disc 5 The disc tray can be opened at any time by pressing the Open Close button Only remove the disc after the tray has fully opened Note Do not put anything except a Compact Disc into the tray foreign objects may damage the mechanism Do not force the tray by hand during the opening and closing opera tions To avoid dir...

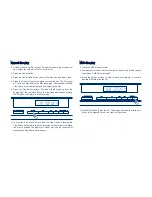
Page 9: ...the CD player will return to Standby mode 6 To stop the disc at any point press the Stop button Pressing the Play Pause button while the disc is playing will pause the disc When the disc is paused the display will flash play can be resumed by pressing the Play Pause button again MP3 disc play 1 Insert an MP3 disc as normal 2 The display will show the total number of tracks and folders respec tivel...

Page 10: ...e right Skip Scan button the CD will then fast for ward within the track 3 Release the button when the desired time has been reached Play will resume 4 Press and hold the left Skip Scan button the CD will then rewind within the track Using numerical keys You can use the numerical keys on your supplied remote handset to choose tracks 1 Ensure that a disc is loaded The player can be in standby mode ...

Page 11: ...n the remote control REPEAT ALL will appear on the display The whole disc will now be repeated until the function is turned off 4 Press Repeat again to turn off the Repeat function MP3 disc repeat playback Repeating MP3s 1 Ensure that the disc is playing 2 Press the Repeat button on the remote control three times REPEAT ALBUM will appear on the display All the tracks in the MP3 folder will now be ...

Page 12: ...end in the correct order 5 Press the Stop button at any time to stop the disc Using the Intro function 1 Ensure that a disc is loaded 2 Press Intro on the remote control INTRO will appear on the display If the disc is not playing the CD player will automatically play the first ten seconds of each track If a disc is being played when Intro is pressed the player will progress to the next track and p...

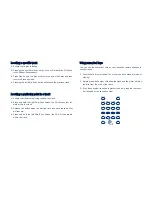
Page 13: ...mber on the remote 4 Press Program The desired track is now entered and the program number increases by one 5 Repeat steps three and four until all your desired tracks are entered 6 Press Play Pause The programmed tracks will play 7 You can use the Skip Scan functions on your remote control to move through your programmed selection in the same way as normal play back 8 Pressing Stop once will stop...

Page 14: ...cratched or dirty Ensure the player is on a firm surface and not subject to vibrations There is a hum coming from the speaker Ensure that all cable connections are secure The remote handset will not function Check that the batteries have not expired Ensure that nothing is blocking the remote sensor TROUBLESHOOTING TECHNICAL SPECIFICATIONS Voltage AC As specified on rear panel Consumption As specif...

Page 15: ...y anyone other than Cambridge Audio or a Cambridge Audio dealer or autho rised service agent which is authorised to do Cambridge Audio warranty work Any unauthorised repairs will void this Warranty This Warranty does not cover products sold AS IS or WITH ALL FAULTS REPAIRS OR REPLACEMENTS AS PROVIDED UNDER THIS WARRANTY ARE THE EXCLUSIVE REMEDY OF THE CONSUMER CAMBRIDGE AUDIO SHALL NOT BE LIABLE F...

Page 16: ...CD5 v3 0 Part No AP20206 3 www cambridge audio com ...

Reviews: