5- Pre-install site check
Considerations:
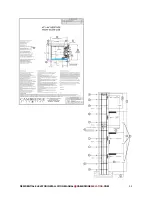
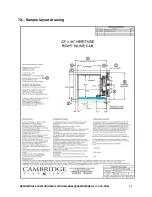
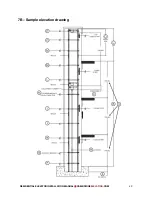
The procedure below references your final elevation drawings that were shipped with the
elevator. Please see the sample layout and
elevation diagrams 7a and 7b
for directions on
where on the final drawings you will find the required information.
NOTE: Often there are several versions of the elevation and layout drawings made
during the order process. The information on these preliminary drawings will likely be
incorrect. If you are unsure that you have the latest version, contact technical support
for assistance.
It is recommended that at least 4 weeks prior to the installation (
and
when you arrive to start
the installation) that the site is checked for the following (in order to verify that the shaft
dimensions and everything else shown on the final diagrams are correct).
If the travel cable hoistway cable and hydraulic hose are to be ran inside conduit or sleeves or
walls, note the following.
•
The travel cable is nearly 3 inches wide and will not pull through tight bends or multiple
bends very well
•
4 inch or larger conduit may be required for the travel cable depending on the number
and degree of bends.
•
Alternatively, we may be able to provide a round cable to get to the hoistway and then
transition to the flat travel cable but this will entail a higher cost.
•
The Cat5 cables will not take excess strain and hard handling. We suggest you pull
extra Cat5 cables.
Material required:
•
Final elevation and layout diagrams
Tools recommended:
•
Plumb bob with line
•
Measuring tape 25ft
•
Final layout and elevation diagrams
•
Flashlight
•
Pen and notepad
Procedure:
Using the final approved site diagrams (refer to
diagram 7A and 7B
for sample layout and
elevation diagram), confirm the following
•
The pit depth is correct,
sample elevation diagram 7B
note: A.
•
The total travel distance is correct,
sample elevation diagram
7B
note: B.
RESIDENTIAL ELEVATOR INSTALLATION MANUAL CAMBRIDGE
ELEVATING
.COM
32
Summary of Contents for BES 3
Page 1: ...BES 3 RESIDENTIAL ELEVATOR INSTALLATION MANUAL OCTOBER 2019...
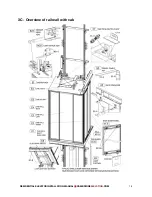
Page 18: ...3B Overview of rail wall RESIDENTIAL ELEVATOR INSTALLATION MANUAL CAMBRIDGEELEVATING COM 17...
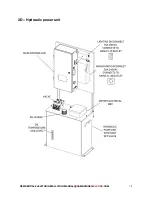
Page 20: ...3D Hydraulic power unit RESIDENTIAL ELEVATOR INSTALLATION MANUAL CAMBRIDGEELEVATING COM 19...
Page 35: ...RESIDENTIAL ELEVATOR INSTALLATION MANUAL CAMBRIDGEELEVATING COM 34...
Page 40: ...7A Sample layout drawing RESIDENTIAL ELEVATOR INSTALLATION MANUAL CAMBRIDGEELEVATING COM 39...
Page 41: ...7B Sample elevation drawing RESIDENTIAL ELEVATOR INSTALLATION MANUAL CAMBRIDGEELEVATING COM 40...
Page 43: ...RESIDENTIAL ELEVATOR INSTALLATION MANUAL CAMBRIDGEELEVATING COM 42...
Page 49: ...RESIDENTIAL ELEVATOR INSTALLATION MANUAL CAMBRIDGEELEVATING COM 48...
Page 57: ...RESIDENTIAL ELEVATOR INSTALLATION MANUAL CAMBRIDGEELEVATING COM 56...
Page 58: ...13A Jack post detail RESIDENTIAL ELEVATOR INSTALLATION MANUAL CAMBRIDGEELEVATING COM 57...
Page 61: ...14A Cylinder detail RESIDENTIAL ELEVATOR INSTALLATION MANUAL CAMBRIDGEELEVATING COM 60...
Page 65: ...16A Sling RESIDENTIAL ELEVATOR INSTALLATION MANUAL CAMBRIDGEELEVATING COM 64...
Page 70: ...RESIDENTIAL ELEVATOR INSTALLATION MANUAL CAMBRIDGEELEVATING COM 69...
Page 74: ...20A Sheave detail RESIDENTIAL ELEVATOR INSTALLATION MANUAL CAMBRIDGEELEVATING COM 73...
Page 76: ...21A Sling roping detail RESIDENTIAL ELEVATOR INSTALLATION MANUAL CAMBRIDGEELEVATING COM 75...
Page 84: ...24A Pre stroke detail RESIDENTIAL ELEVATOR INSTALLATION MANUAL CAMBRIDGEELEVATING COM 83...
Page 87: ...26A Jack post roping detail RESIDENTIAL ELEVATOR INSTALLATION MANUAL CAMBRIDGEELEVATING COM 86...
Page 89: ...27A Sling extensions detail RESIDENTIAL ELEVATOR INSTALLATION MANUAL CAMBRIDGEELEVATING COM 88...
Page 91: ...28A Sling roller detail RESIDENTIAL ELEVATOR INSTALLATION MANUAL CAMBRIDGEELEVATING COM 90...
Page 93: ...29A Cab floor RESIDENTIAL ELEVATOR INSTALLATION MANUAL CAMBRIDGEELEVATING COM 92...
Page 105: ...34A Cab inline RESIDENTIAL ELEVATOR INSTALLATION MANUAL CAMBRIDGEELEVATING COM 104...
Page 106: ...34B Cab through RESIDENTIAL ELEVATOR INSTALLATION MANUAL CAMBRIDGEELEVATING COM 105...
Page 107: ...34C Cab 90 degree RESIDENTIAL ELEVATOR INSTALLATION MANUAL CAMBRIDGEELEVATING COM 106...
Page 112: ...36A Hoistway wiring detail RESIDENTIAL ELEVATOR INSTALLATION MANUAL CAMBRIDGEELEVATING COM 111...
Page 115: ...37A Cartop electrical RESIDENTIAL ELEVATOR INSTALLATION MANUAL CAMBRIDGEELEVATING COM 114...
Page 121: ...39A Sensor head RESIDENTIAL ELEVATOR INSTALLATION MANUAL CAMBRIDGEELEVATING COM 120...
Page 122: ...39B Coded strips RESIDENTIAL ELEVATOR INSTALLATION MANUAL CAMBRIDGEELEVATING COM 121...
Page 127: ...40A TRAVEL CABLE RESIDENTIAL ELEVATOR INSTALLATION MANUAL CAMBRIDGEELEVATING COM 126...
Page 129: ...41A Control panel diagram RESIDENTIAL ELEVATOR INSTALLATION MANUAL CAMBRIDGEELEVATING COM 128...
Page 163: ...RESIDENTIAL ELEVATOR INSTALLATION MANUAL CAMBRIDGEELEVATING COM 162...
Page 164: ...RESIDENTIAL ELEVATOR INSTALLATION MANUAL CAMBRIDGEELEVATING COM 163...
Page 165: ...RESIDENTIAL ELEVATOR INSTALLATION MANUAL CAMBRIDGEELEVATING COM 164...
Page 166: ...RESIDENTIAL ELEVATOR INSTALLATION MANUAL CAMBRIDGEELEVATING COM 165...
Page 167: ...RESIDENTIAL ELEVATOR INSTALLATION MANUAL CAMBRIDGEELEVATING COM 166...
Page 171: ...RESIDENTIAL ELEVATOR INSTALLATION MANUAL CAMBRIDGEELEVATING COM 170...
Page 172: ...RESIDENTIAL ELEVATOR INSTALLATION MANUAL CAMBRIDGEELEVATING COM 171...
Page 173: ...RESIDENTIAL ELEVATOR INSTALLATION MANUAL CAMBRIDGEELEVATING COM 172...
Page 174: ...RESIDENTIAL ELEVATOR INSTALLATION MANUAL CAMBRIDGEELEVATING COM 173...
Page 175: ...RESIDENTIAL ELEVATOR INSTALLATION MANUAL CAMBRIDGEELEVATING COM 174...
Page 187: ...49A Handrail RESIDENTIAL ELEVATOR INSTALLATION MANUAL CAMBRIDGEELEVATING COM 186...
Page 205: ...57A Telephone line detail RESIDENTIAL ELEVATOR INSTALLATION MANUAL CAMBRIDGEELEVATING COM 204...

