12
12
12
interface cable.
Power Connections
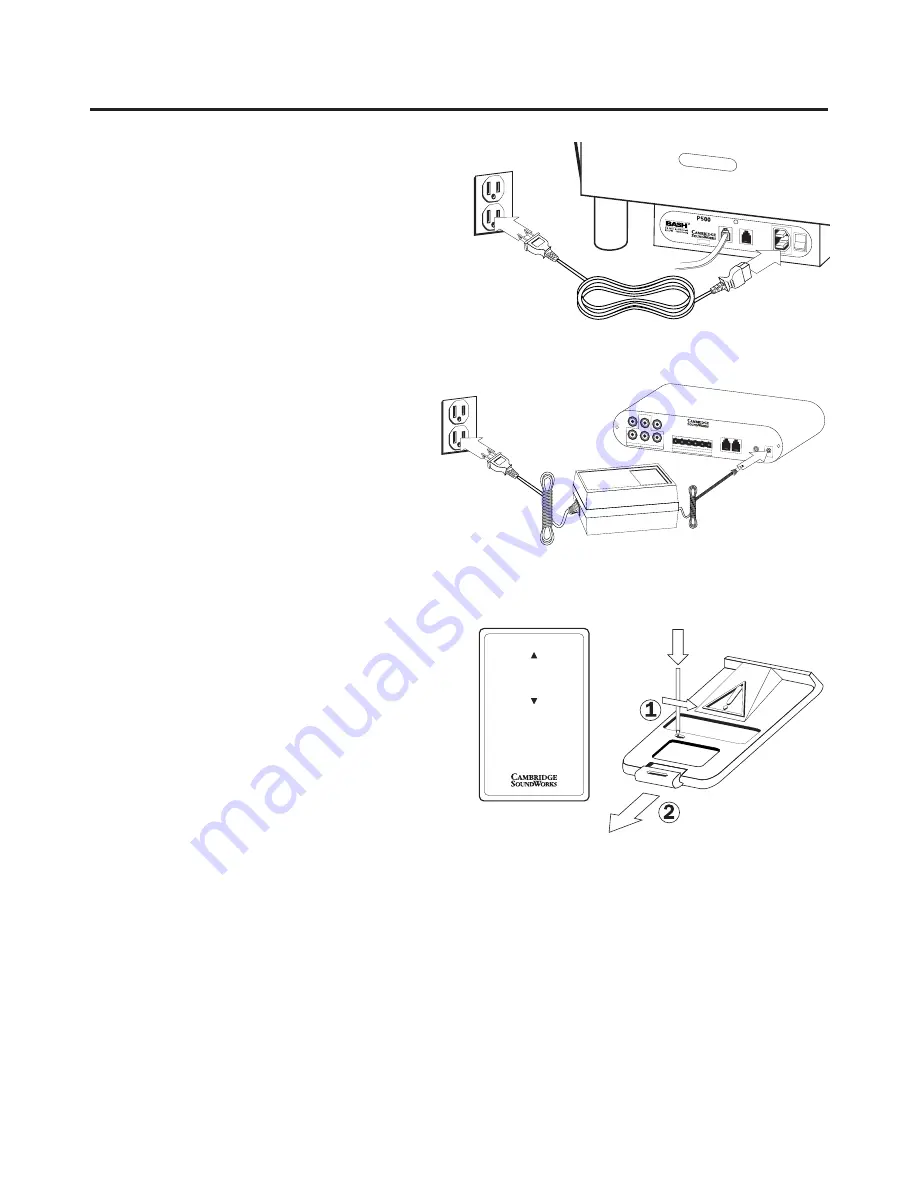
First, insert the AC plug of the Control Module’s power
supply adapter into an AC outlet. Then insert the
adapter’s output plug into the Control Module’s
12V AC input jack. Turn the Control Module’s power
switch to
AUTO
.
Insert the subwoofer enclosure’s power cable into the
receptacle on the subwoofer enclosure’s input panel.
Then insert the AC plug into an AC outlet. Turn the
subwoofer enclosure’s power switch
ON
.
Remote Control
The remote control adjusts the
VOLUME
setting, an
adjustment best made from your listening position.
The battery inside the remote should last for a year or
two. When you need to replace it, use a small pointed
object (paper clip, pen, toothpick) to release the bat-
tery holder (see diagram). The battery type is CR2032
(3V) and is available wherever wrist watch and hearing
aid batteries are sold.
Test Your Connections
Once all connections have been made, test your
sound system to verify the subwoofer produces bass
output. Advance the Bass Level control to the
10 o’clock position. Turn on your receiver and play a
CD or movie you know to have significant bass. Listen
for subwoofer output as you increase your receiver’s
volume control up to a moderate volume level. If you
don’t hear any output from the subwoofer, slowly
advance the subwoofer’s Bass Level (preferably via
the remote control). If you don’t get any output,
FINAL SETUP
00000000
Powered
Subwoofer
POWER
INTERFACE J
ACKS
120VAC
7.0A
RIGHT IN
LEFT IN
CENTER IN
PREAMP LEVEL INPUTS
RIGHT
HIGH PASS
OUT
SUB IN
LEFT
HIGH PASS
OUT
+
–
+
–
+
–
RIGHT
CENTER
LEFT
SPEAKER LEVEL INPUTS
1
2
INTERFACE JACKS
ON
AUTO
OFF
12V
AC INPUT
Newton, Massachusetts USA
Made in China
CONTROL MODULE
NO USER SER
VICEABLE P
ARTS INSIDE
REFER SER
VICING TO QUALIFIED PERSONNEL
VOLUME UP
VOLUME DOWN
SUBWOOFER VOLUME


