Page 4 of 8
CX-ED1259L ‘RIM’ Electric Strike
INSTALLATION INSTRUCTIONS
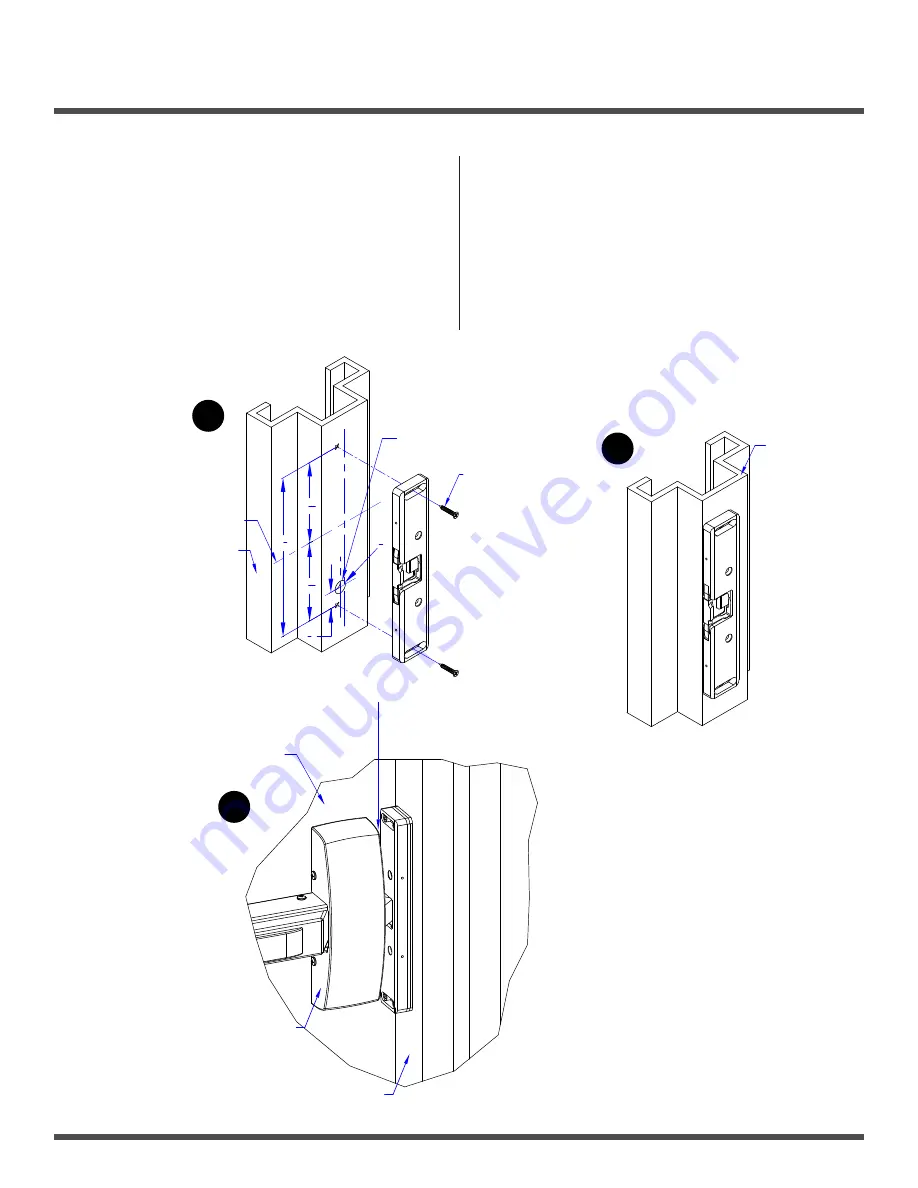
Step 2: Aligning the Strike
1. Using center line, measure 4 3/16” top and bottom, and
drill Ø 5/8” hole for connecting wires, as per template.
2. Fix strike body with Ø 3/16” self-tapping screws.
3. Close door (Ensure crash bar latch does not touch keeper
while closing the door). If necessary, adjust strike so that
strike and crash bar latch are well aligned.
Note: the keeper jaws are fitted with a silicone shim. The
crash bar should only touch this shim, not apply pressure
when the door is closed.
4. While adjusting strike, allow a small gap between strike
body and crash bar (approx. 1/8”) Mark remaining screws
position.
5. Open door and remove strike. Drill threads at screws
positions.
7. Connect wires as per drawing.
8. Fix strike with remaining screws (1/4-20 x 1 ½” (4pcs) at
both ends / 10-32 x 1(2pcs) in the middle)
9. Remove keeper shim.
8
3
8
''
4
3
16
''
4
3
16
''
7
8
''
Ø58
''
Horizontal
Centerline
Self-tapping
screws x 2pcs
Jamb
Jamb
Connecting
Wire hole
Closed Door
Door Jamb
Crash Bar
Ensure latch does not touch
strike keeper while closing
door, and while adjusting strike.
1
2
3


