Page 4 of 13
WC16PS SERIES RESTROOM CONTROL
INSTALLATION INSTRUCTIONS
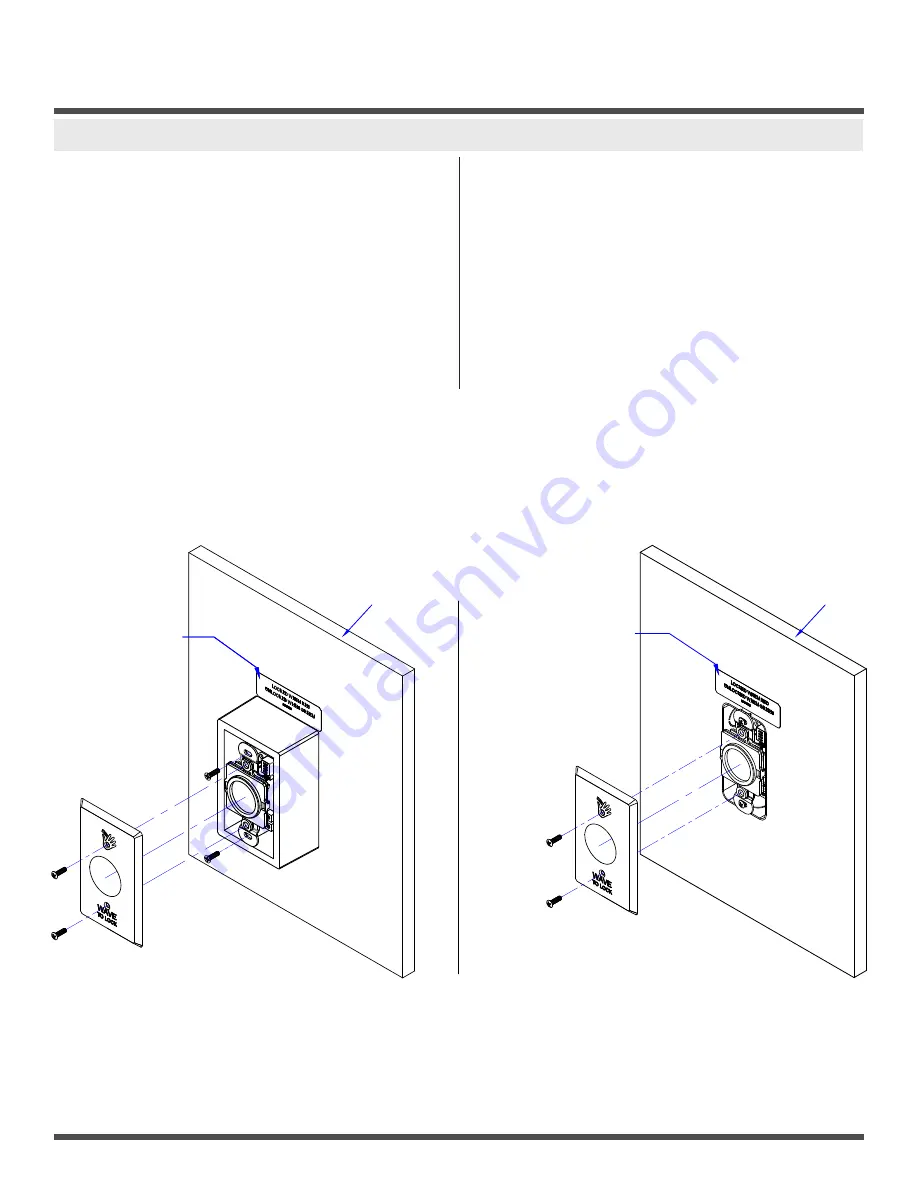
SINGLE GANG ELECTRICAL BOX MOUNT - CM-331/43S-SGLR
1. a) If using an in-wall box ensure the box is plumb and
square, and flush with the wall surface. (See Diagram 1)
b) If using a surface box, ensure it is secure & plumb.
2. Bring your 4 or 6-conductor wire through the back or side
of the enclosure and leave approximately 6” tail for
wiring connection.
3. Make the electrical connections to the device according to
the wiring section.
4. Using the dip switch located on the end of the unit, set the
operating mode.
5. Attach the unit to the enclosure using the two #6-32
screws provided.
6. Apply power and adjust range and time delay via the
potentiometers on the front of the unit.
7. Attach the faceplate to the unit using the two black
#6-32 x 1/2’’ machine screws or tamperproof screws.
NOTE: Do not overtighten!
8. Apply the label as required.
Wall
Wall
CM-331/42S-SGLR Label
CM-331/42SW-SGLR Label
CM-331/42S-SGLR Label
CM-331/43S-SGLR Surface Mount
CM-331/43S-SGLR Flush Mount


