3
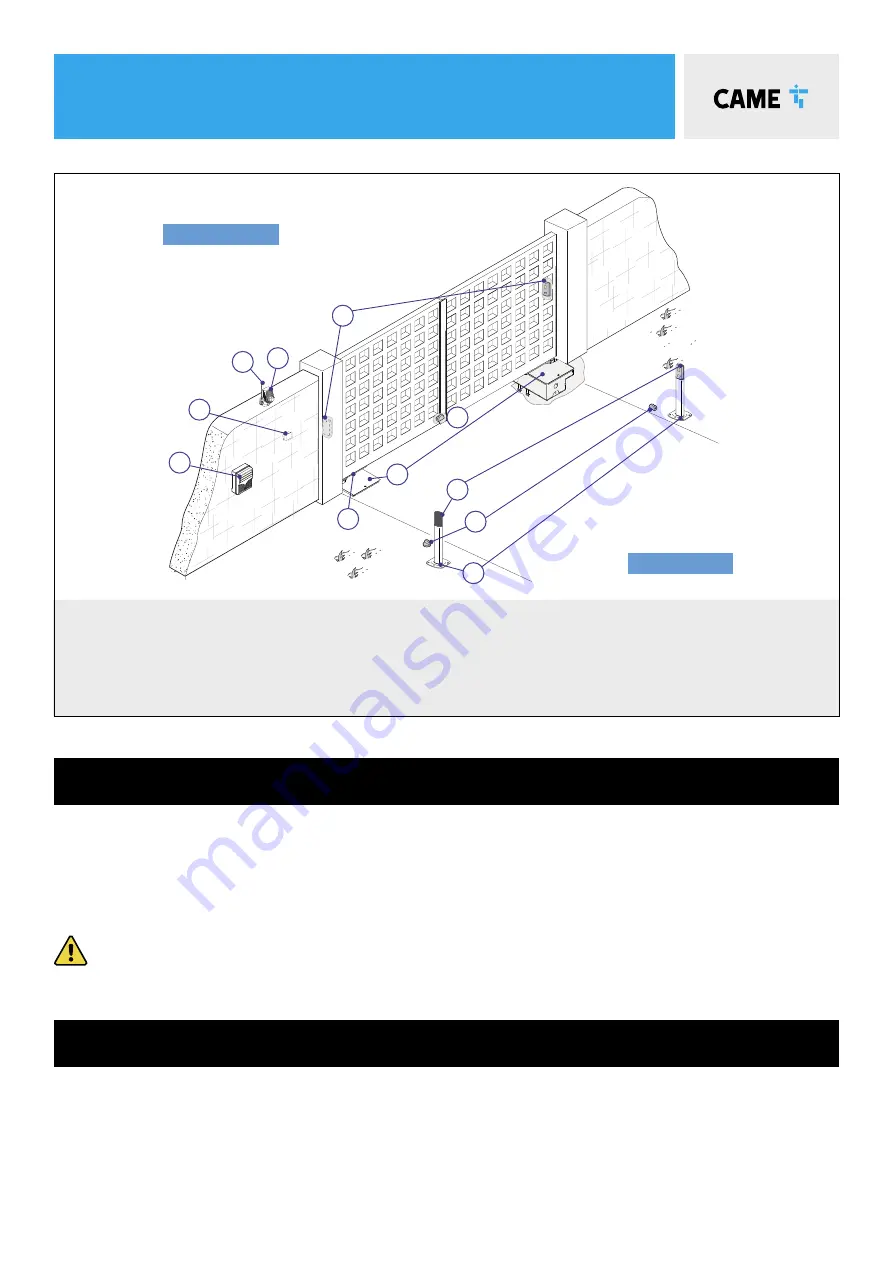
TYPICAL GATE SETUP
1
7
8
8
9
2
5
3
4
6
10
OUTSIDE OF GATES
INSIDE OF GATES
1
FROG Motor with
Foundation Box
4
Flashing Light (optional)
8
Mechanical End Stop (not supplied)
5
Selector Keypad (optional)
9
Photocell column (optional accessory)
2
Control Panel
6
Photocells (on outside of gate posts)
10
Latch
3
Reception Antenna
7
2nd set of Photocells (optional)
CONTROL PANEL
PHOTOCELLS
• The control panel should be mounted in an accessible position and not directly behind the gates, to avoid a
potential crushing hazard.
• Use cable glands to connect the devices to the control panel. One of these must be used exclusively for the
power supply cable.
• All holes should be sealed to avoid ingression and maintain the IP54 protection rating.
Only a competent service provider should open the enclosure
and adjust the settings.
• The photocells are used in pairs, one transmitter and one receiver.
• They should be installed between 500-600mm from the ground, facing each other.
• Power for the photocells is taken from the control panel 24v AC.
• The maximum range of the photocell should always be observed.
When the photocell beam is broken, the control panel can be programmed on how to react.
Please see ‘Safety’ section for more information.
Summary of Contents for 8K01MI-0523
Page 30: ...notes ...
Page 31: ...notes ...


