26
DMX
IT
ALIANO
POLSKI
ESP
AÑOL
FRANCAIS
DEUTSCH
ENGLISH
INSTALLATION
HAZARD:
Overhead mounting requires extensive experience, including the calculation of
the load limit values of the installation material and regular safety inspection of all
installation materials and spotlights. If you do not have these qualifications, do not
attempt to carry out an installation yourself. Refer instead to a qualified professional.
There is a risk of incorrectly mounted and secured devices coming loose and falling
down. This can cause serious injury or death.
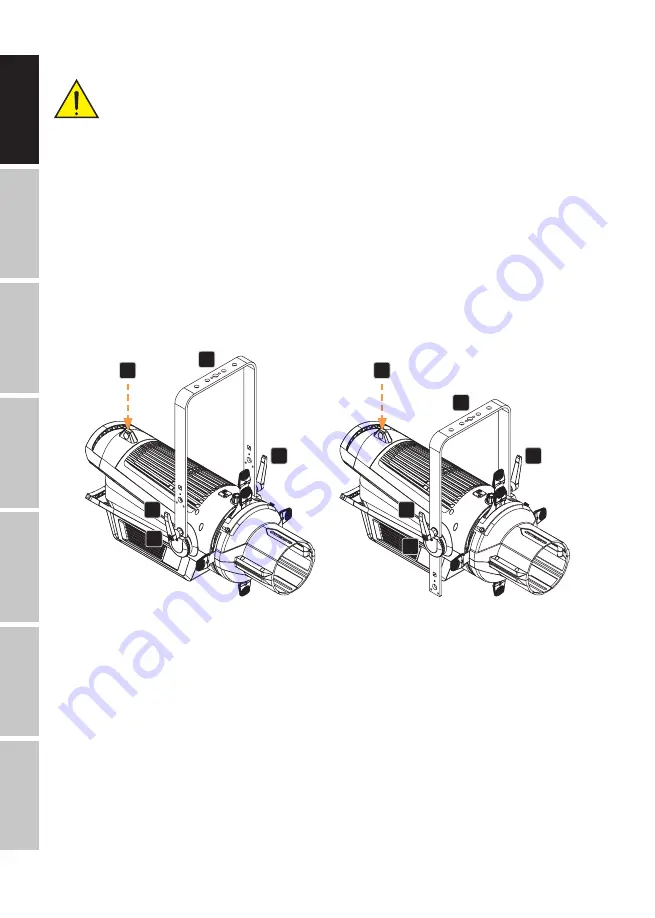
The mounting bracket can be attached to the spotlight in two positions (An and B). When changing
the position, make sure that the mounting bracket is reattached securely to the spotlight in the
same way.
Installation on a truss is possible with a suitable truss clamp, which is attached to the mounting
bracket (C). Suitable truss clamps are optionally available. Loosen the two clamp levers on the
sides of the spotlight (D) to adjust the beam direction in the vertical plane and tighten the two
clamp levers again after adjustment.
The securing lug for securing the spotlight is located on the top of the housing (E).
E
E
B
A
D
D
D
D
C
C
INSTALL FIXED BEAM ANGLE LENSE TUBE
PLEASE NOTE:
1. Do not operate the spotlight during the installation or removal of a lens tube.
2. Be careful not to damage or contaminate the lens when installing or removing a lens tube.
Ensure that no foreign bodies enter the spotlight housing.
3. Do not operate the spotlight without the lens tube.
To mount a fixed beam angle lens tube, slide the lens tube with the spring-loaded filter frame
hinge upwards into the tube with the adjustable shutter unit (A). Now insert the two supplied
knurled screws (B) into the corresponding threads in the lens tube and tighten them. To focus the


