


6
DEUTSCH
FRANCAIS
ESP
AÑOL
IT
ALIANO
POLSKI
ESP
AÑOL
FRANCAIS
ENGLISH
IT
ALIANO
POLSKI
DEUTSCH
ENGLISH
7
DMX
DMX
OPERATION
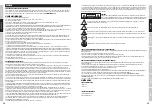
Switch off the LED fog machine and disconnect it from the power supply before filling the container! Fill the container of the LED fog
machine only with Cameo fog fluid (preferably Cameo Fast Fluid) and close it carefully. The fog machine is ready for operation a few minutes
after switching on (approx. 5 minutes). It features a canister light (LED) and a 4-digit LED display to provide information on the operating
status. Display elements canister light and display are activated in the factory settings.
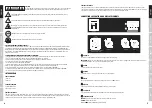
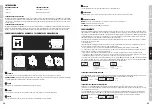
1. During warm-up phase of the evaporator, the canister is permanently lit up in red, the display shows "uP" and the device is not ready for
operation.
2. Whilst ready for operation, the canister is constantly lit blue, and depending upon settings, the display will show either "rEAd" (control via
cable remote control), or the currently configured DMX start address (control via DMX controller).
3. If the fog fluid in the container is all used up, the canister light will start to flash red after approximately 2 minutes, two minus symbols
will be shown in the display and the LED fog machine will switch to error mode. Switch off the unit and disconnect it from the mains. Fill the
container with fog fluid and switch the unit back on. Follow the same procedure if you notice that the fluid has all been used before the fog
machine switches to error mode.
If there is a DMX signal to the device, the DMX mode is activated automatically and the currently configured DMX start address will appear
in the display. The cable remote control is disabled in this case. If there is no DMX signal, the LED fog machine can be controlled with the
supplied cable remote control.
The evaporator is heated up.
LED fog machine ready (ready).
Control via cable remote control.
LED fog machine ready,
DMX signal is present.
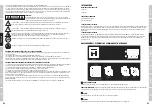
CONFIGURE DMX START ADDRESS
Press the MODE button repeatedly until "Addr" appears in the display. Now press ENTER and configure the DMX start address using the UP
and DOWN buttons as required (001 - 509). Confirm your entry with ENTER.
-> ENTER ->
UP/DOWN
-
-> ENTER
<- MODE
ADJUSTMENT OF DISPLAY ELEMENTS
In some cases, canister lighting and LED display can have a disturbing effect and can therefore be switched off (the empty canister warning
is excluded and will be activated in the event of an error).
Press the MODE button repeatedly until the display shows "dArk", press ENTER and select the desired setting using the UP and DOWN buttons
(on = container lighting switched off, display switched off after approx. 15 seconds / oFF = container lighting and display permanently active).
Confirm your entry with ENTER.
-> ENTER ->
UP/DOWN
/
-> ENTER
<- MODE
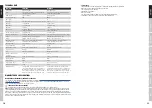
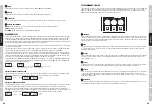
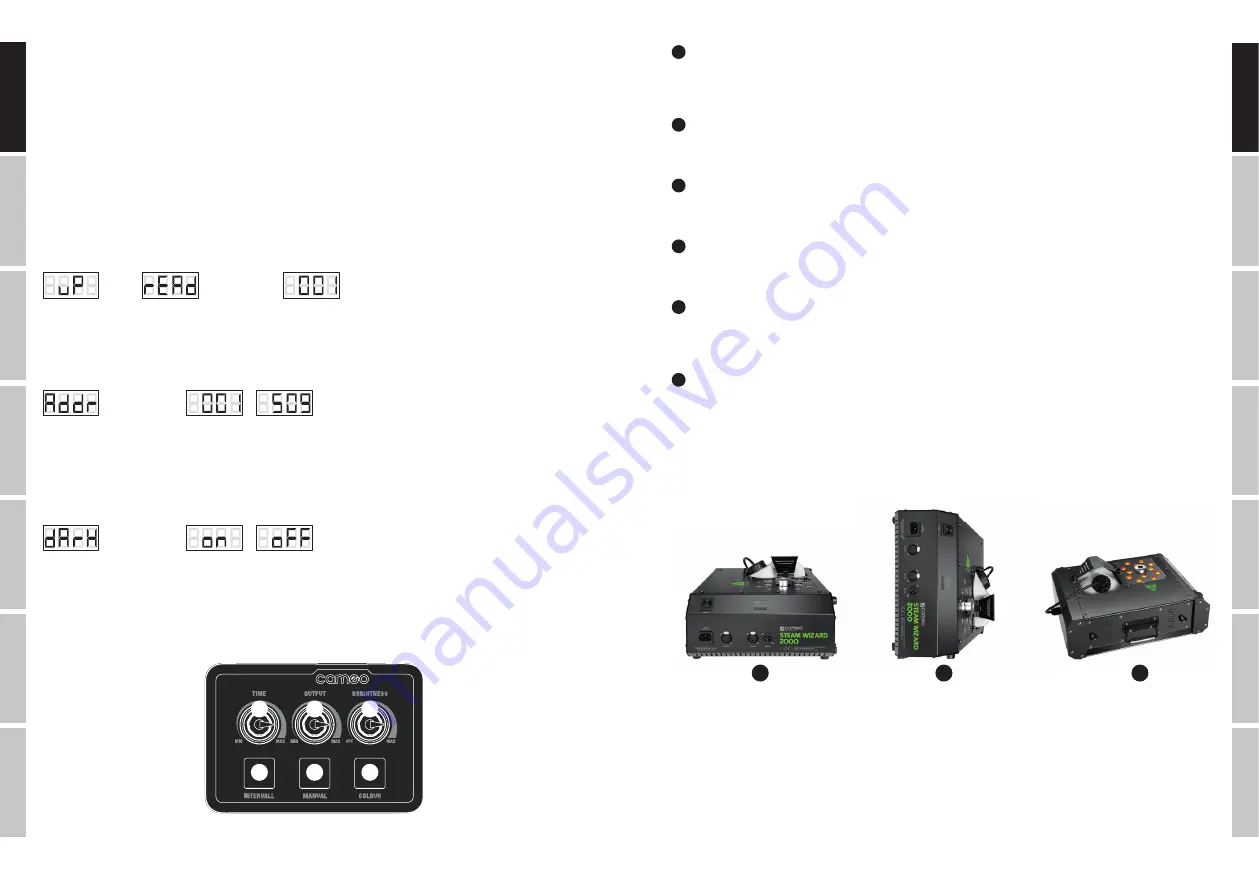
CABLE REMOTE CONTROL
2
4
6
1
3
5
1
INTERVAL
Interval function for fog output and simultaneous illumination of LEDs. Press the button to start the interval function and again to quit. The
fog burst and LED illumination period is approximately 2 seconds. Configure the time interval between bursts with the TIME dial. If the
interval function is activated, the indicator LED on the button is lit. During fog bursts, “FoG” appears on the display.
2
TIME
Knob for adjustment of time between bursts of the interval function (all the way to the left = continuous bursts / 0 second interval, all the way to
the right = approx. 60 seconds interval). An integrated LED indicator lights up as soon as the heating-up phase of the evaporator is complete.
3
MANUAL
Button for manual triggering of the combined effect. Fog burst and LED illumination continues for as long as the button is pressed. When the
button is pressed the indicator LED in the button is lit. During fog bursts, “FoG” appears on the display.
4
OUTPUT
Knob to adjust the fog burst density quantity (all the way to the left = fog output disabled / 0%, all the way to the right = maximum fog
density / 100%). An integrated LED indicator lights up as soon as the heating-up phase of the evaporator is complete.
5
COLOUR
Button to adjust the LED light colour. Press and hold the button for approximately 1 second until the LEDs are turned on, then press briefly
and repeatedly to select the desired colour (14 colour presets and automatic colour change). The LEDs are lit for approx. 5 seconds, as is
the LED indicator in the button.
6
BRIGHTNESS
Knob to adjust brightness effect (all the way to the left = blackout / 0%, all the way to the right = maximum brightness / 100%). An integrated
LED indicator lights up as soon as the heating-up phase of the evaporator is complete.
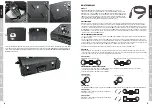
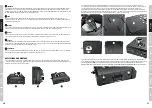
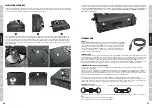
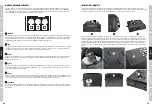
INSTALLATION
For installation on a level surface, the LED fog machine features four rubber feet on the base (Fig. A, vertical fog output) and on one side
(Fig B, horizontal fog output). For convenient transportation, a folding handle is located on the side of the housing (Fig. C).
A
B
C
The LED fog machine features a top or bottom-loading canister tray to allow it to be installed at any desired angle on a traverse. Load the
canister tray from the bottom if the LED fog machine is installed at an angle greater than 90°. For this purpose, dismount the retaining
clamp (Fig. D), remove the canister and take out the canister base from the bottom of the casing using a suitable tool (Fig. E, 4 screws,
screwdriver PH2). Now install the canister shelves on the top of the housing in the designated position (Fig. F), place the canister in the
canister tray and secure it with the retaining clamp (Fig. G). Make sure the canister is firmly in place.
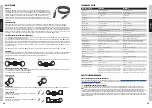
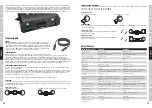
The cable remote control is designed to allow several Cameo Steam Wizard LED fog machines to be controlled simultaneously. For this
purpose, daisy-chain Steam Wizard LED fog machines (SW1000 and/or SW2000) using DMX cables (DMX OUT -> DMX IN) and connect
the cable remote control to the first LED fog machine in the chain. Set the DMX start address to 001 on all „slave“ LED fog machines in
the chain.


