User
Guide
Page 126
Event Action
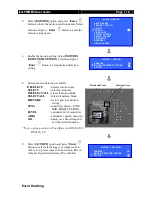
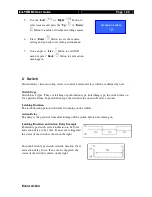
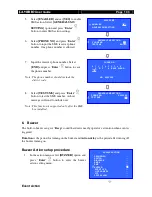
Switch Action Setup Procedure
1.
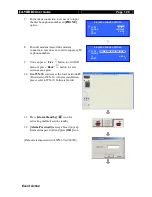
In the action menu, select
[SWITCH]
option and
press “
Enter
”
button to enter the switch
action setting menu.
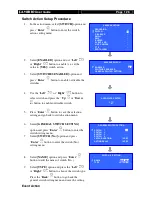
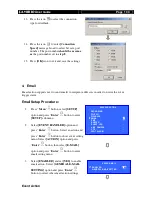
2.
Select
[ENABLED]
option
and use “
Left
”
or
“
Right
”
button to enable (i.e. set the
value to
[YES]
) switch action.
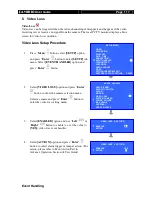
3.
Select
[SWITCHES ENABLED]
option
and
press “
Enter
”
button to enable or disable the
switches.
4.
Use the “
Left
”
or
“
Right
”
button to
select switch and press the “
Up
”
or
“
Down
”
button to enable or disable switch.
5.
Press “
Enter
”
button to save the selection
setting and go back to switch action menu.
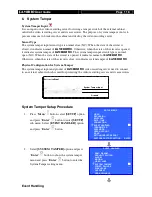
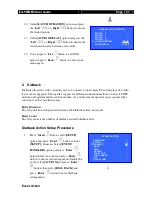
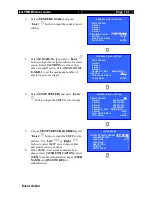
6.
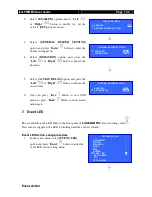
Select
[GENERAL SWITCH SETTING]
option
and press “
Enter
”
button to enter the
switch setting menu.
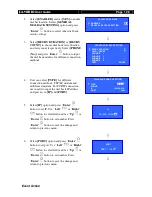
7.
Select
[SWITCH (No.)]
option and press
“
Enter
”
button to enter the switch (No.)
setting menu.
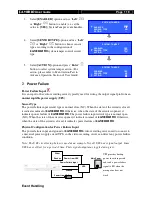
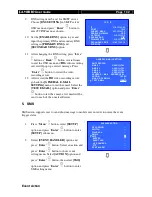
8.
Select
[NAME]
option and press “
Enter
”
button to edit the name of switch (No.).
9.
Select
[TYPE]
option and press the “
Left
”
or
“
Right
”
button to choose the switch type.
Press the “
Back
” button to go back the
general switch setting menu and save the setting.
XXXXXXX SWITCH
ENABLED
YES
SWITCHES ENABLED
- - - -
GENERAL SWITCH SETTING
. . .
ASSOCIATE SWITCH
1 -
3
-
GENERAL SWITCH SETTING
SWITCH 1
. . .
SWITCH 2
. . .
SWITCH 3
. . .
SWITCH 4
. . .
LATCH DURATION
10 SEC
ACTION DELAY
10 SEC
SWITCH X SETTING
NAME
SWITCH X
TYPE
LATCHING
XXXXXXX ACTION
RECORDING
…
SWITCH
…
DIALBACK
…
…
SMS
…
BUZZER
…
EVENT LED
…
LIVE CAMERA
…
PTZ
…
SPOT ALARM
…

