User
Guide
Page 34
Basic Installation for Local and Remote Monitoring
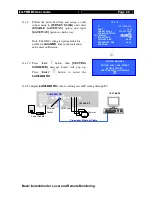
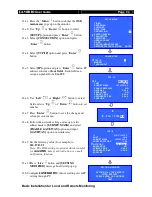
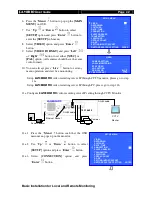
11.a.1
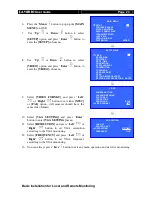
Press the “
Menu
”
button such that the
OSD
main menu
pops up on the monitor.
11.a.2
Use “
Up
” or “
Down
”
button to select
[SETUP]
option and press “
Enter
”
button.
11.a.3
Select
[CONNECTION]
option and press
“
Enter
”
button
11.a.4
Select
[TCP/IP]
option and press “
Enter
”
button
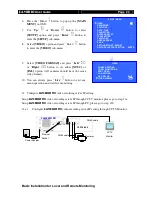
11.a.5
Select
[IP]
option and press “
Enter
”
button. IP
address consists of
four fields
. Each field can
assign a number from
0 to 255
.
11.a.6
Use “
Left
”
or “
Right
”
button to select
field and use “
Up
” or “
Down
”
button to set
number.
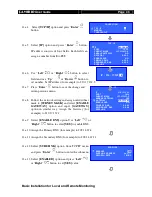
11.a.7
Press “
Enter
”
button to save the change and
return previous menu.
11.a.8
Follow the network setting and assign valid
subnet mask to
[SUBNET MASK]
and select
[ENABLE GATEWAY]
option and input
[GATEWAY]
option in similar way.
11.a.9
Set the Gateway value (for example) to
210.17.139.1
Note: The DNS setting is optional which is useful
for
sure
LINK
, time synchronization or e-mail
notification function.
11.a.10Press “
Live
”
button and
[SETTING
MODIFIED]
message board will pop up.
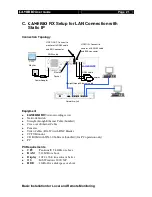
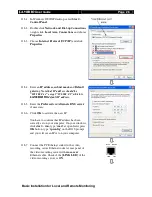
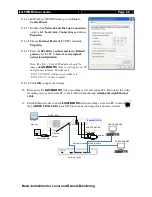
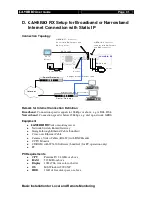
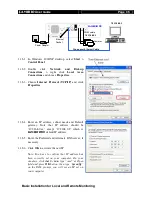
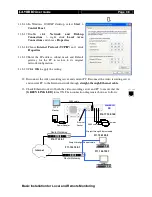
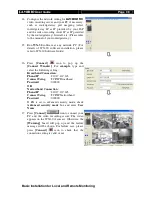
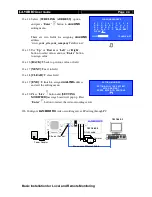
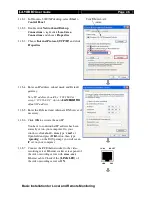
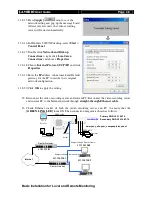
11.b Configure
RX
video recording server IP
setting through PC
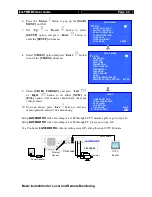
SETUP MENU
VIDEO
. . .
RECORDING
. . .
SWITCHES
. . .
DATE / TIME
. . .
CONNECTION
. . .
EVENT HANDLER
. . .
TRANSMITTER . . .
PASSWORD
. . .
USER ACCOUNT . . .
RX-SE
. . .
SETTING IMPORT/EXPORT . . .
RESTORE FACTORY SETTING
ENTER
CONNECTION
TCP / IP
…
MODEM
…
THROUGHPUT
…
TCP / IP
IP
192.168.0.2
PORT
1024
SUBNET MASK
255.255.255.0
ENABLE GATEWAY
NO
GATEWAY
0.0.0.0
ENABLE DNS
NO
PRIMARY DNS
0.0.0.0
SECONDARY DNS
0.0.0.0
SURELINK
…
SETTING MODIFIED
SETTING WILL TAKE EFFECT
AFTER RESTART ,
PRESS ENTER TO CONTINUE
OK
IP
IP : 210. 17.139.
145
TCP / IP
IP
210.17.139.145
PORT
1024
SUBNET MASK
255.255.255.0
ENABLE GATEWAY
YES
GATEWAY
210.17.139.1
ENABLE DNS
NO
PRIMARY DNS
0.0.0.0
SECONDARY DNS
0.0.0.0
SURELINK
…

