User
Guide
Page 74
OSD Menu Operation
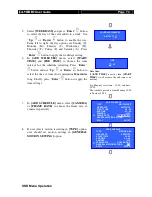
5.
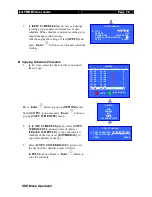
Select
[WEEKDAYS]
and press “
Enter
”
button
to select the day of time slot added in a week. Use
“
Up
”
or “
Down
”
button to enable the day.
From left to right, the day options are Sunday (S),
Monday (M), Tuesday (T), Wednesday (W),
Thursday (T), Friday (F) and Saturday (S). Press
“
Enter
”
button to apply the weekdays setting.
6.
In
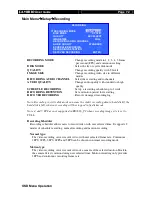
[ADD SCHEDULE]
menu, select
[START
TIME]
and
[END TIME]
to choose the time
interval for the schedule recording. Press “
Enter
”
button and use “
Up
” or “
Down
”
button to
select the time. A time slot is minimum
10 minutes
long. Finally, press “
Enter
”
button to apply the
time settings.
Note that :
If
[END TIME]
is earlier than
[START
TIME]
, it will assume the end time is on
next day.
E.g. Monday, start time : 18:00, end time :
09:00
The schedule period is from Monday 18:00
to Tuesday 09:00.
7.
In
[ADD SCHEDULE]
menu, select
[CAMERA]
or
[FRAME RATE]
to choose the frame rate or
camera respectively.
8.
If user selects motion recording in
[TYPE]
option,
user should set motion settings in
[GENERAL
MOTION SETTING]
option.
SCHEDULE WEEKDAY
S M T W T F
S
TI ME
02
: 00
ADD SCHEDULE
TYPE
MOTION REC
WEEKDAYS
SMTWTFS
START TI ME
00 : 00
END TIME
02 : 00
CAMERA
1234
FRAME RATE
CONTINUOUS
GENERAL MOTION SETTING
. . .
APPLY
ENTER
ADD SCHEDULE
TYPE
MOTION REC
WEEKDAYS
SMTWTFS
START TI ME
00 : 00
END TIME
02 : 00
CAMERA
1234
FRAME RATE
CONTINUOUS
GENERAL MOTION SETTING
. . .
APPLY
ENTER

