EMC_SPEC040_CLCR.doc
Rev. E
–
2021 10 18
54/63
Install & Operating Manual
CleanSeal V3
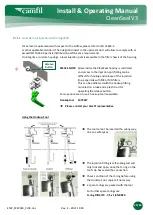
Installing the Testing Shroud
•
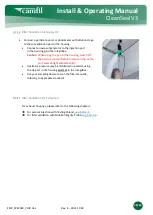
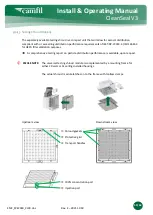
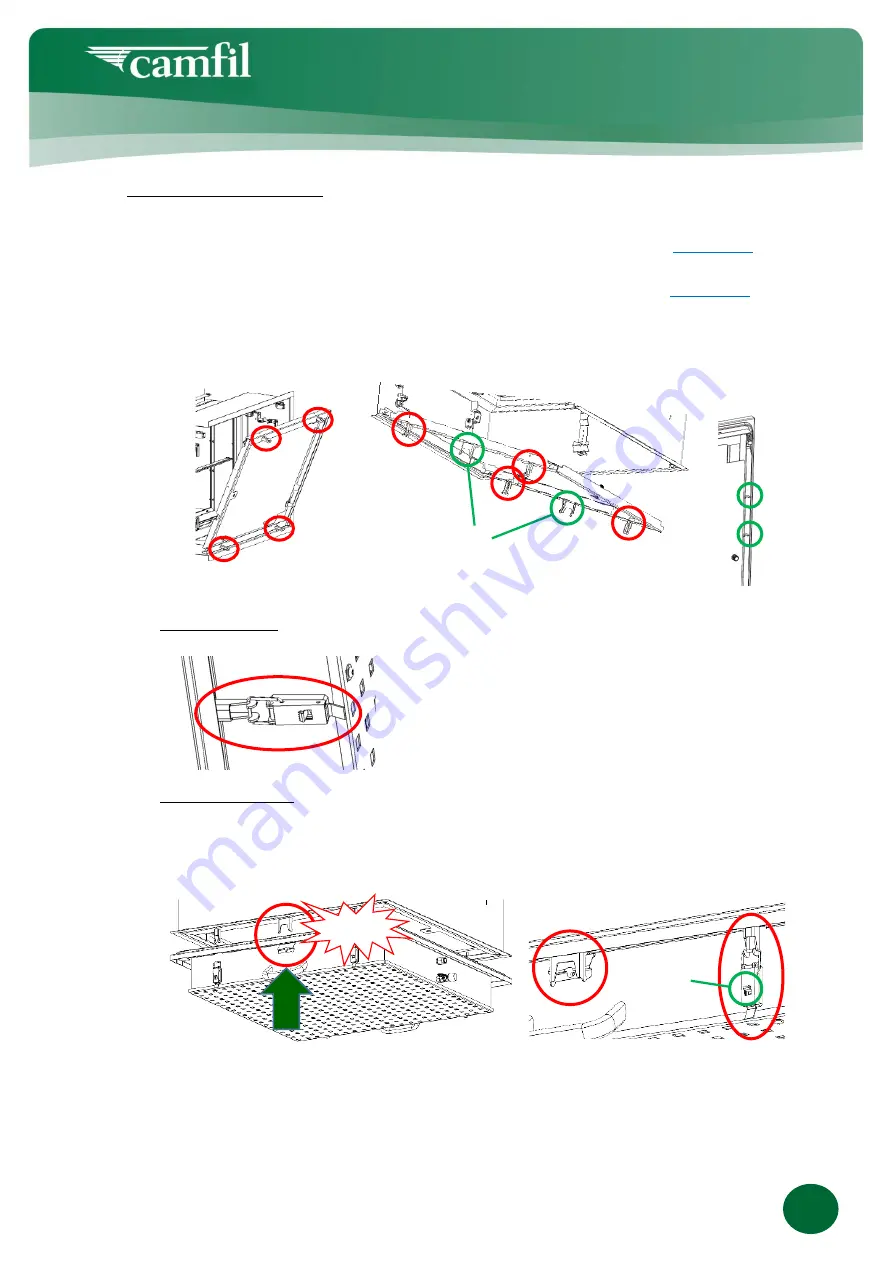
Replace frontplate or door by the respective mounting frame with diffuser plate.
o
The wall mounting frame is operated like CleanSeal Exhaust (CR) doors,
see § 10.4.2
It features 4 locking hooks
.
o
The ceiling mounting frame is operated like CleanSeal (CL) front plates,
see § 10.4.2
It features 4 locking hooks
and 2 safety hooks
.
o
Insert long dp port tubes (for prefilter doors) into clamps
on the mounting frame
to avoid damage to the tube, the MIP system and/or the filter during manipulation
•
Before installing the shroud, make sure its gaskets are in good condition
•
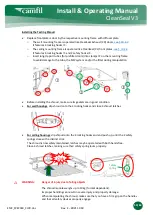
For wall housings
, slip shroud onto the 4 locking hooks and close 4 shroud latches
•
For ceiling housings
, slip shroud onto the 4 locking hooks and and push up, until the 2 safety
springs close with a distinct click.
The shroud is now safely maintained, latches may be operated with both hands free.
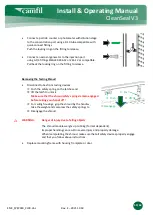
Close 4 shroud latches, making sure their safety spring locks properly.
WARNING:
Danger of injury due to falling objects
The shroud module weighs up to 10 kg (format dependent).
Improper handling can result in severe injury and property damage.
When manipulating the shroud, make sure that you have a firm grip on the handles
and that all safety devices properly engage.
Click
Safety
spring

