EMC_SPEC040_CLCR.doc
Rev. E
–
2021 10 18
38/63
Install & Operating Manual
CleanSeal V3
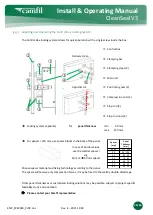
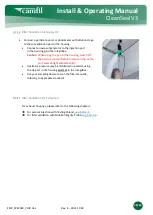
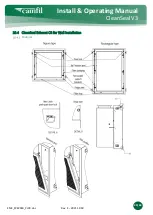
Installing the Control Box
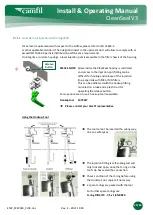
The Control Box can serve a secondary purpose as an access hatch to the technical area
in case of intervention on tubing or the flexible drive shaft.
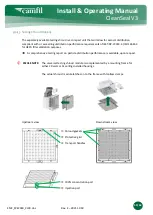
PLEASE NOTE:
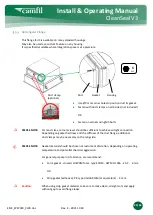
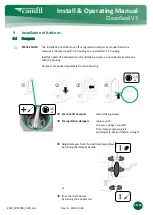
The locking mechanism allows for quick & easy de- and reinstallation,
using a radiator key or electric cabinet key or a flat spanner.
Turn the square locking knob clockwise to the stop,
the main rod is now aligned diagonally.
•
Insert the box into the cutout.
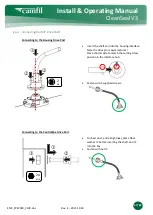
Caution :
In case of excess length of the shaft,
DO NOT roll it to a coil !
•
Turn the center square knob counter-clockwise to the stop. The main rod is now aligned vertically.
•
Continue turning the screw counter-clockwise to the desired clamping strength.
PLEASE NOTE:
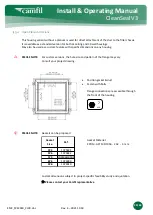
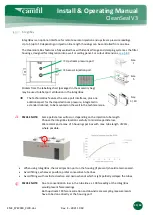
The Control Box will ensure dust tight separation between the room and
the technical area.
In case of airtight installation apply sealant under the flange and around
the locking knob.
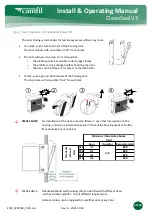
PLEASE NOTE:
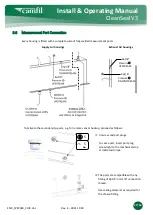
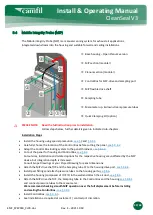
The actual direction of the probe movement will depend on the housing type
and the chosen installation orientation :
•
Turn
CLOCKWISE
Probe moves
TOWARDS
the drive port
•
Turn
COUNTER-CLOCKWISE
Probe moves
AWAY
from the drive port
•
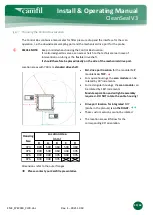
Apply the provided stickers
in a convenient location
to signal direction of probe
movement to the operator.
8
X

