background image

MW8 & MotionWare User Guide: Issue 1.2.1 

Page 12 


2  Installing the MotionWare Software 


2.1  System 

Requirements  

The MotionWare software is supplied on a CD-ROM or 
USB Memory Stick containing all of the components 
required to install the software package. The following are 
the minimum requirements of a host PC for installing the 
MotionWatch software:  


Windows XP, Vista, Windows 7 or 8, 32 or 64bit 
operating systems 


IBM compatible 2GHz + processor speed 
recommended 


100 MB hard disk space 


One free USB port 


A CD-ROM or DVD drive for software installation 


Graphics SVGA(1280 x 1024) recommended 

 
In general, a faster processor will provide superior 
performance. 


2.2  Installing the 

Software 

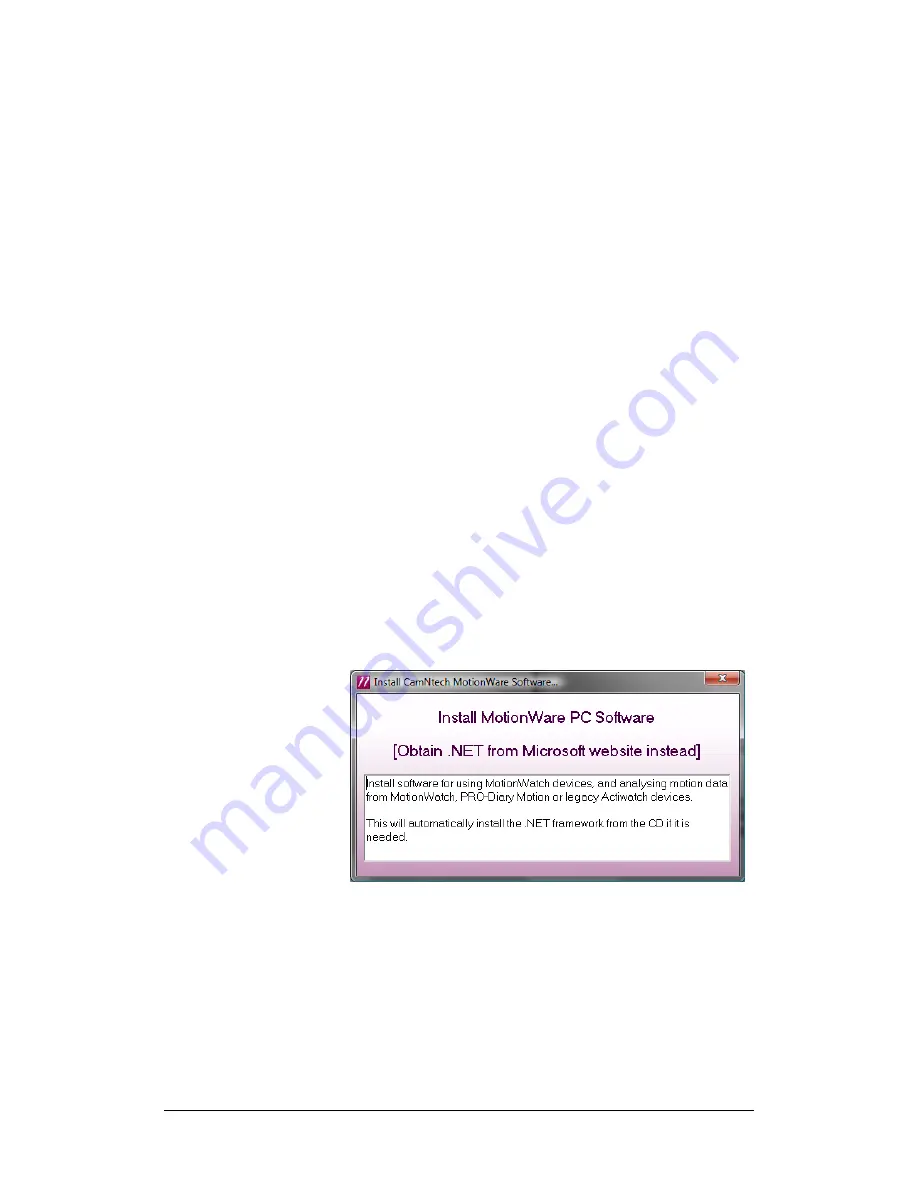
Place the CD ROM into the drive (or insert the USB stick 
into a free port); the MotionWare software installation 
menu should start automatically as shown below: 


If it does not start automatically (this functionality has 
sometimes been disabled for security reasons) you will 
need to browse with Windows Explorer to view the CD 
ROM or USB stick then double-click on the file 
‘SplashScreen.exe’. 
 
Click on the ‘Install MotionWare PC Software’ option. 
Follow the installation wizard

’s onscreen prompts until the 

installation is complete.  It is recommended that you install 

Summary of Contents for MotionWatch 8

Page 1: ...1 2 1 Page 1 The MotionWatch 8 and MotionWare User Guide Document Reference 30147 Version 1 2 1 Date of current version 30 03 2017 The MotionWatch is a Class I Medical Device EU Document revision his...

Page 2: ...th Canada The MotionWatch is licensed for clinical use in Canada with HC license number 94219 Australian TGA The MotionWatch has been cleared by the Australian TGA and is listed on the ARTG with ref n...

Page 3: ...ide Consult Instructions for Use This symbol indicates that important operational information is contained in the user instructions i e this user guide Ingress Protection Rating IPX7 The MotionWatch i...

Page 4: ...ating the Software 13 2 4 Installing the USB Drivers 13 2 5 Software Serial Number 14 2 6 Running the Software Main Screen 14 2 7 MotionWare Settings 15 View or Enter Software Serial Number 15 Set Ins...

Page 5: ...riod 30 Select Any 31 Select Days 31 Select All 31 5 10 Saved Periods and Longer Periods 31 5 11 Editing Data 32 5 12 Generating Reports 33 Include Recording Properties 33 Include Markers 33 Include S...

Page 6: ...rt Nap Periods 47 10 Day Activity Analysis 48 10 1 Overview 48 10 2 Day Analysis 48 Selecting Days 49 Highlighted Activity Graph 49 Summary Activity 49 Definition of Results 49 10 3 Set Calibration 50...

Page 7: ...rmation 71 C1 Decontamination 71 C2 Battery 71 C3 Warnings General 71 C4 Disposal at End of Life 71 C5 EMC Declaration and Guidance 72 Electromagnetic Emissions 72 Electromagnetic Immunity 73 C6 Appli...

Page 8: ...download and analysis of data captured with the MotionWatch The MotionWatch also incorporates a light sensor to record luminous intensity lux of white light and an event marker button Utilizing the l...

Page 9: ...ess to the battery To open the casing grasp the front of the watch by the two finger grips and rotate anti clockwise by approximately 15 degrees to release WARNING DO NOT ATTEMPT TO FORCE OPEN CLOSED...

Page 10: ...ING AND INVALIDATE THE WARRANTY 1 2 Indications For Use The MotionWatch is a compact lightweight body worn activity monitoring device that may be used to document physical movement associated with app...

Page 11: ...ospital environment 1 5 General Description of Use The MotionWatch contains a miniature accelerometer to allow measurement and recording of physical movement of the wrist which provides a close correl...

Page 12: ...ve for software installation Graphics SVGA 1280 x 1024 recommended In general a faster processor will provide superior performance 2 2 Installing the Software Place the CD ROM into the drive or insert...

Page 13: ...he software you should first remove the old version The installation has to then be restarted by removing and re inserting the CD ROM or by double clicking on the SplashScreen exe file 2 4 Installing...

Page 14: ...tton to link to the CamNtech website and register the software note you will need the reference number supplied on the CD or media When you have received your serial number enter the 8 digits and then...

Page 15: ...settings window which will then be included near the top of all printed reports This may be desirable if you wish to hand the actogram or other reports directly to participants after use Warn of Firmw...

Page 16: ...This function allows you to export the raw data from every motion file in a directory into corresponding csv files It may be useful if you wish to analyse the data yourself rather than using the Motio...

Page 17: ...his will produce the following window When the download has completed click the Exit Run Update button to close the application and initiate the installer Automatically Check for Updates Tick this che...

Page 18: ...ck on the Use MotionWatch button on the front screen The MotionWatch Manager screen is automatically closed when the MotionWatch is disconnected The MotionWatch setup options will be explained in deta...

Page 19: ...been downloaded first Click the Cancel Setup button to return to the current setup tab without applying the new setup User ID Enter characters to identify the subject patient study Full Name optional...

Page 20: ...aist This is an optional field that does not affect the data processing Epoch The epoch is the duration for which the MotionWatch will accumulate samples before storing the result in memory For exampl...

Page 21: ...ndication of remaining battery life using a colour coded bar The bar will change colour to provide a clear indication of battery status as the battery becomes depleted The battery life gauge has the f...

Page 22: ...ast 1 minute before inserting the new battery If the battery is replaced but the battery life indicator is not updated to 100 click on the new battery button under the Utilities tab to reset it manual...

Page 23: ...When the all data has downloaded full memory will take less than 1 minute the Save Recording dialog will open to allow the data to be saved Note that the recorded data in the MotionWatch is not erase...

Page 24: ...ord movement data whilst connected to the PC If a continuous recording is desired then the watch should be removed from the USB cable and returned to the subject as promptly as possible 4 4 Join Files...

Page 25: ...Right click on the file for more options 5 2 Managing Recent Recordings If the recent recordings list becomes full or cluttered it is possible to remove entries from the list or to fully delete the re...

Page 26: ...d files Note that the default file format is MTN depicting MoTioN and this type of file will be displayed automatically It is possible to change the file type filter to browse for other file types see...

Page 27: ...MW8 MotionWare User Guide Issue 1 2 1 Page 27 csv format and then use the csv import utility to re save the data in compatible format see Appendix E1 CSV Import Utility...

Page 28: ...ble window The MotionWise window is the key tool for the selection of data for more detailed analysis The top region of the window provides summary patient information The entire window may be stretch...

Page 29: ...tem in the View menu The Actogram will adjust to give immediate feedback after you have changed any of the options Row Length Select 24 or 48 hour graphs to show single day or double day plotted graph...

Page 30: ...tom of the actogram instead Finer Detail Grid Lines Show or hide the light grey hourly grid lines on the graphs these will also depend upon the resolution of the monitor or printer Annotations The mar...

Page 31: ...y s option will select a period starting and ending at midnight on the chosen day s To make a selection point anywhere within the graph on the day of interest hold down the left mouse button and then...

Page 32: ...tune the time period for the edit either by dragging the Start and End bars on the graph or by changing the text boxes containing times below the graph Next you must choose to change either the Activ...

Page 33: ...n but before download In this case simply select all of the time after the valid recording and mark it as missing data This can be restored at any point using the Original data option above 5 12 Gener...

Page 34: ...eport options click the Copy Results Tables button to export the data The data may now be imported into external software e g a spreadsheet for further analysis or formatting Copy to Word Processor Pl...

Page 35: ...le Columns It is possible to further customise the parameters that will be included in the report Click on the filter visible columns button for either the marker or sleep analysis data A window conta...

Page 36: ...ng window will be displayed The adjustment values can be changed here if required and then be applied to the data by clicking Apply now 5 14 Restore original download To reverse undo any daylight savi...

Page 37: ...ly default to the summary function To select Sleep Analysis choose Sleep from the Analysis Function options at the left of the screen The detailed Sleep Analysis window will be displayed It is now pos...

Page 38: ...by epoch wake sleep categorisation Wake bouts The number of contiguous sections categorised as wake in the epoch by epoch wake sleep categorisation Mean sleep bout The average length of each of the sl...

Page 39: ...ed with a threshold of 20 but this may be chosen differently depending on the population Rest per 24h The percentage of epochs in a 24 hour period which would be counted as sleep if the whole period w...

Page 40: ...Click on the Print Preview button to preview the report and click on the Print button to send the report to the printer 6 7 Sleep Summary Table From the MotionWise window select Sleep Summary Table fr...

Page 41: ...Issue 1 2 1 Page 41 Analysis This will perform the analysis on the visible data After checking the data and results for any anomalies you must then re save the sleep period to capture the night s resu...

Page 42: ...Netherlands Institute for Brain Research e van someren nin knaw nl The original paper published by Dr Van Someren is Van Someren E J W DF Swaab C C Colenda W Cohen W V McCall and P B Rosenquist Brigh...

Page 43: ...ength periods of activity rest within any 24 hour period The variable has a theoretical range of 0 to 2 with higher values indicating higher fragmentation Typical values for healthy subjects will be b...

Page 44: ...CRA Analysis Results The Copy Statistics button will allow you to transfer the overall statistics easily into a spreadsheet program or similar Simply click the button transfer to a spreadsheet window...

Page 45: ...analyzing for trends The period may be selected between no smoothing and 60 minutes Daytime Period It is possible to specify the start and end of the daytime period to be used for the analysis This wi...

Page 46: ...lect Napping from the analysis functions side bar A screen similar to that shown below will be displayed 9 3 Select Nap Activity Threshold The Napping activity level epoch is used to set the activity...

Page 47: ...ill not be scored as a nap period 9 6 Analysis Results The analysis window will show the number of potential naps detected The analysis graph will display the potential nap periods as green highlighte...

Page 48: ...active on a daily or weekly basis and the approximate intensity of that activity To use the Day Analysis function single click to select a recording from the recent files list and then click the Day A...

Page 49: ...f this window Summary Activity Below the main activity graph a bar chart summarises the amount of time spent in constant activities of vigorous moderate or low intensity alongside sedentary time The t...

Page 50: ...ction The analysis function uses a calibration to derive reference thresholds for vigorous moderate low and sedentary activity types These values differ from patient to patient depending on their capa...

Page 51: ...ey may not reflect the values of a brisk walk and should be used with caution Calibration periods can also be selected manually by dragging the mouse cursor over a period on the activity graph or by e...

Page 52: ...vity All adults should also undertake physical activity to improve muscle strength on at least 2 days a week They should minimise the amount of time spent being sedentary sitting for extended periods...

Page 53: ...ndow Use the scroll bar at the right to move through the weeks and click on the one of interest Alternatively you can scroll through the weeks using the up and down arrows to the right of the week cal...

Page 54: ...the week the wearer was then very active on Saturday The View menu can be used to turn on and off the highlighting of Low Medium and Vigorous levels Weekly Summary Totals Below the summary graph a bar...

Page 55: ...eeks Weekly Totals The upper graph of the Totals Averages window shows the total time spent in different activity bands over the weeks of the recording In the example shown the recording spanned over...

Page 56: ...day than on an average weekday but there is more variation within those also Note that both graphs can be affected by the View and Options menus The View menu controls whether highlights are shown for...

Page 57: ...oad the data from our cloud server All data is encrypted using the encryption keys created at your HQ management site and is completely secure when distributed from Branch to Cloud to HQ Note CamNtech...

Page 58: ...n keys to keep in order to prevent loss of data If you lose the encryption keys you will lose access to all of your data encrypted with them CamNtech will not be able to help you read your encrypted d...

Page 59: ...do so This folder will contain all data transferred from the branch sites After configuring all of the items above you may click on Sync Sync Now This should produce no new data in the list but no er...

Page 60: ...with the cloud The configuration file is created by your HQ site computer and contains information such as login details and public encryption key Note a single configuration file can be used on more...

Page 61: ...Folder Name this is the name of the folder inside the Recordings Folder Location where the encrypted recordings will be stored after they have been downloaded from a MotionWatch Destination File Prev...

Page 62: ...your branch site s using your own delivery method such as secure email 11 5 Branch Site Computer Configuration Ensure you have created a configuration file as discussed in section 11 4 Loading a Confi...

Page 63: ...Login Check field if these checks succeed Auto Upload The Auto Upload feature automatically uploads new recordings to the cloud immediately after they have been downloaded from a MotionWatch To turn...

Page 64: ...ecordings were not uploaded such as loss of Internet connection you can manually sync them by clicking the Sync Now button on the Settings menu Main Window Menu Sync Now The sync indicator will show o...

Page 65: ...dded operating software that allows the MW8 to be updated remotely Firmware Ver This is the version number of the main operating software for the MW8 Serial Number The watch serial number Battery volt...

Page 66: ...s this will take a few seconds The MotionWatch will then automatically disconnect apply the firmware then re connect The MotionWatch Manager window will be temporarily closed during this period and wi...

Page 67: ...se the USB connection and battery Do not connect the USB cable Using a suitable tool carefully push the battery out from the holder towards the USB connector Grasp the battery and withdraw it complete...

Page 68: ...er part of the casing The seal should be periodically checked to ensure that it is correctly seated clean and not damaged note that some silicone grease residue will be apparent do not remove this Per...

Page 69: ...n at locations on the body other than the wrist A range of elasticated straps is available to allow location on the waist ankle thigh or upper arm There are also special straps for mounting on the fee...

Page 70: ...from the USB and remove then refit replace the battery see maintenance section for details of battery changing Wait at least 1 minute before re fitting the battery and observe the correct start up seq...

Page 71: ...care when handling and disposing of coin cell battery C3 Warnings General The MotionWatch is NOT defibrillation proof C4 Disposal at End of Life Waste Electrical Electronic Equipment WEEE The EU requ...

Page 72: ...is used in such an environment Emissions Tests Compliance Electromagnetic environment guidance RF Emissions CISPR 11 Group 1 The MotionWatch uses RF energy only for its internal function Therefore its...

Page 73: ...s 2kV for power supply lines 1kV for input output lines Mains power quality should be that of a typical commercial or hospital environment Surge IEC 61000 4 5 1kV differential mode 1kV common mode N T...

Page 74: ...601 1 2 2007 Medical electrical equipment Part 1 2 Collateral standard Electromagnetic compatibility Requirements and tests See Appendix C for declaration and guidance EN60601 1 11 2010 Medical electr...

Page 75: ...Epoch 1 2 5 15 30 60 seconds Comms Direct USB Plug Play drivers Micro USB cable Download All data in 50 seconds approx Strap Bespoke XL 12mm silicone 245mm overall length or 12mm nylon Light Sensor Ty...

Page 76: ...or negative during each second is recorded 3 This is compared to a minimum not moving threshold of approximately 0 1g Values below this threshold are ignored to simplify the final activity graph 4 Th...

Page 77: ...Z2 value is found per second 3 The square root of the sum of squares is calculated and added to the epoch sum 4 This is compared to a minimum not moving threshold of approximately 0 1g Values below t...

Page 78: ...the Actogram button to show the graph of the required data Next set up the Actiware report generation you should only need to do this once From the tools menu select options and then click on the exp...

Page 79: ...play If the details are not correct the export may not be in the correct format please ensure the correct settings were applied in Actiware for CSV export Click Save AWD to generate the output file St...

Page 80: ...to align with FDA submission HS 1 0 20b 1 0 22 14 01 14 Updated screenshots and added instructions for new View options and Editing Data TE 1 0 22 1 0 22a 31 01 14 Updated battery replacement procedu...

Reviews: