background image

10

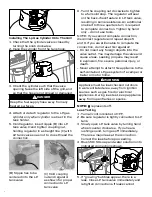
2.  Use a long nose lighter and place through 

lighting hole in the front of the grill to 

approximately 1/2” (1 to 2 cm) from the 

burner.

3.  Turn on the control knob to the “HIGH” 

position. The burner should light within 5 

seconds.

4.  If the burner does not light, turn the control 

knob to “OFF” and wait 5 minutes for gas 

to dissipate and repeat lighting procedure.

5.  If the burner does not light within the first 

few attempts of match lighting, there is 

a problem with the gas supply. Turn off 

the gas at the burner and cylinder. DO 

NOT attempt to operate the grill until 

the problem is found and corrected. See 

“Trouble Shooting” section of this manual.

Turning LP Cooker Off

•  Turn knob to OFF position. 

•  Turn LP tank OFF by turning hand-wheel 

clockwise to a full stop.

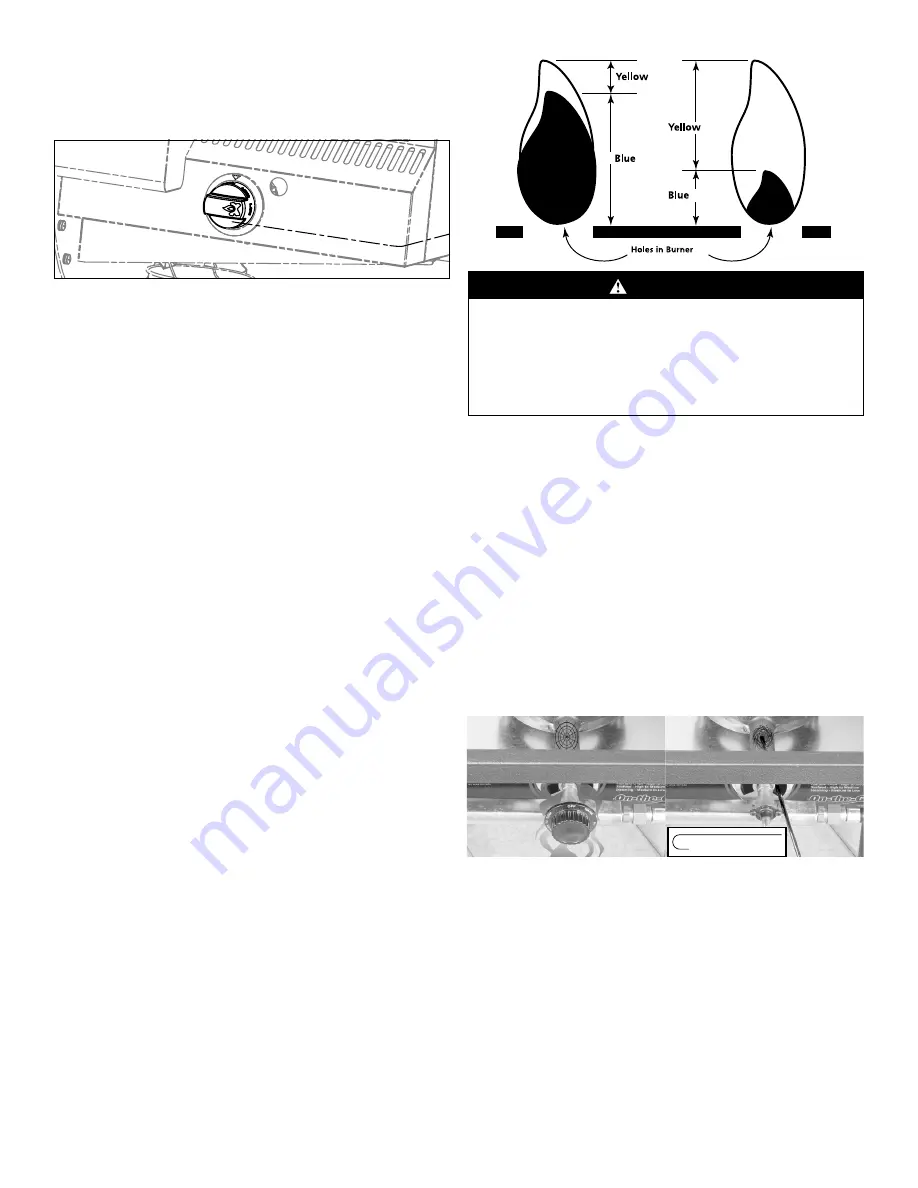
Burner Flame Check

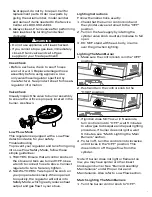
•  Light burner; rotate knob from HIGH to 

LOW. You should see a smaller flame in LOW 

position than seen on HIGH. Always check 

flame prior to each use. The air damper 

mounted on the front of your burner helps to 

control the amount of primary air that mixes 

with the LP gas. A blue flame with little or 

no yellow flame provides the best heat. 

Adjust the air damper by turning it clockwise 

or counterclockwise until the desired flame 

is achieved. Curing of paints and parts will 

produce an odor only on first use.

 WARNING

All cleaning and maintenance should only be 

done when the appliance is cool and with the 

fuel supply turned off at the LP cylinder. DO 

NOT clean any part in a self-cleaning oven. 

The extreme heat will damage the finish.

Cleaning The Burner

NOTE: Spiders and small insects can spin 

webs and build nests inside the burner. This 

especially occurs in late summer and fall 

before frost when spiders are most active. 

These nests can obstruct gas flow and cause 

a fire in and around the burner and orifice. 

Such a fire can cause operator injury and 

serious damage to the appliance. To help 

prevent a blockage and ensure full heat 

output, clean and inspect burner tube often 

(once or twice a month). NOTE: Water or air 

pressure may not clear a spider web.

Steps for cleaning the Burner:

1. Remove orifice/valve from burner.

2.  Look inside the burner tube for nests, 

webs, or mud.

3.  To remove the above obstructions, use an 

accessory flexible venturi brush or bend 

a small hook on one end of a long flexible 

wire or use an air hose.

4.  Inspect and clean the burner if needed.

5. Reattach orifice/valve to burner.

Summary of Contents for SIDEKICK 14

Page 1: ...SIDEKICK 14 WARNINGS INSTRUCTIONS MODEL PG14BB...

Page 2: ...flow is restricted by placing items or other appliances close to or adjacent to openings Do not build this appliance into a cavity or enclosure DANGER Never operate this appliance unattended Never ope...

Page 3: ...TOR PG14 10 1 TANK BKT 1 PGSEAR 14 LP BURNER 1 PG14 9 AIR VENT 1 0826L LP SPRING 1 0980 BEZEL 1 FTG600 27 POT GRATE 1 PG14 1 IGNITER 1 PG14 2 VALVE 1 PG14 3 KNOB 1 PG14 4 GREASE CUP 1 PG14 5 PART NOT...

Page 4: ...s 3 The use of alcohol prescription or non prescription drugs may impair your ability to properly assemble or safely operate this appliance 4 For OUTDOOR use only Do NOT use in a building garage or an...

Page 5: ...OT move the appliance when in use Allow unit to cool to 115 F 45 C before moving or storing 20 This appliance will be hot during and after use Use insulated oven mitts or gloves for protection from ho...

Page 6: ...Storage Turn OFF all control knobs and LP tank valve Turn coupling nut counterclockwise by hand only Do not use tools to disconnect Place dust cap on cylinder valve outlet whenever cylinder is not in...

Page 7: ...empty LP tanks through an exchange service Use only those reputable exchange companies that inspect precision fill test and certify their cylinders Exchange your tank only for an OPD safety feature eq...

Page 8: ...FF 2 Be sure regulator is tightly connected to LP tank 3 Slowly open LP tank valve by turning hand wheel counter clockwise If you hear a rushing sound turn gas off immediately There is a major leak at...

Page 9: ...ove Connect regulator to tank Securely tighten 2 SLOWLY OPEN Twist open the knob on your propane tank slowly When opened too quickly the regulator will enter into Safety Mode which greatly reduces hea...

Page 10: ...provides the best heat Adjust the air damper by turning it clockwise or counterclockwise until the desired flame is achieved Curing of paints and parts will produce an odor only on first use WARNING A...

Page 11: ...a thermometer must be used Introduction of water from any source into the cooking oil or grease may cause overflow and severe burns from hot oil and water splatter When frying with oil and grease all...

Page 12: ...onents or exposure to weather natural disasters such as earthquakes hurricanes tornadoes floods lightning fires or failure to follow instructions for use ANY WARRANTIES IMPLIED BY LAW SHALL IN NO EVEN...

Reviews: