
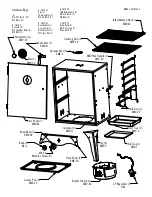


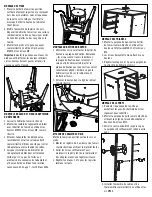
ASSEMBLE HANDLES
1. Assemble the carry handle as shown to the
smoker cabinet using M6X15 C-sink bolts
and M6 nuts.
2. The nuts should be firmly tightened to the
bolts.
3. Repeat steps 1 and 2 for handles on both
sides of the smoker cabinet.
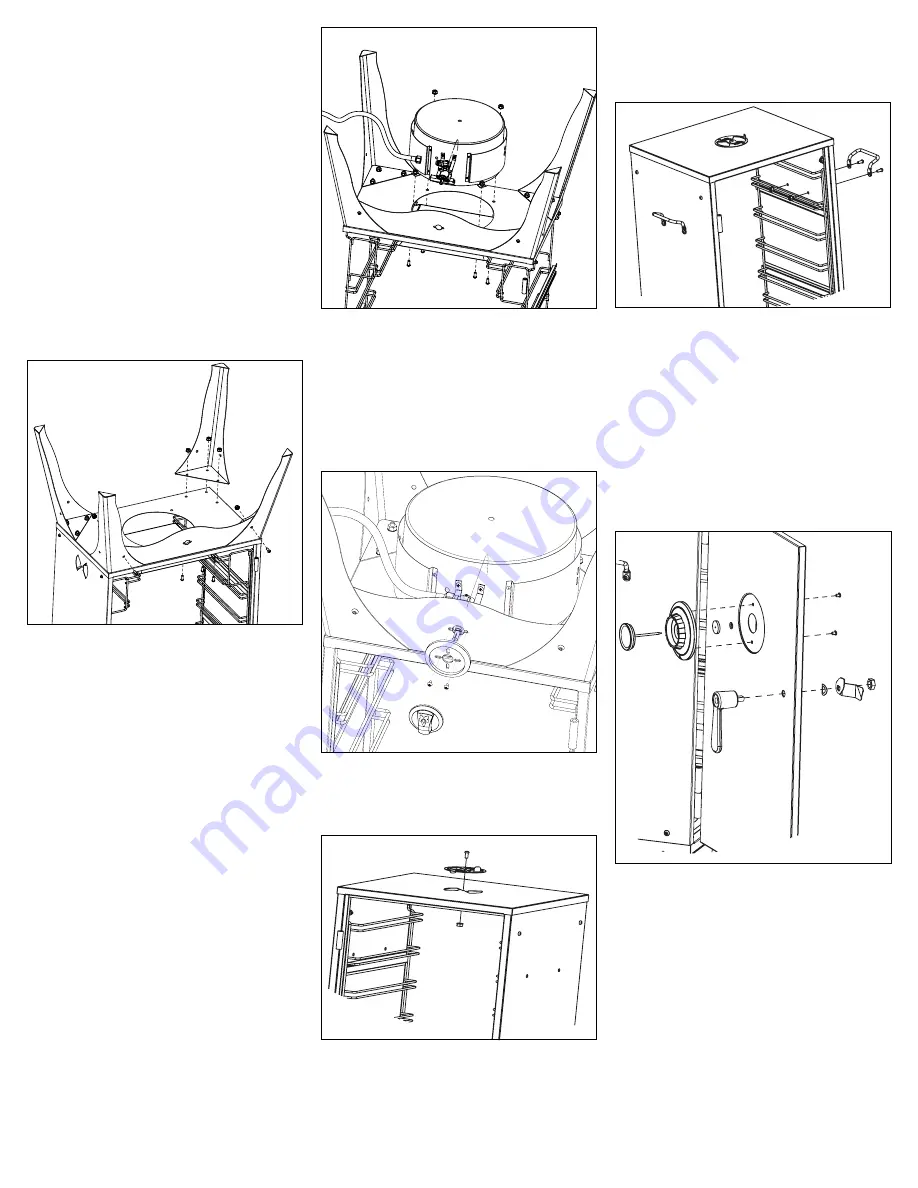
ASSEMBLE DOOR
1. Re-mount the door panel by sliding the door’s
hinge pins into the cabinet’s hinge seats.
2. Assemble the door handle as shown using
the handle, wave washer, and two M12 jam
nuts.
3. Tighten the M12 lock nut until the desired
resistance of the handle is achieved.
4. Install the dial with the thermometer
installed as shown using two M5X6 bolts.
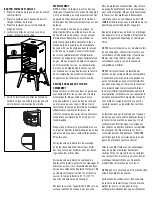
ASSEMBLE KNOB BEZEL
1. Use two screws to attach the knob bezel
to the faceplate. Note - Screws go through
bezel and through the faceplate into valve.
Faceplate may need to be adjusted to get
holes to align properly. Make sure to center
bezel on valve before tightening screws.
2. Push the knob onto the valve stem as shown.
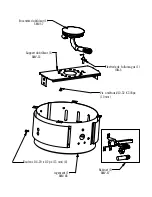
ATTACH DAMPER VENTS
Stand the smoker upright on its legs.
1. Assemble 1 damper vent on top of smoker as
shown using the hardware provided.
2. Tighten the nut enough to keep the damper
vent snug but allow it to rotate with little
resistance.
3. Repeat steps 1 and 2 for the two remaining
side damper vents.
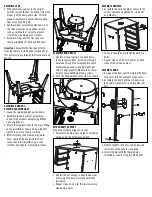
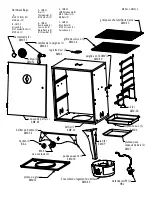
ASSEMBLE LEGS
1. With the smoker cabinet in the upright
position remove the door by lifting it from the
hinges. Set the door panel aside. This will
make assembly much easier. Remove knob
from valve by pulling off.
2. Set the smoker assembly upside down. Set
the smoker cabinet on a padded surface
such as cardboard or carpet to prevent
scratching or damaging your smoker.
3. Assemble 4 legs and the front panel as
shown using M6X10” bolts and M6 nuts.
Important
: Assemble the front panel to the
front legs before installing the inside bolts as
this bolt must pass through the front panel and
the leg.
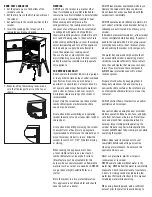
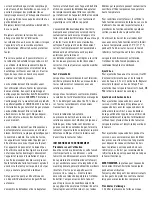
ASSEMBLE BURNER &
ATTACH REGULATOR HOSE
1. Leave the smoker cabinet upside down.
2. Assemble the burner drum assembly as
shown to the smoker cabinet using M6X10
bolts and M6 nuts.
3. Attach the regulator hose to the brass fitting
on the manifold as shown. Use a wrench to
tighten the hose to the brass fitting.
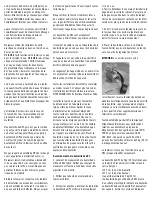
4. After installing the burner and regulator
hose, check for leaks around the hose
connection and manifold using a soap
solution. See Page 8 - Checking for Leaks.


