


add wood while operating. Adding wood while
operating may splash hot water and cause
serious injury.
Use of accessories not intended for smoker is
not recommended and may lead to injury or
property damage.
An LP cylinder not connected for use should
not be stored in the vicinity of smoker or any
other appliance. Do not store spare LP cylinders
within 10 feet of smoker. LP cylinders must be
stored outdoors, out of reach of children.
Do not store a spare LP-gas cylinder under
or near this appliance. Never fill the cylinder
beyond 80 percent full. Failure to follow these
instructions exactly could result in a fire
causing death or serious injury.
The smoker should be shut off and all supply
valves (on piping or on fuel cylinders) should be
closed in the event that the odor of unburned
gas is detected. Do not attempt to use the unit
until any gas leaks are fixed.
Do not use the smoker if the burner fails
to light or fails to remain lit. Under such
conditions, gas should be shut off and fuel
cylinders should be disconnected. Do not
operate under high wind conditions.
LP tanks are intended for operation in the
upright position only.
Care should be taken to protect the fuel supply
hose from damage from either foot or vehicle
traffic.
If the appliance is not in use, the gas must
be turned off at the supply cylinder and the
cylinder should be disconnected from the
appliance.
Storage of the appliance indoors is only
permissible if the cylinder is disconnected and
removed from the appliance.
All installations are to conform to local codes.
In the absence of local codes, installation
should conform to the National Fuel Gas Code,
ANSI Z223.1/NFPA 54
Smoker should be installed with the hose
regulator assembly extended at full length of
hose directly away from the burner. Keep fuel
supply hose away from any heated surfaces.
When so configured, placement results in
maximum tank to smoker distance. When
smoker is operated, the hose/regulator and
gas tank should be on a line perpendicular to
wind direction. Placing tank closer than 24” to
the smoker can overheat the tank and cause
release of propane through relief openings and
can result in tank fire or explosion.
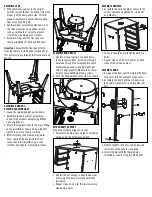
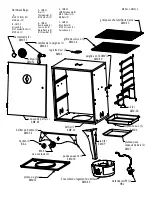
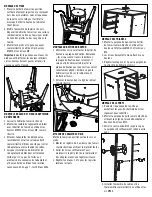
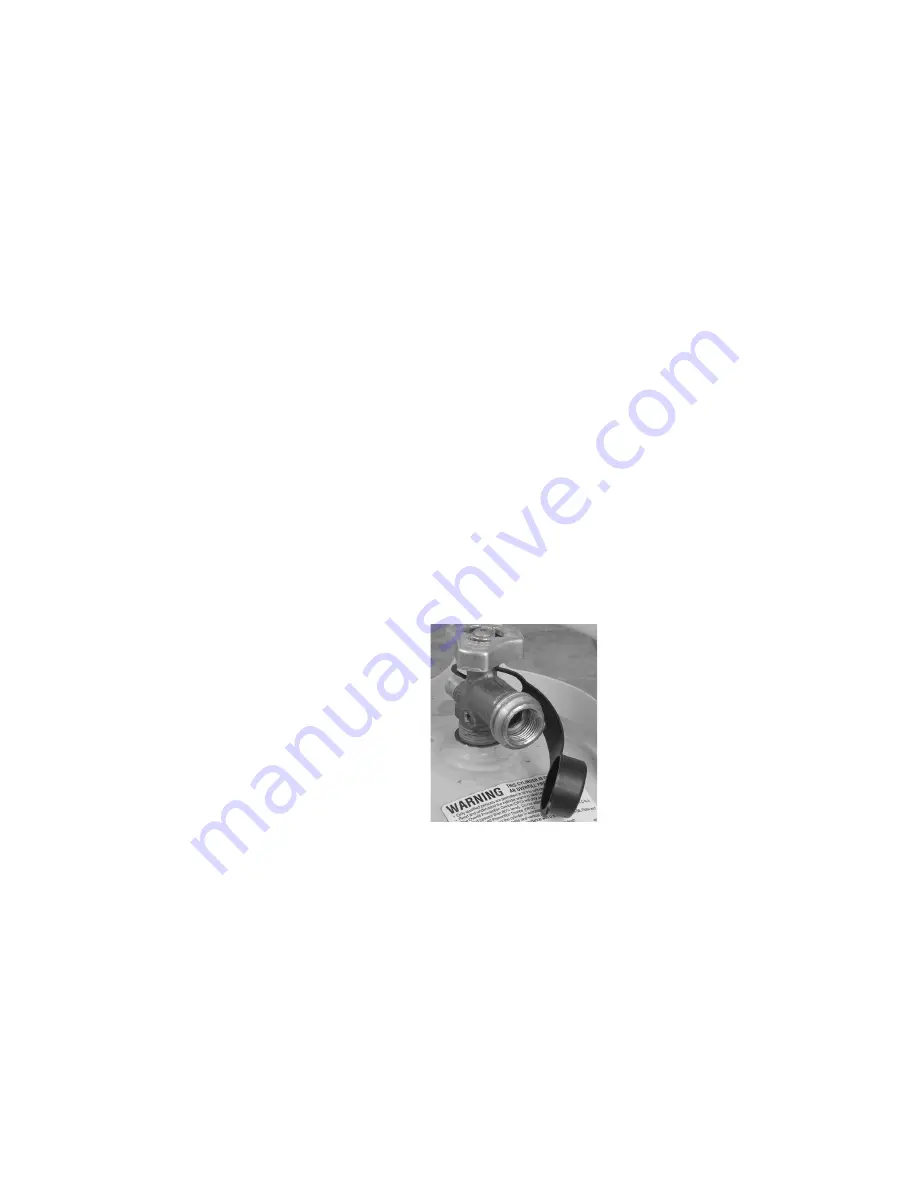
Connecting the LP Tank
1. The knob on the LP tank must be closed. See
that the knob is turned clockwise to a full stop.
2. Check that the control knob on the smoker is
turned off.
3. Remove the protective cap from the LP tank
valve and coupling nut, if present.
4. Hold the regulator in one hand and insert the
nipple into the valve outlet. Be sure the nipple
is centered in the valve outlet. The coupler
connects to the large outside threads on the
valve outlet.
5. Hand tighten the coupler clockwise until it
comes to a full stop. Firmly tighten by hand
only.
6. Place the tank to the side or rear of the
smoker. Make sure the hose does not touch any
part of the burner drum housing.
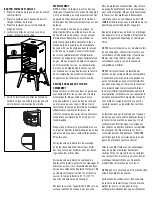
CAUTION:
In the connection process, the HVR
side of the connection will seal on the back
check in the valve,
resulting in a
slight resistance.
The connection
requires about
one-half to
three-quarters
additional turn
to complete
connection.
Any fuel supply cylinder used must be
constructed and marked in accordance with
specifications for propane cylinders of the U.S.
Department of Transportation (DOT)
CFR 49 or CAN/CSA B339. The appliance is
to be used only with the 20 pound, vertical
standing vapor withdrawal type tank.
This smoker is designed to operate on LP
(Liquefied Propane) gas only.
The 20 lb LP cylinder used with this smoker
must conform to the following requirements:
•Type 1 Connections
•Diameter - 12” (30.5cm)
•Height - 18” (45.7cm)
•Maximum capacity of 20 pounds
•The gas cylinder used must include a collar to
protect the cylinder valve.
The cylinder supply system must be arranged
for vapor withdrawal. Follow the instructions
stated on gas cylinder tanks when filling or
transporting tanks. Failure to do so could result
in problems relating to overfilling, excessive
venting release of gas and to regulator
freezing.
Never fill the cylinder more than
80 percent full.
Do not allow dirt or foreign material to get into
or onto tank connection when it is not attached
to the fuel supply system. Use the protective
cap provided.
Place dust cap on cylinder valve outlet
whenever the cylinder is not in use. Only install
the type of dust cap on the cylinder valve outlet
that is provided with the cylinder valve. Other
tpes of caps or plugs may result in leakage of
propane.
Cylinders must be filled before initial use.
All handling, transport, filling and storage
of LP gas cylinders must be in accordance
with NFPA 58 Storage and Handling of Liquid
Petroleum Gasses, or CAN/CSA b149.2 Propane
Installation Code. Cylinders must be suitably
tied down during transport. Do not place any
other items on top of cylinders at any time.
Cylinders are not to be exposed to excessive
temperatures or high heat. Refer to the data
plate for model identification. Units are
factory equipped for use on only one type of
fuel. These units cannot be, and should not
be used on other types of fuels. Doing so can
cause severe damage to the unit and the
installation area and the added risk of serious
injury. Any attempt to operate this product on
fuels for which it is not designed voids the
manufacturer’s warranty.
This unit is not to be utilized with a non-self-
contained LP-gas supply system.
The pressure regulator and hose assembly
supplied by the manufacturer with the
appliance must be used. Replacement pressure
regulators and hose assemblies must be those
specified by the appliance manufacturer. See
rating sticker on side of appliance for regulator
model number.


