Automatic Weather Station with UT20/UT30 Tower
2-10
2.7 Mounting Low Level Sensors and Other Equipment
Low level sensors can be fitted, together with the enclosure, solar panel and other
equipment, after the tower is raised. If you wish to mount them high enough to
deter vandals (i.e. above easy reach from the ground) you may need a stepladder.
2.7.1 Pyranometer
If you decided not to mount the pyranometer at the top of the tower, as detailed
earlier, it can be mounted virtually anywhere on the main tower structure using the
tri-clamp connector. It can be mounted so that it can be reached directly from
ground level for ease of access, but you may prefer to mount it higher than this. If
so, you will need a stepladder to access it.
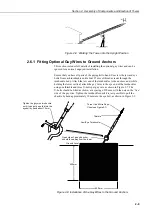
Pre-assemble the pyranometer to the 016E mounting arm, as detailed in
Section 2.3, before mounting the arm to the tower. Carefully select the mounting
position, as the tower itself can cast shadows onto the pyranometer and so cause
errors in readings. Try to ensure that no shadows will be cast at any time of the day
or year. It is usual to align the arm pointing due south (in the northern
hemisphere).
Attach the arm and pyranometer to the structure and check the level of the
pyranometer using the built-in bubble levelling gauge. Fully secure the arm to the
tower and check that the pyranometer is still perfectly level. Adjust as necessary
and tighten the mounting screws.
2.7.2 Temperature/Relative Humidity Probe
The sensor can be inserted into the radiation shield before it is mounted on the
tower. This is done by loosening the large hexagonal nut and inserting the sensor
into the shield, twisting slightly if necessary, until approximately 40-50 mm of the
sensor tube is visible at the base of the shield. Secure the sensor in position by
tightening the large, plastic hexagonal nut, which in turn forces a rubber ring
inwards to grip the sensor.
Secure the radiation shield to the tower with the U-bolt and wing nuts. For
‘
standard
’
measurements, the sensor should be attached at a height of 1.2 m,
although the exact height will depend on the nature of the application.
2.7.3 Mounting the Enclosure
If your tower is part of a complete Campbell Scientific weather station, you will
need to install and wire up all your components. Assembly instruction for the most
commonly supplied components are given below.
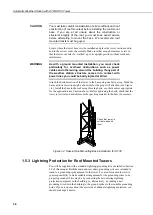
You will need to assess the best position on the tower to mount your enclosure,
weighing up ease of access with the need to minimise problems with vandalism
etc. in the locality. If you decide to mount the enclosure above head height you
will probably need to use a stepladder for access.
The instructions in this Section apply only to the ENC series
enclosures. If your weather station has a different type of enclosure
and you are not sure how to mount it, please call Campbell Scientific
for assistance.
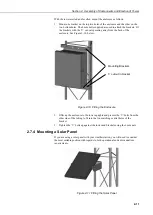
The ENC-MOUNT kit includes two brackets for mounting on the back of the
enclosure, plus four ‘V’ bolts for mounting the bracket onto the tower.
NOTE

