Section 8. Operation
8.5.6.2 LAN Setup
Configure CR1000s before connecting them to the LAN:
1. Start
Device Configuration Utility
(
DevConfig
). Click on
Device Type
: select
CR1000
. Follow on-screen instructions to power CR1000s and connect them
to the PC. Close other programs that may be using the PC COM port, such as
LoggerNet
,
PC400
,
PC200W
,
HotSync
, etc.
2. Click on the
Connect
button at the lower left.
3. Set settings using
DevConfig
as outlined in table
PakBus-LAN Example
Datalogger-Communication Settings
(p. 402).
Leave unspecified settings at
default values. Example
DevConfig
screen captures are shown in figure
DevConfig Deployment | Datalogger Tab
(p. 401)
through figure
DevConfig
Deployment | Advanced Tab
(p. 402).
If the CR1000s are not new, upgrading the
operating system or setting factory defaults before working this example is
advised.
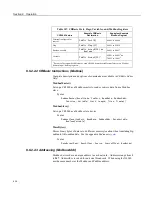
Figure 106.
DevConfig Deployment Tab
401
Summary of Contents for CR1000
Page 2: ......
Page 4: ......
Page 6: ......
Page 32: ......
Page 36: ......
Page 38: ......
Page 40: ......
Page 60: ...Section 4 System Quickstart Figure 16 PC200W View Line Graph 60 ...
Page 96: ......
Page 98: ...98 ...
Page 302: ......
Page 453: ...Section 8 Operation Figure 115 Using the Keyboard Display 453 ...
Page 456: ...Section 8 Operation Figure 118 Real Time Custom 456 ...
Page 457: ...Section 8 Operation 8 8 1 3 Final Memory Tables Figure 119 Final Memory Tables 457 ...
Page 458: ...Section 8 Operation 8 8 2 Run Stop Program Figure 120 Run Stop Program 458 ...
Page 460: ...Section 8 Operation Figure 122 File Edit 460 ...
Page 461: ...Section 8 Operation 8 8 4 PCCard Memory Card Display Figure 123 PCCard CF Card Display 461 ...
Page 478: ......
Page 506: ......
Page 536: ......
Page 636: ......
Page 642: ......
Page 644: ......
Page 676: ......
Page 677: ......


