Section 4. System Quickstart
•
CR1000 datalogger
•
Power supply with an output between 10 to 16 Vdc
•
Thermocouple, 4 to 5 inches long, which is shipped with the CR1000
•
Personal computer (PC) with an available nine-pin RS-232 serial port, or with
a USB port and a USB-to-RS-232 adapter
•
Nine-pin female to nine-pin male RS-232 cable, which is shipped with the
CR1000
•
PC200W
software, which is available on the Campbell Scientific resource
DVD or thumb drive, or at
www.campbellsci.com
.
Note
If the CR1000 datalogger is connected to the PC during normal operations,
use the Campbell Scientific SC32B interface to provide optical isolation through
the
CS I/O
port. Doing so protects low-level analog measurements from
grounding disturbances.
4.7.2 Hardware Setup
Note
The thermocouple is attached to the CR1000 later in this exercise.
4.7.2.1 External Power Supply
With reference to the figure
Power and Serial Communication Connections
(p. 48),
proceed as follows:
1. Remove the green power connector from the CR1000 wiring panel.
2. Switch off the power supply.
3. Connect the positive lead of the power supply to the
12V
terminal of the green
power connector. Connect the negative (ground) lead of the power supply to
the
G
terminal of the green connector.
4. After confirming the power supply connections have the correct polarity, insert
the green power connector into its receptacle on the CR1000 wiring panel.
5. Connect the serial cable between the
RS-232
port on the CR1000 and the RS-
232 port on the PC.
6. Switch the power supply on.
47
Summary of Contents for CR1000
Page 2: ......
Page 4: ......
Page 6: ......
Page 32: ......
Page 36: ......
Page 38: ......
Page 40: ......
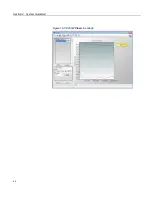
Page 60: ...Section 4 System Quickstart Figure 16 PC200W View Line Graph 60 ...
Page 96: ......
Page 98: ...98 ...
Page 302: ......
Page 453: ...Section 8 Operation Figure 115 Using the Keyboard Display 453 ...
Page 456: ...Section 8 Operation Figure 118 Real Time Custom 456 ...
Page 457: ...Section 8 Operation 8 8 1 3 Final Memory Tables Figure 119 Final Memory Tables 457 ...
Page 458: ...Section 8 Operation 8 8 2 Run Stop Program Figure 120 Run Stop Program 458 ...
Page 460: ...Section 8 Operation Figure 122 File Edit 460 ...
Page 461: ...Section 8 Operation 8 8 4 PCCard Memory Card Display Figure 123 PCCard CF Card Display 461 ...
Page 478: ......
Page 506: ......
Page 536: ......
Page 636: ......
Page 642: ......
Page 644: ......
Page 676: ......
Page 677: ......


