Section 4. System Quickstart
8. Click
Next
to advance to the
Outputs
tab, which displays the list
Selected
Sensors
to the left and data storage tables to the right under
Selected Outputs
.
Figure 7. Short Cut Outputs Tab
4.7.4.4 Procedure: (Short Cut Steps 9 to 12)
9. Two output tables (
1 Table1
and
2 Table2
tabs) are initially available. Both
tables have a
Store Every
field and a drop-down list from which to select the
time units. These are used to set the time intervals when data are stored.
10. Only one table is needed for this tutorial, so Table 2 can be removed. Click
2
Table2
, then click
Delete Table
.
11. Change the name of the remaining table from
Table1
to
OneMin
, and then
change the
Store Every
interval to
1
Minutes
.
12. Add measurements to the table by selecting
BattV
under
Selected Sensors
,
and then clicking
Average
in the center column of buttons. Repeat this
procedure for
PTemp_C
and
Temp_C
.
53
Summary of Contents for CR1000
Page 2: ......
Page 4: ......
Page 6: ......
Page 32: ......
Page 36: ......
Page 38: ......
Page 40: ......
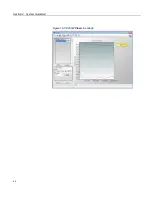
Page 60: ...Section 4 System Quickstart Figure 16 PC200W View Line Graph 60 ...
Page 96: ......
Page 98: ...98 ...
Page 302: ......
Page 453: ...Section 8 Operation Figure 115 Using the Keyboard Display 453 ...
Page 456: ...Section 8 Operation Figure 118 Real Time Custom 456 ...
Page 457: ...Section 8 Operation 8 8 1 3 Final Memory Tables Figure 119 Final Memory Tables 457 ...
Page 458: ...Section 8 Operation 8 8 2 Run Stop Program Figure 120 Run Stop Program 458 ...
Page 460: ...Section 8 Operation Figure 122 File Edit 460 ...
Page 461: ...Section 8 Operation 8 8 4 PCCard Memory Card Display Figure 123 PCCard CF Card Display 461 ...
Page 478: ......
Page 506: ......
Page 536: ......
Page 636: ......
Page 642: ......
Page 644: ......
Page 676: ......
Page 677: ......


