Appendix Title
20
o
Connect the black and red wires on this cable to the data logger. The red wire connects to 12V
and the black wire to the G terminal. The SW12 terminal can be used instead of 12V however as
it is a switched supply it needs to be enabled in the datalogger program to function correctly.
o
Connect the yellow wire to an even-numbered terminal e.g. C1. Connect the green wire to the
odd-numbered pair e.g. C2.
9.4.1
Configuring Logger for RS-232 over Control Ports
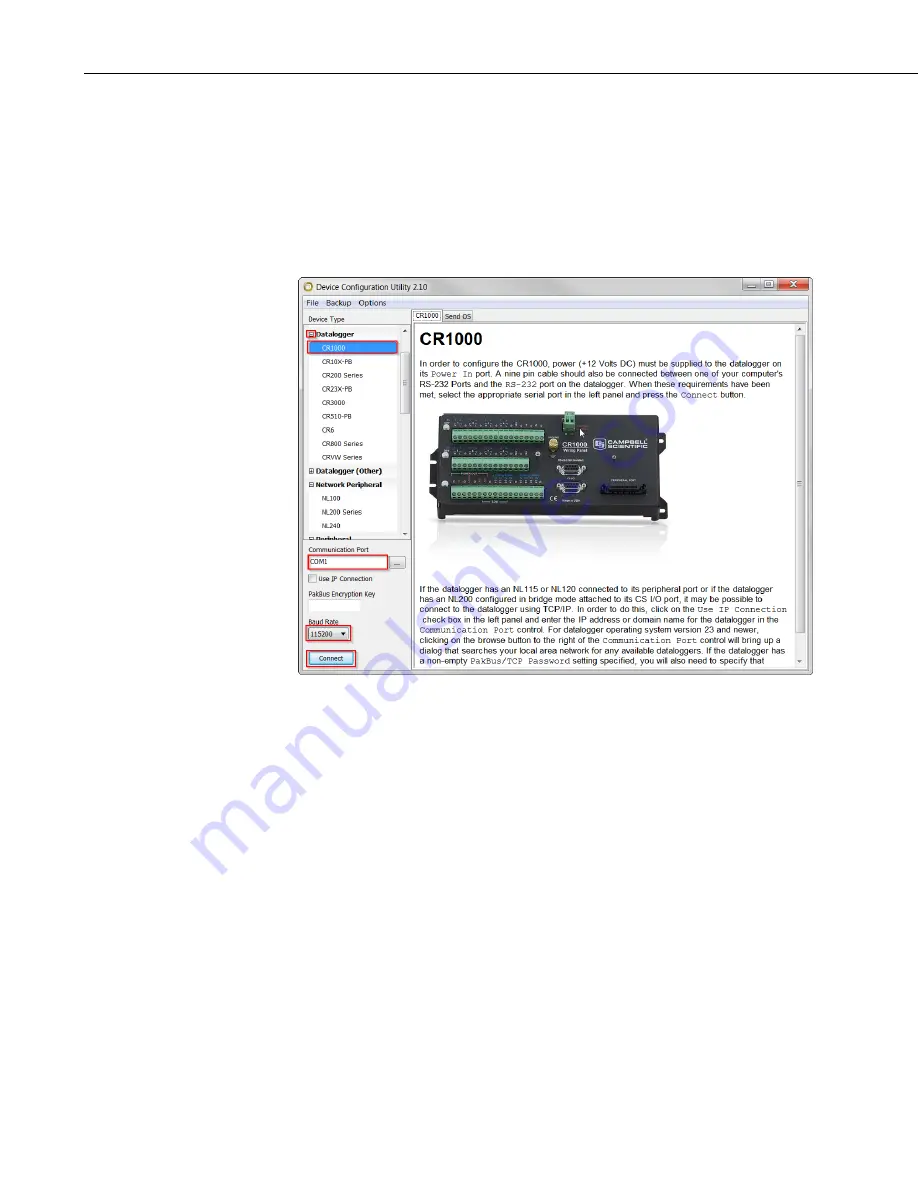
FIGURE 9-5. Connecting with Device Configuration Utility
In order to set up your data logger to use your control ports for RS-
232, you will need to connect to your data logger using Device
Configuration Utility.
Connnect a cable to the logger’s RS-232 port – this can be a serial
cable if your PC or laptop supports one, or a USB-serial cable.
Provide power to the logger.
Open Device Configuration Utility.
Open the Datalogger tab.
Select your logger from the list.
Ensure the Communicaitons Port is correct.
Select Baud Rate. By default, this is 115200 for CR800, CR1000 and
CR3000 and is 9600 for CR200X.
Press Connect.


