Appendix B. PS24 24 Ahr Power Supply and 10 x 12 inch Enclosure
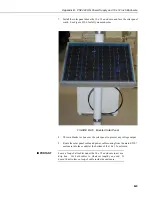
10. Wire the solar panel to the CH100 terminal blocks as follows.
Solar Panel to CH100
Red: CHG
Black: CHG
Polarity makes no difference. Connect one wire per CHG
terminal block.
NOTE
11. Remove the blanket or box from the solar panel once it’s wired in place.
12. Wire the power cable coming from the ET107 station as follows.
Power Cable from ET107 to CH100
Red: +12
Black:
The red charging LED indicates that the solar panel is charging
the battery. The battery will be charged regardless of the switch
position. The switch controls the voltage going to the terminal
blocks marked “+12.
NOTE
B-10
Summary of Contents for ET107
Page 8: ...ET107 Weather Station Table of Contents vi This is a blank page...
Page 68: ...Section 3 ET Software 3 2 This is a blank page...
Page 86: ...Section 4 Maintenance Troubleshooting and Schematics 4 18...
Page 101: ...Appendix C Exploded Views C 1 Enclosure C 1...
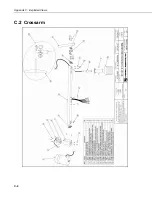
Page 102: ...Appendix C Exploded Views C 2 Crossarm C 2...
Page 109: ......


