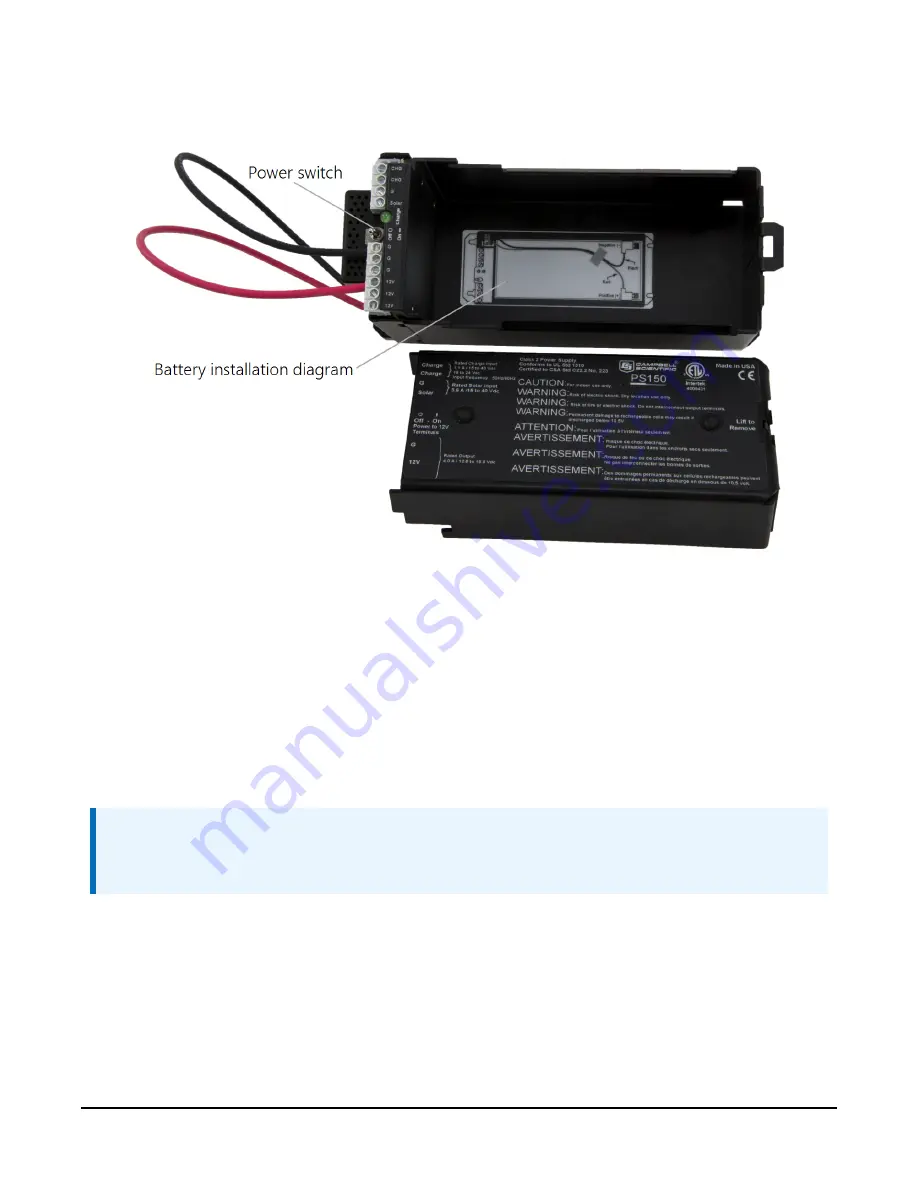
6.10 Battery installation
FIGURE 6-42. PS150 with lid open
1. Move the PS150 power switch to the OFF position (
2. Remove the cover from the PS150 by sliding the latch up at one end of the cover and
sliding the cover down and out (
(p. 55)).
3. Install the battery according to the diagram (
(p. 55)).
4. Plug the battery wire into the connector.
5. Put the cover back on the PS150 and latch it in place.
NOTE:
Do not switch the power supply ON until AC or solar power has been connected to the back
of the enclosure.
The green charge light on the PS150 will flash when charging voltage is present. The charge light
is not affected by the switch. Switching on the power supply without a charging voltage will run
the battery down.
(p. 56) shows factory wiring between the PS150 and the enclosure.
Section 6. Installation
55


