MANUAL USER WI-FI THERMOSTAT ATB100
Page 9
14) Click “CONFIRM”.
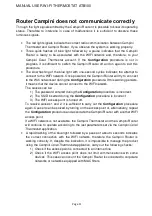
Before proceeding, it is advisable to check the correct connection of the Campini
Router to the home WIFI network. Wait at least for one minute and observe the blue
light propagated by the button:
• The slow flashing of the blue light with one-second cycles indicates the attempt to
connect to the WIFI network. If the type of luminous signaling does not change, see
the chapter R
outer Campini does not communicate correctly
.
• A rapid flashing of the blue light followed by a pause of about 4 seconds indicates the
correct connection with the WIFI network. Go to the next step.
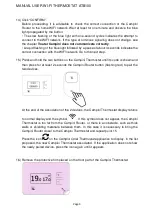
15) Press and hold the two buttons on the Campini Thermostat until its code is shown and
then press for at least 2 seconds the Campini Router button (flashing red) to pair the
two devices.
At the end of the association of the 2 devices, the Campini Thermostat display returns
to normal display and the symbol
. If this symbol does not appear, the Campini
Thermostat is too far from the Campini Router, or there is an obstacle, such as thick
walls or shielding materials, between them. In this case it is necessary to bring the
Campini Router closer to the Campini Thermostat and repeat point 15
Press the icon
on the
Campini Corel Thermostat
application to display, in the list
proposed, the new Campini Thermostat associated. If the application does not show
the newly paired device, press the icon again until it appears.
16) Remove the protective film placed on the front part of the Campini Thermostat.


