background image

English

   - 4 -

Introduction

Thank you for choosing our product. You’ll soon be 

enjoying your new TV. Please read these instructions 

carefully. They contain important information which will 

help you get the best from your TV and ensure safe 

and correct installation and operation.

Accessories Included

• 

Remote Control

• 

Batteries: 2 x AAA

• 

Instruction Book

Features

• 

Remote controlled colour TV

• 

Android

TM

 operating system

• 

Google Cast

• 

Voice Search

• 

Fully integrated digital terrestrial/cable/satellite TV 

(DVB-T-T2/C/S-S2)

• 

HDMI inputs to connect other devices with HDMI 

sockets

• 

USB input

• 

Composite inputs for external devices (such as DVD 

Players, PVR, video games, etc.)

• 

Stereo sound system

• 

Teletext

• 

Headphone connection

• 

Automatic programming system

• 

Manual tuning

• 

Sleep timer

•  On/Off timer
•  Switch off timer
•  Picture off function
•  No signal auto power off function
• 

VGA input

• 

Ethernet (LAN) for Internet connectivity and service

• 

802.11 a/b/g/n/ac built in WLAN Support

• 

HbbTV

Ultra HD (UHD)

TV  supports  Ultra  HD  (Ultra  High  Definition  -  also 

known as 4K) which provides resolution of 3840 x 

2160 (4K:2K). It equals 4 times the resolution of Full 

HD TV by doubling the pixel count of the Full HD TV 

both horizontally and vertically. Ultra HD contents are 

supported from HDMI, some of the Over-the-Top (OTT) 

services, USB inputs and over DVB-T2 and DVB-S2 

broadcasts. 

High Dynamic Range (HDR) / Hybrid Log-

Gamma (HLG)

Using this feature the TV can reproduce greater 

dynamic range of luminosity by capturing and then 

combining  several  different  exposures.  HDR/HLG 

promises better picture quality thanks to brighter, more 

realistic highlights, more realistic colour and other 

improvements.  It  delivers  the  look  that  filmmakers 

intended to achieve, showing the hidden areas of 

dark shadows and sunlight with full clarity, colour and 

detail. HDR/HLG contents are supported via native 

and market applications, HDMI, USB inputs and 

over DVB-S broadcasts. When the input source is 

set to the related HDMI input press the 

Menu

 button 

and set the 

HDMI EDID Version

 option in the 

TV 

Options>Settings>Device Preferences>Inputs 

menu as 

EDID 2.0

 or 

Auto EDID 

in order to watch 

HDR/HLG content, if the HDR/HLG content is received 

through an HDMI input. The source device should also 

be at least HDMI 2.0a compatible in this case.

Dolby Vision

Dolby Vision™ delivers a dramatic visual experience, 

astonishing brightness, exceptional contrast, and vivid 

colour, that brings entertainment to life. It achieves this 

stunning image quality by combining HDR and wide 

colour gamut imaging technologies. By increasing the 

brightness of the original signal and using a higher 

dynamic colour and contrast range, Dolby Vision 

presents amazing true-to-life images with stunning 

detail that other post-processing technologies in the 

TV aren’t able to produce. Dolby Vision is supported 

via native and market applications, HDMI and USB in-

puts. When the input source is set to the related HDMI 

input press the 

Menu

 button and set the 

HDMI EDID 

Version

 option in the 

TV Options>Settings>Device 

Preferences>Inputs 

menu as 

EDID 2.0

 or 

Auto EDID 

in order to watch HDR/HLG content, if the HDR/HLG 

content is received through an HDMI input. The source 

device should also be at least HDMI 2.0a compatible in 

this case. In the 

Picture Mode

 menu two predefined 

picture modes will be available if Dolby Vision content 

is detected: 

Dolby Vision Bright

 and 

Dolby Vision 

Dark

. Both allow the user to experience the content 

in the way the creator originally intended with different 

ambient lighting conditions. To change the 

Picture 

Mode

 setting press the 

Menu

 button while watching the 

Dolby Vision content and go to 

Picture

 menu. While 

watching Dolby Vision Content via an application, 

except YouTube, Netflix and Multi Media Player, you 

will not be able to access the 

Picture

 menu and set 

the 

Picture Mode

.

Summary of Contents for LED67VUA

Page 1: ...LED67VUA OPERATING INSTRUCTIONS COLOUR TELEVISION WITH REMOTE CONTROL ...

Page 2: ...ork Internet 13 Channel 14 Accounts Sign In 16 Apps 16 Device Preferences 16 Channel List 19 Programme Guide 20 USB Recording 24 Instant Recording 24 Watching Recorded Programmes 24 Timeshift Recording 24 Disk Format 25 Schedule List 25 CEC 25 Google Cast 26 HBBTV System 26 Troubleshooting Tips 27 VGA Input Typical Display Modes 28 AV and HDMI Signal Compatibility 28 Supported File Formats for USB...

Page 3: ... other cords When damaged it must be replaced this should only be done by qualified personnel Do not expose the TV to dripping or splashing of liquids and do not place objects filled with liquids such as vases cups etc on or over the TV e g on shelves above the unit Do not expose the TV to direct sunlight or do not place open flames such as lit candles on the top of or near the TV Do not place any...

Page 4: ...d the television set to a suitable support NEVER place the television set on cloth or other materials that may be located between the televi sion set and supporting furniture NEVER place items that might tempt children to climb such as toys and remote controls on the top of the television or furniture on which the television is placed The equipment is only suitable for mounting at heights 2 m If t...

Page 5: ...ents are supported via native and market applications HDMI USB inputs and over DVB S broadcasts When the input source is set to the related HDMI input press the Menu button and set the HDMI EDID Version option in the TV Options Settings Device Preferences Inputs menu as EDID 2 0 or Auto EDID in order to watch HDR HLG content if the HDR HLG content is received through an HDMI input The source devic...

Page 6: ...the clean and soft cloth Leave the stand s protruding over the edge of the surface Unscrew the screws that fix the stand s Remove the stand s When using the wall mount bracket Your TV is also prepared for a VESA compliant wall mount bracket If it is not supplied with your TV contact your local dealer to purchase the recommended wall hanging bracket Holes and measurements for wall mount bracket ins...

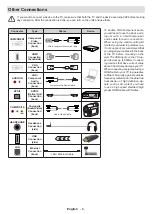
Page 7: ...ide USB Connection side LAN Ethernet Connection back LAN Ethernet Cable To enable VGA Component audio you will need to use the back audio inputs with a VGA Component audio cable for audio connection When using the wall mounting kit contact your dealer to purchase one if not supplied we recommend that you plug all your cables into the back of the TV before mounting on the wall The USB inputs on the...

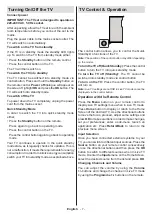
Page 8: ...ion switch your TV into standby mode as explained above TV Control Operation The control button allows you to control the Quick Standby On functions of the TV Note The position of the control button may differ depending on the model To turn the TV off Quick Standby Press the control button to turn the TV into quick standby mode To turn the TV off Standby The TV cannot be switched into standby mode...

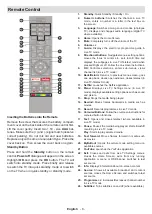
Page 9: ...d time and displays the subpages in Live TV Teletext mode when pressed Right or Left Follow the on screen instructions 9 OK Confirms selections enters sub menus views channel list in Live TV mode 10 Back Return Returns to previous menu screen goes one step back closes open windows closes teletext in Live TV Teletext mode 11 Netflix Launches the Netflix application 12 Menu Displays Live TV Settings...

Page 10: ...or change the network Highlight Change network and press OK if you want to use wireless connection instead of wired connection 6 Network Connection You will be directed to the next step automatically if you connect your TV to internet via Ethernet at this point If not available wireless networks will be searched and listed on the next screen Select your WLAN network from the list and press OK to c...

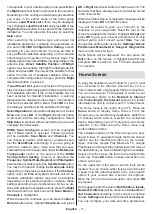
Page 11: ...n of the tuner mode Select your tuner preference to install channels for Live TV function Antenna Aerial Cable and Satellite options are available Highlight the option that corresponds to your environment and press OK or Right directional button to proceed Antenna Aerial If Antenna Aerial option is selected the TV will search for digital terrestrial and analogue broadcasts On the next screen highl...

Page 12: ...erator configure these settings according to your preferences Once you are done with setting the available options press the Right directional button to start scan while Scan Mode or Channels is highlighted While the search continues you can press the Back Return button twice highlight Skip Scan and press OK or Right directional button to stop the search The channels that have already been found w...

Page 13: ...Settings Device Preferences Picture for detailed setting options Display Mode Set the aspect ratio of the screen Select one of the predefined options according to your preference Speakers To hear the TV audio from the connected compatible audio device set as External Audio System Set as TV Speakers to use the speakers of your TV for sound output Power Sleep Timer Define an idle time after which yo...

Page 14: ...ring the initial setup process Auto Sleep Define an idle time after which you want your TV to enter sleep mode automatically 4 Hours 6 Hours and 8 Hours options are available Set as Never to disable System Information Display detailed system information on the current channel such as Signal Level Signal Quality Frequency etc Version Info Display system information such as Model Name and Version Se...

Page 15: ...be skipped when switching the channels via Programme buttons on the remote Highlight the desired channel s on the list and press OK to select unselect Channel Swap Replace the positions of the two selected channels in the channel list Highlight the desired channels on the list and press OK to select When the second channel is selected the position of this channel will be replaced with the position...

Page 16: ...lation mode A dialogue will be displayed for confirmation Highlight OK and press OK button to proceed Highlight Cancel and press OK to cancel Channel Installation Mode Preferred General Satellite Satellite Satellite Re scan Start a satellite scan beginning with the operator selection screen for the Preferred Satellite channel installation mode or with the satellite selection screen for the General...

Page 17: ...as second audio language preference If in the Audio Language setting selected language option is not supported this language preference will be considered This item may not be visible depending on whether or not the last watched channel was digital Open Source Licenses Display Open Source Software license information Version Displays system version number Accounts Sign In Google This option will b...

Page 18: ...the picture mode to suit your preference or requirements Picture mode can be set to one of these options User Standard Vivid Sport Movie and Game You can use User mode to create customised settings Dolby Vision Modes If Dolby Vision content is detected Dolby Vision Dark and Dolby Vision Bright picture mode options will be available instead of other picture modes Backlight Brightness Contrast Colou...

Page 19: ...ment grey scale uniformity can be improved Adjust the strength of the Red Green Blue colours and Gain value manually Highlight Enable and press OK to turn this function on Reset to Default Reset the video settings to factory default settings Note Depending on the currently set input source some menu options may not be available Sound System Sounds System sound is the sound played when navigating o...

Page 20: ...aired Digital TV channels can broadcast special audio commentary describing on screen action body language expressions and movements for people with visual disabilities Speaker Turn this option on if you want to hear the audio commentary through the TV speakers Headphone Turn this option on if you want to route the sound of the audio commentary to the TV s headphone output Volume Adjust the volume...

Page 21: ...a channel in the list and press the OK button to watch To add the currently watched channel to one of your favourite lists select the desired favourite list as described above and press the Menu button on the remote Then enter the Channels menu highlight Add to My Favourites option and press OK The channel will be added to the selected favourite list Only the currently watched channel can be added...

Page 22: ...uration In that case you can connect your TV directly to the network using an Ethernet cable 1 2 1 Network wall socket 2 LAN input on the rear side of the TV Wireless Connection A wireless LAN modem router is required to connect the TV to the Internet via wireless LAN Highlight Wi Fi option in the Network Internet menu and press OK to enable wireless connection Available networks will be listed Se...

Page 23: ...les in the root folder or in the selected folder will be displayed If there isn t any media files of the selected type the folder will be assumed as empty In Recursive Parser mode the source will be searched for all available media files of the selected type and the found files will be listed Press the Back Return button to close this menu In order to activate photo frame feature select Photo as t...

Page 24: ...Shuffle On Off Turn the shuffle option on or off Press OK to change the setting Duration Set the interval between the slides Highlight an option and press OK to change the setting You can also press the Green button to set This option will not be available if the slide show is paused Rotate Rotate the image The image will be rotated 90 degrees clockwise each time you press OK You can also press th...

Page 25: ... a programme you should first connect a USB storage device to your TV while the TV is switched off You should then switch on the TV to enable the recording feature To record long duration programmes such as movies it is recommended to use USB Hard disk drives HDD s Recorded programmes are saved onto the connected USB storage device If desired you can store copy recordings onto a computer however t...

Page 26: ... This function uses HDMI CEC Consumer Electronics Control to communicate with the connected devices Devices must support HDMI CEC and must be connected with an HDMI connection In order to make use of the CEC functionality the related option in the menu should be switched on To check switch on or off the CEC function do the following Enter the Settings Device Preferences Inputs menu on the Home Scr...

Page 27: ...nternet only services for consumers using connected TVs and set top boxes Services delivered through HbbTV include traditional broadcast TV channels catch up services video on demand electronic programme guide in teractive advertising personalisation voting games social networking and other multimedia applications HbbTV applications are available on channels where they are signalled by the broadca...

Page 28: ...irelessly paired with the TV No Channels Make sure that all cables are properly connected and that the correct network is selected Make sure that the correct channel list is selected Make sure that you have entered the correct channel frequency if you have done manual tuning No picture distorted picture Make sure that the antenna is properly connected to the TV Make sure that the antenna cable is ...

Page 29: ...0x1050 75Hz 23 1440x900 60Hz 24 1440x900 75Hz 25 1600x1200 60Hz 26 1680x1050 59Hz 27 1680x1050 60Hz 28 1920x1080 60Hz AV and HDMI Signal Compatibility Source Supported Signals Composite Back AV PAL SECAM NTSC4 43 NTSC3 58 Component YPbPr 480i 480p 60Hz 576i 576p 50Hz 720p 50Hz 60Hz 1080i 50Hz 60Hz HDMI 480i 60Hz 480p 60Hz 576i 576p 50Hz 720p 50Hz 60Hz 1080i 50Hz 60Hz 1080p 24Hz 25Hz 30Hz 50Hz 60Hz...

Page 30: ...Tier Level 5 1 MP4 mp4 mov 3GPP 3gpp 3gp MPEG transport stream ts trp tp MKV mkv MVC 1080P 30fps 80Mbps MPEG transport stream ts trp tp AVS 1080P 60fps 40Mbps Jizhun profile Level 6 0 MPEG transport stream ts trp tp AVS 1080P 60fps 50Mbps Broadcasting profile Level 6 0 1 08 60 MPEG transport stream ts trp tp WMV3 1080P 60fps 40Mbps ASF asf AVI avi MKV mkv WMV wmv VC1 1080P 60fps 40Mbps Advanced Pr...

Page 31: ...ansport stream ts trp tp MPEG program stream DAT VOB MPG MPEG Music EAC3 ec3 MP4 m4a AAC LC HEAAC 8KHz 48KHz Up to 5 1 Movie AVI avi Matroska mkv 3GPP 3gpp 3gp MP4 mp4 mov MPEG transport stream ts trp tp MPEG program stream DAT VOB MPG MPEG FLV flv RM rm rmvb Music AAC aac MP4 m4a WMA 8KHz 48KHz Up to 2 128bps 320Kbps Movie ASF wmv asf AVI avi Matroska mkv Music ASF wma WMA 7 WMA 8 WMA 9 Standard ...

Page 32: ...ov Music WAV wav MP4 m4a LBR cook 8KHz 11 025KHz 22 05KHz 44 1KHz Up to 5 1 6Kbps 128Kbps Movie RM rm rmvb FLAC 8KHz 96KHz Up to 5 1 1 6Mbps Movie Matroska mkv mka Music FLAC flac DTS LBR 12KHz 22KHz 24KHz 44 1KHz 48KHz Up to 5 1 up to 2Mbps Movie MP4 mp4 mov DTS XLL Up to 96KHz Up to 6 Movie MPEG transport stream ts trp tp MP4 mp4 mov DRA 8KHZ 96KHz Up to 7 1 1533Kbps Movie MPEG transport stream ...

Page 33: ... Parser Remark srt SubRip ssa ass SubStation Alpha smi SAMI sub SubViewer MicroDVD DVDSubtitleSystem SubIdx VobSub SubViewer 1 0 2 0 Only txt TMPlayer Supported DVI Resolutions When connecting devices to your TV s connectors by using DVI converter cable DVI to HDMI cable not supplied you can refer to the following resolution information 56Hz 60Hz 66Hz 70Hz 72Hz 75Hz 640x480 x x 800x600 x x x 1024x...

Page 34: ...6 CH48 200 mW 5250 5350 MHz CH52 CH64 200 mW 5470 5725 MHz CH100 CH140 200 mW Country Restrictions This device is intended for home and office use in all EU countries and other countries following the rele vant EU directive without any limitation except for the countries mentioned below Country Restriction Bulgaria General authorization required for outdoor use and public service Italy If used out...

Page 35: ...y rights of Microsoft Use or distribution of this technology outside of this product is prohibited without the appropriate license s from Microsoft Content owners use Microsoft PlayReady content access technology to protect their intellectual property including copyrighted content This device uses PlayReady technology to access PlayReady protected content and or WMDRM protected content If the devi...

Page 36: ...je na sljedećoj internetskoj adresi Via Santuario 43 35031 Abano Terme Padova Italy HU Via Santuario 43 35031 Abano Terme Padova Italy igazolja hogy a TFT IDTV típusú rádióberendezés megfelel a 2014 53 EU irányelvnek Az EU megfelelőségi nyilatkozat teljes szövege elérhető a következő internetes címen Via Santuario 43 35031 Abano Terme Padova Italy IT Il fabbricante Via Santuario 43 35031 Abano Ter...

Page 37: ...50621940 ...

Reviews: