background image

SWIFT CURRENT SPA


PART 6: 

DRAIN & STORE 

Drain System


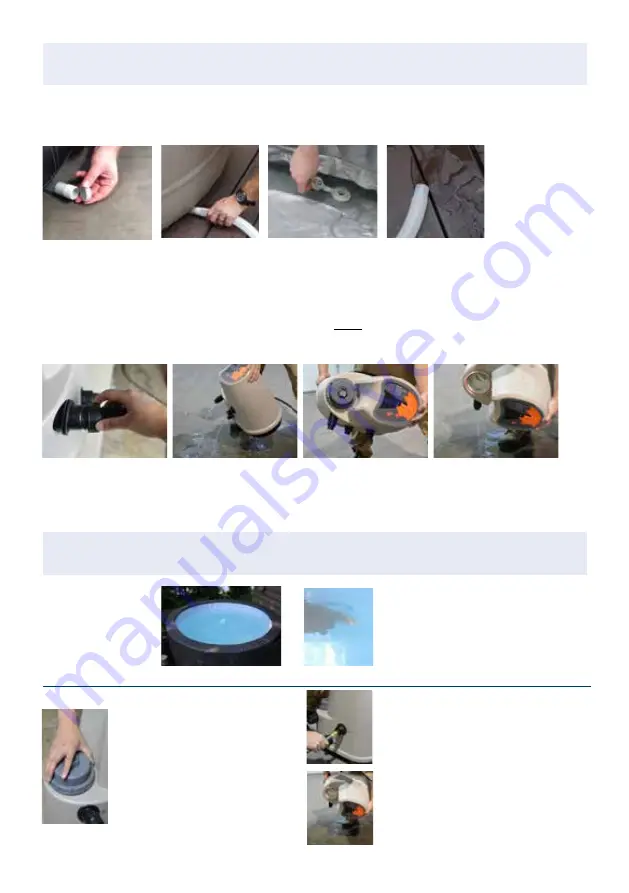
Locate and remove the external threaded Drain Cap. Attach Drain Hose to Drain Outlet. Locate and remove 

the stopper on the spa floor to allow water to drain. 

Dry the Spa and Portable Control Unit


After an RCD test, press ‘JETS’ to blow out the water inside the jet holes. Turn PCU off and disconnect all connectors 

from connection ports on the PCU. Turn PCU back on and run blower for 30 seconds to allow excess water to clear 

from blower port. Unplug RCD and hold PCU at an angle, allowing water to drain from connection ports. Once water 

flow stops, remove Filter Housing Lid and hold PCU upside down. Give the PCU a slight shake, allowing all excess 

water to be removed. Close Filter Housing Lid when complete. NOTE: PCU must be stored upright. Leaving PCU at 

an angle or upside down may result in damage.


Operate with the jets pipe connected, press jets to force excess 

water out from spa body/bladder, then dry down, store in a warm & dry place.

Storage

Use a towel to wipe off the spa and dry for 24 hours. Unscrew the Air Valve on the lid. Unzip the liners and gently fold 

them for storage along with the foam panels. It is recommended that you store the spa in its original package in a 

warm dry place. 

 PART 7:

 SPA OPERATION CHECK LIST

CHECK 1: 

Water Level

Ensure water is high 

enough and level in the 

spa. Check if this will help 

the spa performance.

CHECK 2: Inside Connection 

Caps

Make sure the clear plastic Inlet/Outlet caps have 

been removed before turning on the PCU.

CHECK 3: Bleed Air out of 

Portable Control Unit

If PCU makes a grinding noise, there is a 

restriction of water flow to the PCU. Bleed 

the air out of the pump by unscrewing the 

Air Valve. Check if this resolves the pump’s 

malfunctioning.

CHECK 4: Back Flush PCU

Back flushing the PCU is recommended every 

few months to help PCU performance and 

longevity. Simply remove the PCU from the tub 

connections (cap ports inside tub first if you do 

not want to drain spa) remove the filter and run 

water from a garden hose into the ‘Heater Port’. 

Flush for 1to 2 minutes and hold PCU 

upside down to drain remaining water.

(12)

Summary of Contents for CA17690GB

Page 1: ...A Swift Current Swift Current Foam Wall Spa Foam Wall Spa w w w c a n a d i a n S p a c o m p a n y c o m Instruction Manual 220 240V 50Hz 13A Read this Manual before operation c a n a d i a n s p a c o m p a n y c o m ...

Page 2: ...t 5 feet 1 5 m from all metal surfaces DANGER Risk of Electric Shock Do not permit any electrical appliances such as a light telephone radio or television within 5 feet 1 5 m of a spa DANGER Risk of Accidental Drowning Extreme caution must be exercised to prevent unauthorized access by children To avoid accidents ensure that children cannot use this spa unless they are supervised at all times DANG...

Page 3: ...Test Certificate Pump only Heating Efficiency Ambient temperature is 68 F 20 C Jets KP 10008 CA17690GB Swift Current 5 Persons 160 x 73cm 63 x 29 184cm x 73cm 73 x 29 1000L 220 240V 50Hz 2040W L1 400W L2 650W L3 850W 40W 40 C 104 F Hard top cover foam with Synthetic Leather Polyester Laminated PVC 45 5kg 100lbs 51 7kg 114lbs 1 75 x 55 x 62cm 30 x 22 x 25 2 110 x 73 x 76cm 43 x 29 x 30 CE 1 5 2 F h...

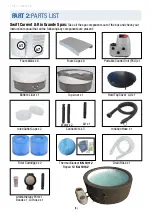
Page 4: ...following key components are present 4 Top Liner x 1 Filter Cartridges x 2 Foam Caps x 8 Portable Control Unit PCU x1 Hard Top Cover Lid x 1 Inflation Hose x 1 Bottom Liner x 1 Inlet Outlet Caps x 2 Drain Hose x 1 Foam Walls x 8 x7 x1 Aromatherapy Port x 1 Beads x 1 Air hose x 1 Connectors x 3 Water x 2 Air x 1 Thermal Blanket KK 10112 Repair Kit KA 10142 ...

Page 5: ...Strawberry Champagne Classic Universal Step KF 10061 Simple to assemble these spa steps allow for quick and easy entry into a spa while providing a non slip surface for safety No tools required to assemble Made of durable UV protected polypropylene Starter Chemical Kit KA 10022 This chemical kit is an excellent addition to any spa and provides users with all of the essential spa chemicals needed t...

Page 6: ... IS IMPORTANT YOUR SPA IS LEVEL After filling your spa check the water level against the wavy red lines marked on 3 sides of the spa If the water level matches on the 3 sides your spa will be level 3 Spa Assembly Start with a level clean surface 3 Place remaining blank foam panels next to the first foam panel then slide a foam cap on top of the first foam panel and continue adding foam caps betwee...

Page 7: ... Liner Ensure you put the cut out of the drain fig a inside to the left of the three holes fig a OUTSIDE INSIDE 4 Connecting the PCU to the Spa Insert the three connectors into the three holes of the liner then attach the other ends of the connectors to the PCU on the spa as highlighted see symbols for correct alignment A Heater port B Blower Aromatherapy Jet massage port C Filter port D Drainage ...

Page 8: ... light turns green 3 Press the TEST button the indicator light turns off 4 Press the RESET button the indicator light turns green the pump is ready to use 5 Install the Filter Cartridge Firstly check the filter size is compatible with your spa Open the Filter Housing lid put the new filter cartridge into the cartridge chamber making sure filter grid is in place at the base of the housing Replace F...

Page 9: ... temperature The value will increase or decrease by 1 F 1 C for each press Temperature Adjustment Ranges 86 F 103 F 30 C 39 C NOTE There may be a 3 4 degree variance between the temperature shown on the PCU and the temperature of the spa water Temperature Mode Button Press this button to change from Celsius to Fahrenheit Lock Button Hold down for 5 seconds to lock all button functions Repeat to re...

Page 10: ...hich will be indicated with a flashing red light NOTE Heater will not resume until spa water drops 2 degrees below set temperature for maximum efficiency You can also manually restart the heater by pressing HEAT when heater is turned off Jets Massage System JETS Button Press the JETS button to activate the Jet Massage System on the spa Pressing once will start the lowest speed of the jets L 1 will...

Page 11: ...e A reminder CHG FIL will appear to change the filter after 25 days Hold down HEAT for 5 seconds to clear the message Change water once a month or depending on usage and use appropriate spa chemicals Please pay attention to the chemicals used and dosage Spa damage resulting from misuse of chemicals is not covered by the warranty Water Balance We recommend you maintain your water balance PH value 7...

Page 12: ... store in a warm dry place Storage Use a towel to wipe off the spa and dry for 24 hours Unscrew the Air Valve on the lid Unzip the liners and gently fold them for storage along with the foam panels It is recommended that you store the spa in its original package in a warm dry place PART 7 SPA OPERATION CHECK LIST CHECK 1 Water Level Ensure water is high enough and level in the spa Check if this wi...

Page 13: ...is over 122 F 50 C 1 Unplug the RCD cable from the outlet 2 See Part 8 Spa Operation Check List for possible solutions 3 Power on spa again to see if error is resolved if not please contact for service Note filling with hot tap water upon initial fill may cause this error Drain and refill with cold water E6 Inlet or outlet on inner wall is blocked See Part 8 Spa Operation Check List for possible s...

Page 14: ... Not Working Dirty filter cartridge Inlet outlet port blocked Air lock Something is wrong with the control panel Clean replace the filter cartridge every 3 4 weeks check white filter grid under filter in housing Clean the inlet outlet ports Purge air from the pump as previously outlined Portable Control Unit Leaking Adapter seal improperly located Water leakage from pump body Check the pump body C...

Page 15: ...rance Germany Ireland Italy Netherlands Spain or the United Kingdom and the same model as this spa is sold at the same voltage rating in the relevant country What is not covered Canadian Spa Company does not guarantee the repair or replacement of a product where a defect is the result of Accidental damage faults caused by negligent use or care misuse neglect carelessness or operation or handling o...

Page 16: ...1 5GL UK T 44 1293 824094 canadianspacompany co uk North America Office Canadian Spa Company 1283 Cornwall Rd Oakville ON L6J 7T5 Canada T 1 877 909 7727 canadianspacompany ca German Office Canadian Spa Company GmbH Hohenstaufenring 43 45 50674 Köln Germany T 49 0 2203 8064038 canadianspacompany de French Office 280 Rue James Watt Perpignan 6610 France T 33 411819 773 canadianspacompany fr USA Off...

Reviews: